So, you’ve found a beautiful old bottle, but it’s covered in years of dust and grime. The first thing to do—before you even think about scrubbing—is give it a gentle bath in some warm, soapy water. This is by far the most important and safest starting point, as it gets rid of any loose grit that could scratch the glass later on.
Starting Your Vintage Bottle Cleaning Project
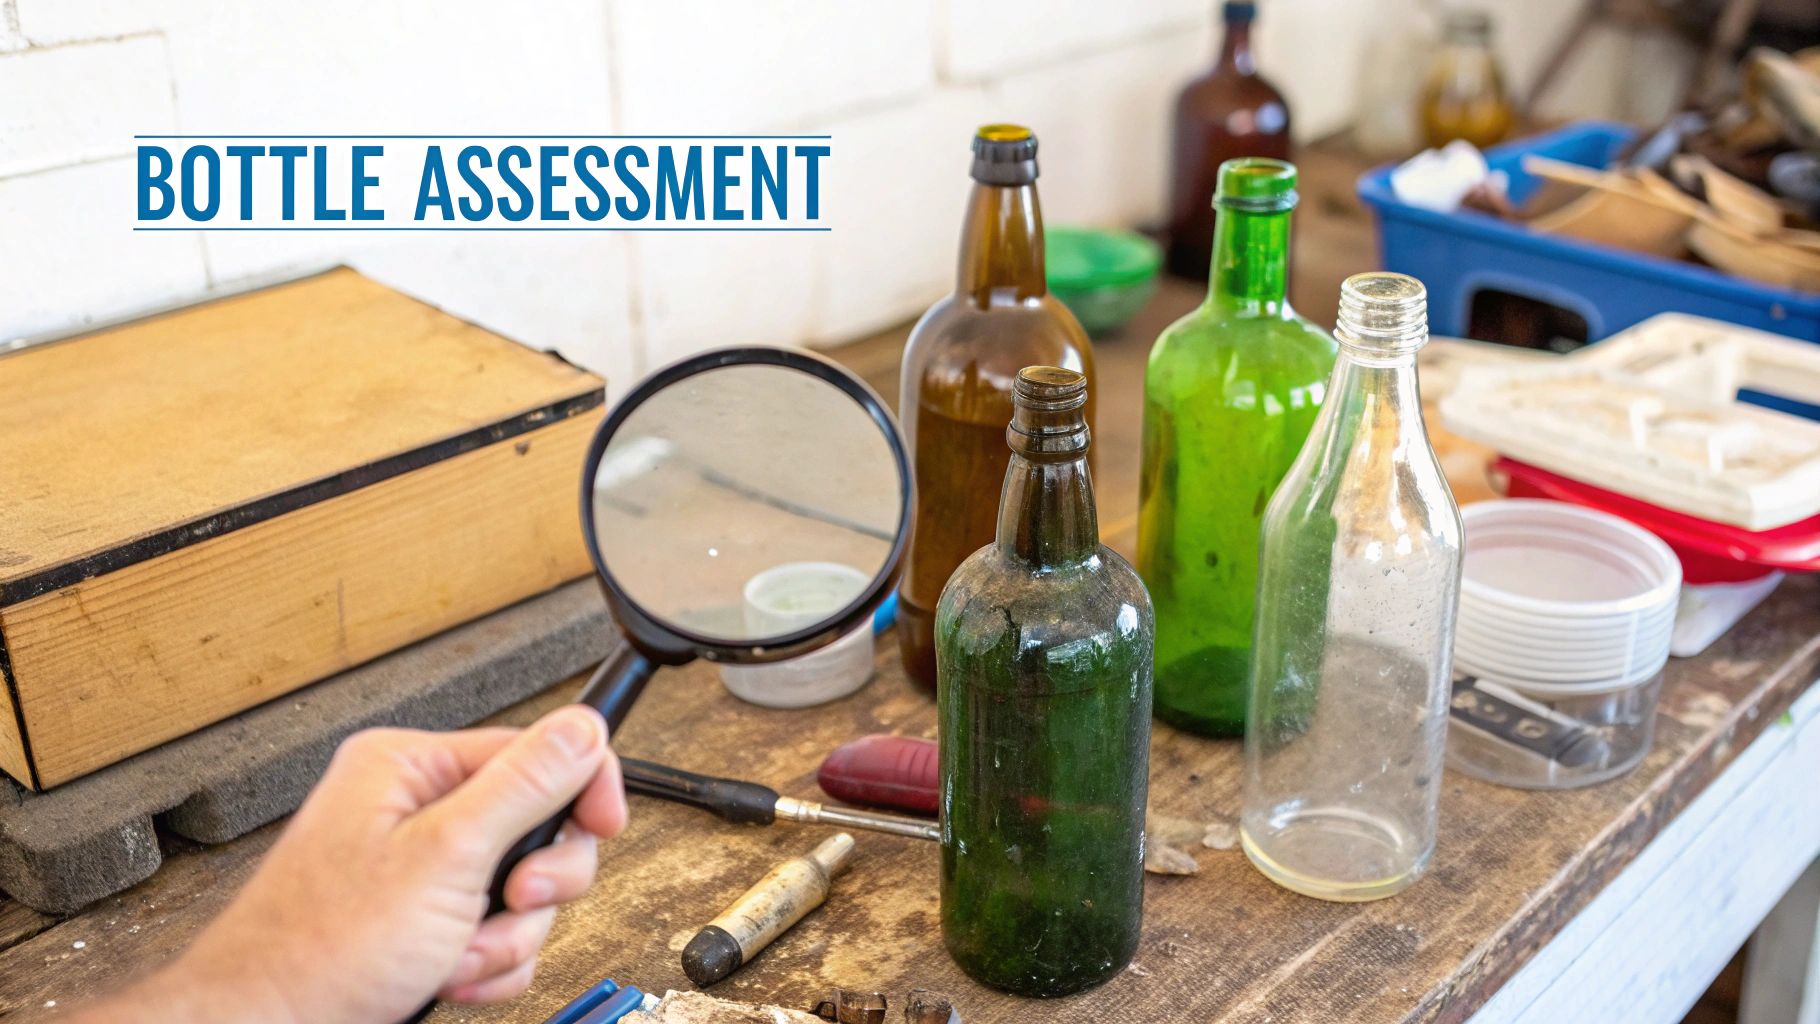
Before you jump in, take a moment to really look at your bottle. Is it just dusty, or are you dealing with that stubborn, cloudy film from mineral deposits inside? Knowing what you're up against will determine your whole cleaning strategy and prevent you from accidentally damaging a valuable piece. If you're not sure what you have, getting a handle on identifying vintage glassware is a great first step.
The good news is you don’t need a bunch of fancy equipment. Everything you need for this initial soak is probably already in your kitchen.
Essential Materials for a Gentle Start
Getting your supplies together first makes everything go much more smoothly. For this first pass, stick to the basics.
- A soft bottle brush: Look for one with pliable bristles that can bend into those tight corners and narrow necks without scratching anything.
- Mild dish soap: Any simple, grease-cutting soap will do. Just make sure it doesn't contain bleach or other harsh additives.
- A plastic tub or sink liner: This is a simple trick to protect your bottle from getting chipped on a hard porcelain or stainless steel sink.
The philosophy here is to be effective without being harsh, much like using gentle, residue-free cleaning methods for delicate items. You want the bottle clean, but more importantly, you want it intact.
Pro Tip: Never use hot or cold water. Old glass is surprisingly sensitive to sudden temperature changes, which can cause thermal shock and lead to invisible cracks. Stick to lukewarm water and let patience do the heavy lifting.
Once you’re ready, fill your lined sink or tub with warm water, add a few drops of soap, and let the bottle submerge completely. I usually let them soak for at least an hour, but for really caked-on dirt, leaving it overnight can work wonders. This simple soak loosens decades of grime, making the real cleaning so much easier.
Quick Guide to Vintage Bottle Cleaning Methods
Here's a quick comparison of the most effective cleaning techniques and what they're best used for.
| Method | Best For | What It Removes |
|---|---|---|
| Soapy Water Soak | The essential first step for all bottles | Surface dust, loose grime, light residue |
| Rice & Vinegar | Stubborn internal gunk in sturdy bottles | Caked-on dirt, light mineral stains, films |
| Denture Tablets | Persistent cloudy film and stains | Heavy mineral deposits, stubborn cloudiness |
| Professional Tumbler | Sick glass, etching, and serious restoration | Permanent mineral etching (sickness) |
This table should help you choose the right approach after you've completed the initial soak and assessed what kind of dirt you're still facing.
Removing That Stubborn Grime Inside
After a good, long soak, the outside of your bottle might be sparkling. But what about that stubborn film you can't reach on the inside? It’s a classic problem, especially with those old medicine or soda bottles with impossibly narrow necks. A brush just isn't getting in there.
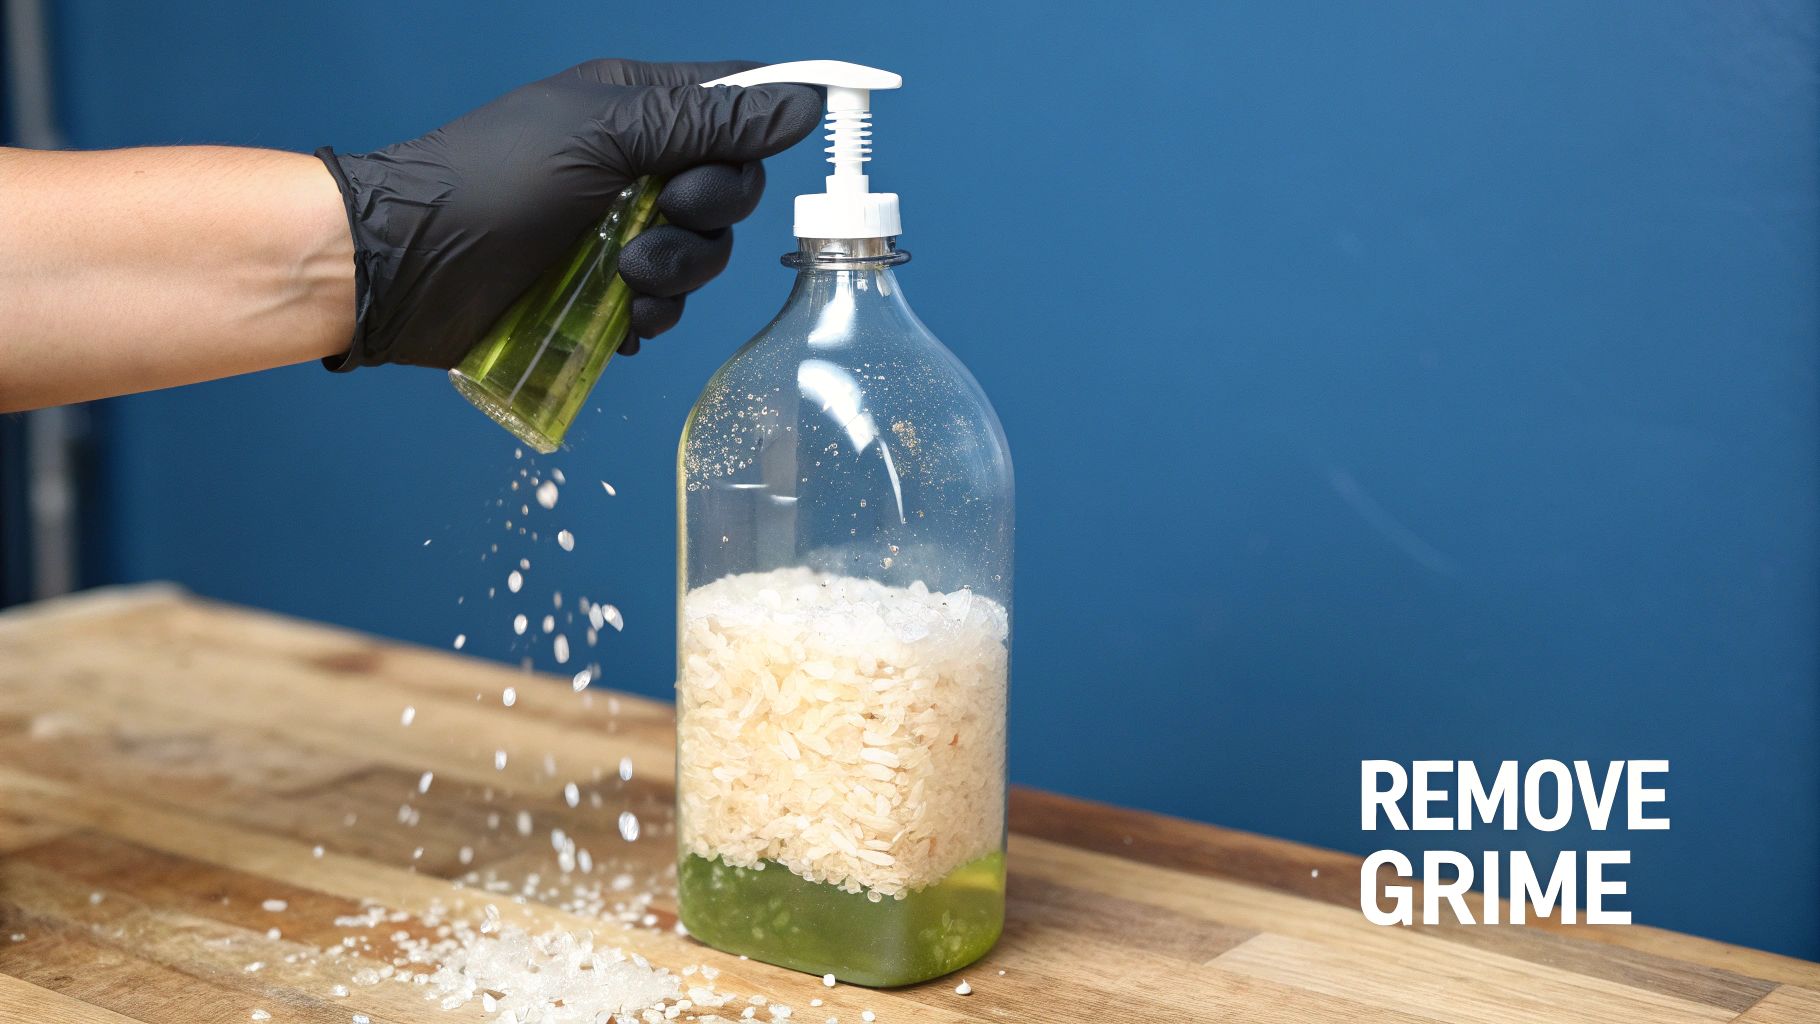
The trick is to use a gentle abrasive to scrub the inside for you. You don’t need any special equipment for this; a few common household items can act as perfect little scrubbers, dislodging years of caked-on gunk.
Using Abrasives for a Deep Interior Clean
The principle here is simple. You're going to create a mini washing machine inside the bottle. Just add a small amount of an abrasive material, a squirt of dish soap, and some warm water. Then, cover the opening and get to shaking.
You’ve probably got some effective options in your kitchen right now:
- Uncooked Rice: A handful of rice is often the perfect starting point. It's abrasive enough to loosen grime but soft enough that it won't scratch the glass.
- Coarse Sand or Small Gravel: For the really tough jobs, a spoonful of clean sand or fine aquarium gravel gives you more scrubbing power. Just make sure to rinse it well first to get rid of any dust.
- Crushed Eggshells: This one might sound odd, but it works wonders. Dried and crushed eggshells create small, sharp-edged particles that are fantastic for breaking up that filmy residue.
When you're shaking the bottle, go for a firm, controlled swirling motion. A violent back-and-forth shake isn't necessary and could be risky. You want to hear the material gently scraping against the glass—that’s the sound of success. If it's clunking loudly, ease up a bit.
For the truly impossible-to-clean bottles, a fan pull chain can be a game-changer. This method is a favorite among serious collectors for its incredible effectiveness on bottles that have been buried for decades.
An Advanced Trick for the Toughest Cases
If you’ve got a bottle that seems hopeless, here’s a pro tip. Head to the hardware store and pick up a simple 3-4 foot metal ball chain—the kind used for a fan pull. This chain acts as an incredible flexible scrubber.
Just feed the chain into the bottle, add your soapy water, and shake. Collectors have found this technique can remove 80–95% of interior grime, even from bottles buried for over 50 years on old 1900s-era properties. It’s a true secret weapon, and you can see how it works in practice to get a better idea.
No matter which method you use, be prepared to rinse thoroughly when you're done. For the most stubborn stains, you might need to repeat the process a couple of times. A little patience goes a long way, but this technique can leave the inside of your vintage bottle looking as clear as the day it was made.
How to Dissolve Haze and Mineral Stains
One of the most common frustrations I hear about is that stubborn, cloudy film that soap and water just can't seem to cut through. If you've run into this, you're not alone. That haze is almost always caused by mineral deposits—think calcium and lime—left behind from whatever the bottle once held, or from years of sitting in hard water.
Thankfully, the best fix is also one of the simplest and safest: a good, long soak in white vinegar. Its mild acidity is perfect for breaking down those alkaline mineral stains without posing any risk to the glass itself. It's a trusted method used by collectors to preserve the integrity of even the most delicate historic pieces.
The Soaking Process
Getting started is as easy as it sounds. Just fill the bottle with straight, undiluted white vinegar, making sure the entire hazy area is completely submerged.
If you're dealing with light cloudiness, a soak for an hour or two might be all it takes. For bottles with a really thick, stubborn film, you'll need more patience. Be prepared to let it sit for 24 hours or even longer to give the vinegar enough time to work its magic and fully dissolve the buildup.
And don't forget the outside! If the exterior is cloudy too, you can simply submerge the whole bottle in a plastic tub of vinegar. For those really tough spots, understanding how to remove hard water stains from glass can give you some extra tricks up your sleeve.
This isn't just an old-timer's trick, either. Surveys of antique bottle collectors show that between 70–85% rely on vinegar and salt for their cleaning. It’s hands-down the most popular, affordable, and eco-friendly method out there.
My Key Takeaway: Patience is your best friend here. A longer soak does the hard work for you, breaking down those deposits so you don't have to resort to harsh scrubbing that might scratch the glass.
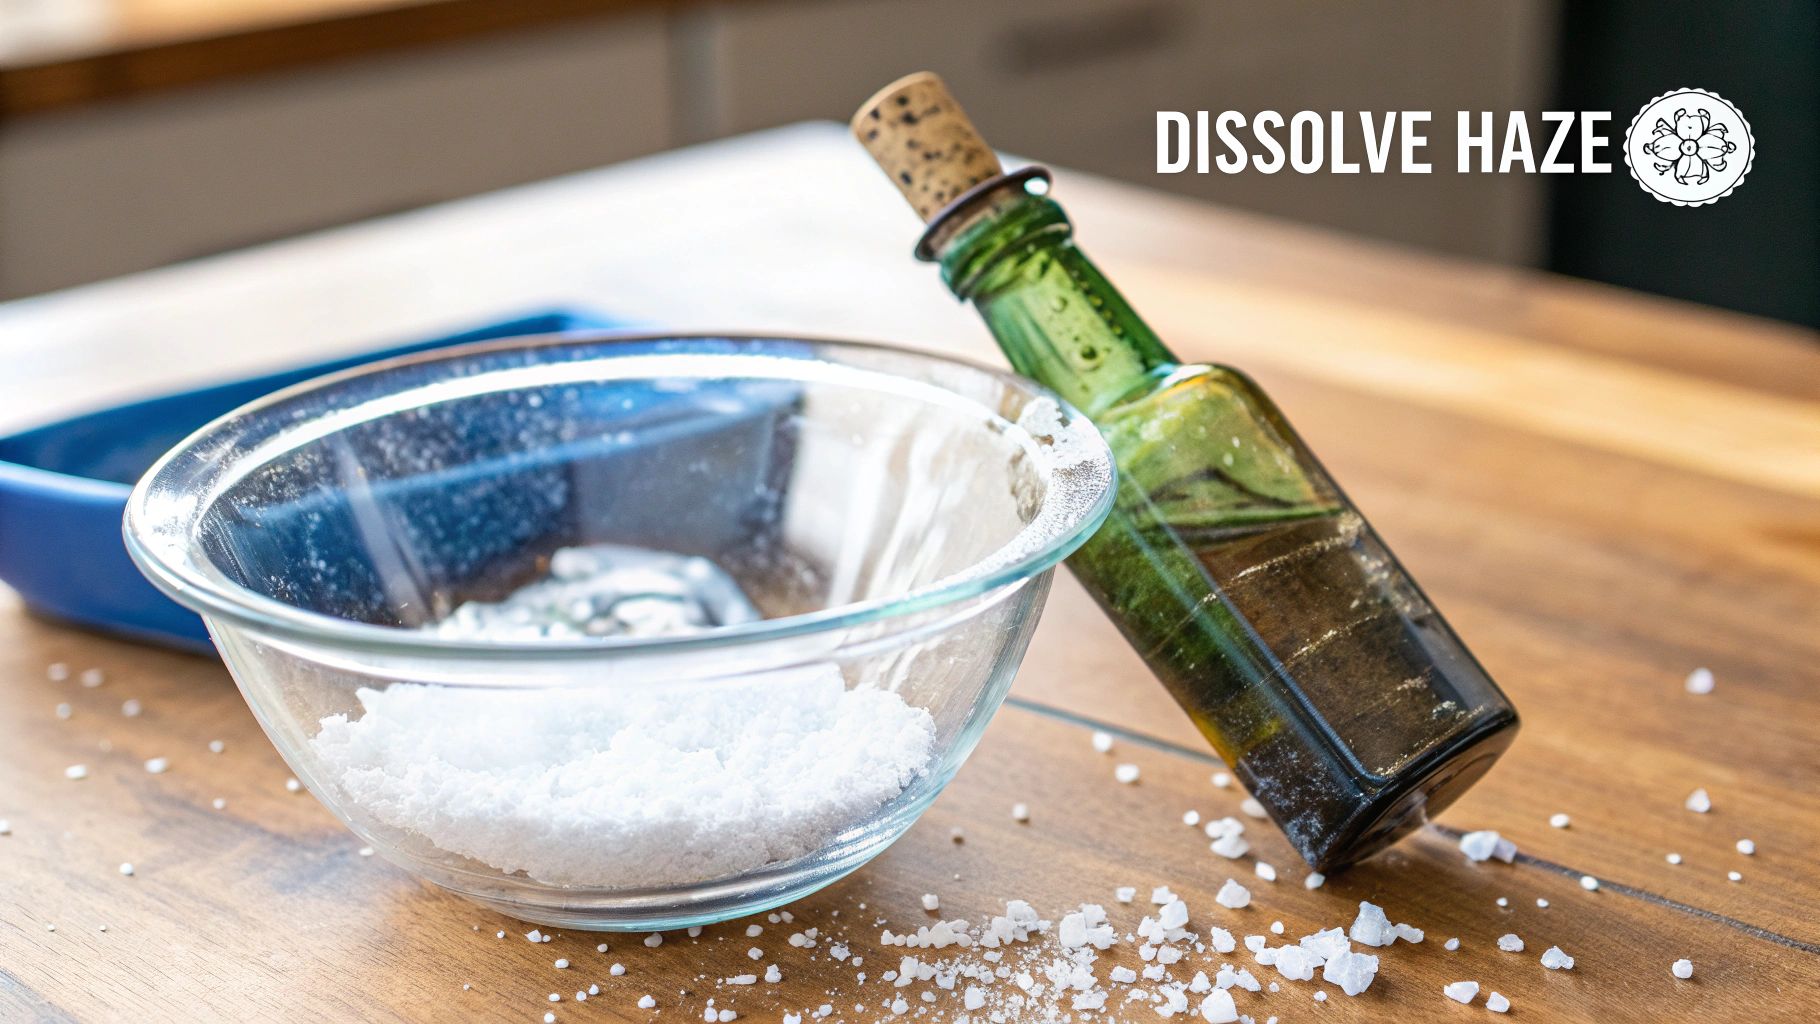
Following Up with a Salt Scrub
After the vinegar has done its job, you might still see some loosened bits of grime clinging to the inside. Now it's time to bring in the coarse salt.
Pour out most of the vinegar, but leave an inch or two in the bottom.
Toss in a tablespoon or two of coarse salt—sea salt or kosher salt work great. Their large crystals are abrasive enough to scrub the glass clean without scratching it.
Now, just cap the bottle and give it a good, vigorous shake for a minute or two. You'll see the salt swirling around, scrubbing away that last bit of film.
Once you’re done, rinse the bottle thoroughly with warm water until you can't smell any vinegar. Let it air dry, and you should be looking at a sparkling, crystal-clear piece of glass.
Removing Organic Stains and Musty Odors
https://www.youtube.com/embed/CHzLckkSATI
So you’ve gotten rid of the caked-on grime and that cloudy mineral haze, but something’s still not quite right. Maybe there’s a faint yellow tint to the glass, or a musty smell you just can’t shake. That’s usually the ghost of the bottle’s past—lingering residue from old medicine, ink, or other organic stuff that has seeped into the glass over decades.
Vinegar is a powerhouse for mineral deposits, but it often meets its match with these kinds of stains. For this job, one of my favorite tricks is something you'd never expect: a simple denture cleaning tablet.
The Magic of Fizz
Denture tablets are brilliant because they’re made to dissolve tough organic stains and neutralize odors on a microscopic level. When you drop one in water, it erupts into thousands of tiny, fizzing bubbles. This gentle but persistent action is what makes them so perfect for cleaning the inside of a delicate old bottle.
Those little bubbles get to work, scrubbing every nook and cranny of the interior. They lift away that stubborn yellowing and break down the smelly gunk in places no brush could ever hope to reach. It’s a wonderfully low-effort way to get a high-impact clean without resorting to harsh chemicals or risky scrubbing.
This technique has become a secret weapon for collectors. In fact, many restorers have found it has a 60–70% success rate for removing yellowing from glass made between 1850 and 1950. You can find more collector tips about this popular cleaning method on notinggrace.com.
A Quick Tip: Always use warm water, never hot. The warmth helps the tablet work more effectively, but boiling hot water could cause thermal shock and crack fragile, old glass.
Putting Denture Tablets to Work
Ready to try it? The process is incredibly simple and is a great trick to have up your sleeve for stubborn bottles.
- First, fill the bottle about three-quarters of the way with warm water.
- Next, drop in one or two denture tablets. One is usually plenty for a standard bottle, but for larger containers or really tough stains, go ahead and use two.
- Now, let it soak. You’ll see it start to fizz immediately. Give it at least a few hours to do its thing. For really persistent stains or strong odors, I’ve found that letting it sit overnight works wonders.
- Finally, rinse it out. Pour out the solution and rinse the bottle thoroughly with clean, warm water. It might take a few rinses to get all the residue out.
This simple soak is often all it takes to banish decades of mustiness and bring back that beautiful, clear sparkle to your favorite finds.
Finishing Touches for a Flawless Display
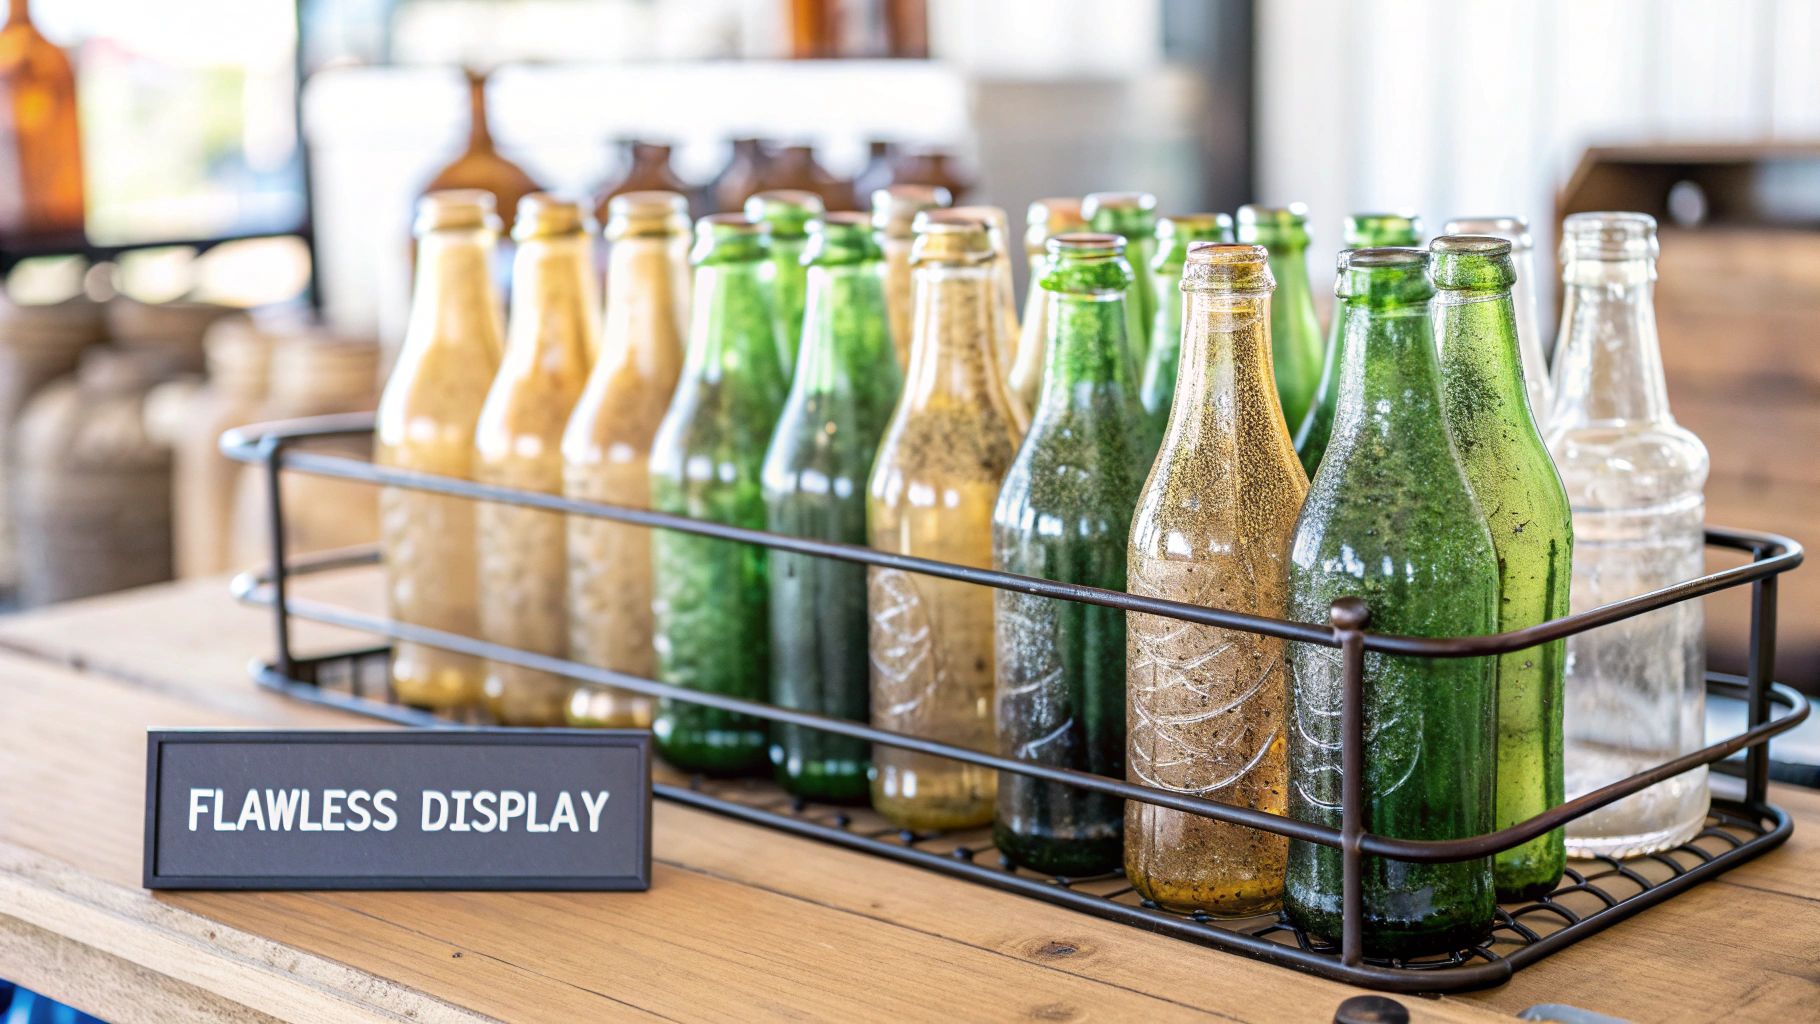
You've done the hard work, and now it's time for the final touches that will make your vintage bottles truly sparkle. Don't skip the final rinse! Any cleaning residue left behind can dry into a cloudy film, undoing all your effort.
Here's a little trick I've learned: use distilled water for that last rinse. Tap water often contains minerals that leave pesky spots as the bottle dries, but distilled water ensures a perfectly clear finish.
Let Them Air-Dry the Right Way
Once rinsed, just let them be. Wiping them down with a towel, no matter how soft, almost always leaves behind tiny bits of lint. Patience is your best friend here.
- Go upside down. Place the bottles on a soft, folded towel or a dedicated bottle-drying rack to let gravity do the work.
- Give them some air. Good circulation is key to preventing that old, musty smell from developing inside.
- Wait it out. It might take up to 24 hours for a bottle to dry completely, especially if it has a narrow neck. Trust me, it’s worth the wait.
Rushing the drying process is the number one mistake I see. It's the fastest way to get frustrating water spots that completely ruin that crystal-clear, antique sparkle you worked so hard for.
With your bottles clean and gleaming, think about where they'll live. Keep them out of direct sunlight, as those harsh UV rays can cause the beautiful colors in old glass to fade over time. If you need some inspiration, check out these creative collectible display ideas to help you show off your collection safely and beautifully.
Your Top Vintage Bottle Cleaning Questions, Answered
Even when you have a solid game plan, cleaning old bottles can throw you a curveball. I've been there. Let’s tackle some of the most common issues that pop up so you can handle them like a pro.
Can Vintage Bottles Go in the Dishwasher?
I know it's tempting, but please, keep vintage glass out of the dishwasher. It's just not worth the risk. The intense heat and aggressive detergents can cause "thermal shock," leading to tiny, invisible cracks that weaken the glass over time.
Even worse, it can cause "sick glass"—a permanent, cloudy film that you can't scrub off. Trust me on this one; a gentle hand wash is the only way to go.
It's also super important to know if you're dealing with a true antique or a more recent vintage piece. The older the glass, the more fragile it tends to be. You can learn about the key differences between vintage and antique in our detailed guide to help you pick the right approach.
What’s the Trick to Removing a Stuck Stopper or Cork?
Ah, the stuck stopper. It’s a classic problem. If you've got a glass stopper that won't budge, try a few drops of penetrating oil right at the seam. Let it work its magic for a couple of hours, then give it a gentle, wiggling twist. Sometimes, alternating a warm, damp cloth with a cool one on the neck of the bottle can also do the trick by causing the glass to expand and contract just enough to loosen the seal.
Corks are a different beast altogether because they get brittle and just want to fall apart. A regular corkscrew often makes things worse. Your best bet is to expect it to crumble and have a pair of long, skinny tweezers ready to fish out the pieces after you get the bulk of it out.
How Can I Clean a Bottle Without Ruining the Paper Label?
Saving an original paper label is all about keeping it dry, no matter what. You'll need to clean around it. Take a slightly damp cloth and carefully wipe down the exposed glass, steering clear of the paper. You can still soak and scrub the inside—just be extra cautious not to splash.
A couple of pro tips I've learned along the way:
- Wrap it up: Before cleaning the inside, tightly wrap the bottle's exterior with plastic wrap to shield the label from any drips.
- Final touch: Once the bottle is completely clean and dry, you can gently dust the label itself with a soft, dry paintbrush or cloth.
Found a bottle you can't identify? Let Curio do the work. Just snap a photo to uncover its history, origin, and value in seconds. Download Curio and start your free trial today!