So, you think you’ve stumbled upon a genuine antique? The real work—and the real fun—is in figuring out if it's the real deal. Telling an authentic antique from a clever reproduction comes down to looking for the tell-tale signs of age, materials, and old-world craftsmanship.
True antiques, which are pieces 100 years or older, have a story to tell through their hand-cut joints, the mix of woods used, and the unmistakable patina that only time can create.
Your First Look at Identifying Antique Furniture
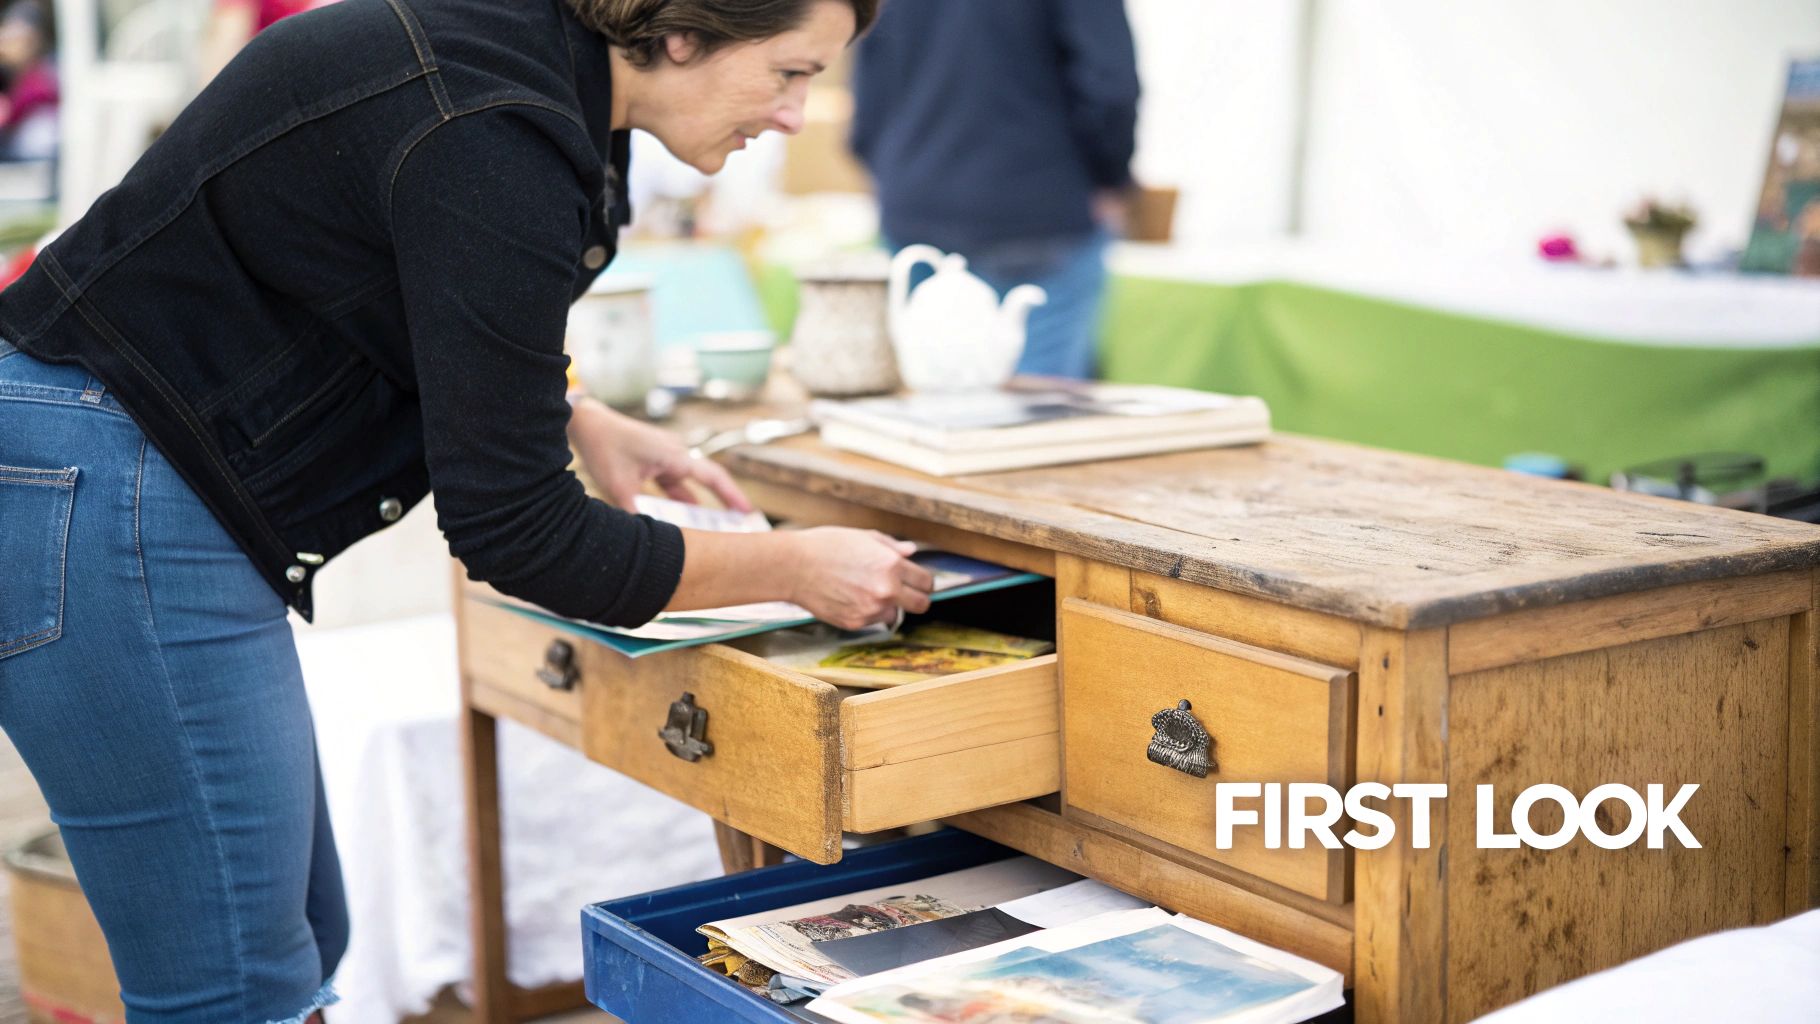
Picture this: you're at an estate sale and spot a gorgeous old desk tucked away in a corner. Or maybe you've just inherited a chest of drawers from a great-aunt. That initial spark of curiosity is where your investigation begins. Before you get lost in the details, a quick once-over can give you some major clues.
Think of yourself as a detective. Every little detail—from the way a drawer is put together to the subtle scent of old wood—is a piece of evidence. Understanding these core tells is the first step in learning how to separate the truly old from the just old-looking.
Key Indicators to Check Immediately
When you first lay eyes on a potential antique, you don’t need a fancy toolkit. Just your eyes and your hands will do. These first checks help you quickly sort the promising pieces from the modern fakes.
Start with the overall feel. Does it seem like it was made by a person or a machine? Look for those subtle imperfections that scream character—they’re often the fingerprint of a long-gone artisan.
Here's what to zero in on:
- Joinery: Pull out a drawer and look at the corners. Do you see dovetail joints that are a little uneven or irregular? That's a great sign of hand-cutting. If the dovetails are perfectly uniform and sharp, they were likely made by a machine, meaning the piece is probably from after 1850.
- Wood Type: Look underneath and inside. Antique makers were frugal; they'd use the good stuff (like mahogany or walnut) for the parts you see and cheaper secondary woods (like pine or poplar) for drawer bottoms, backboards, and internal frames. A mix of woods is a very good sign.
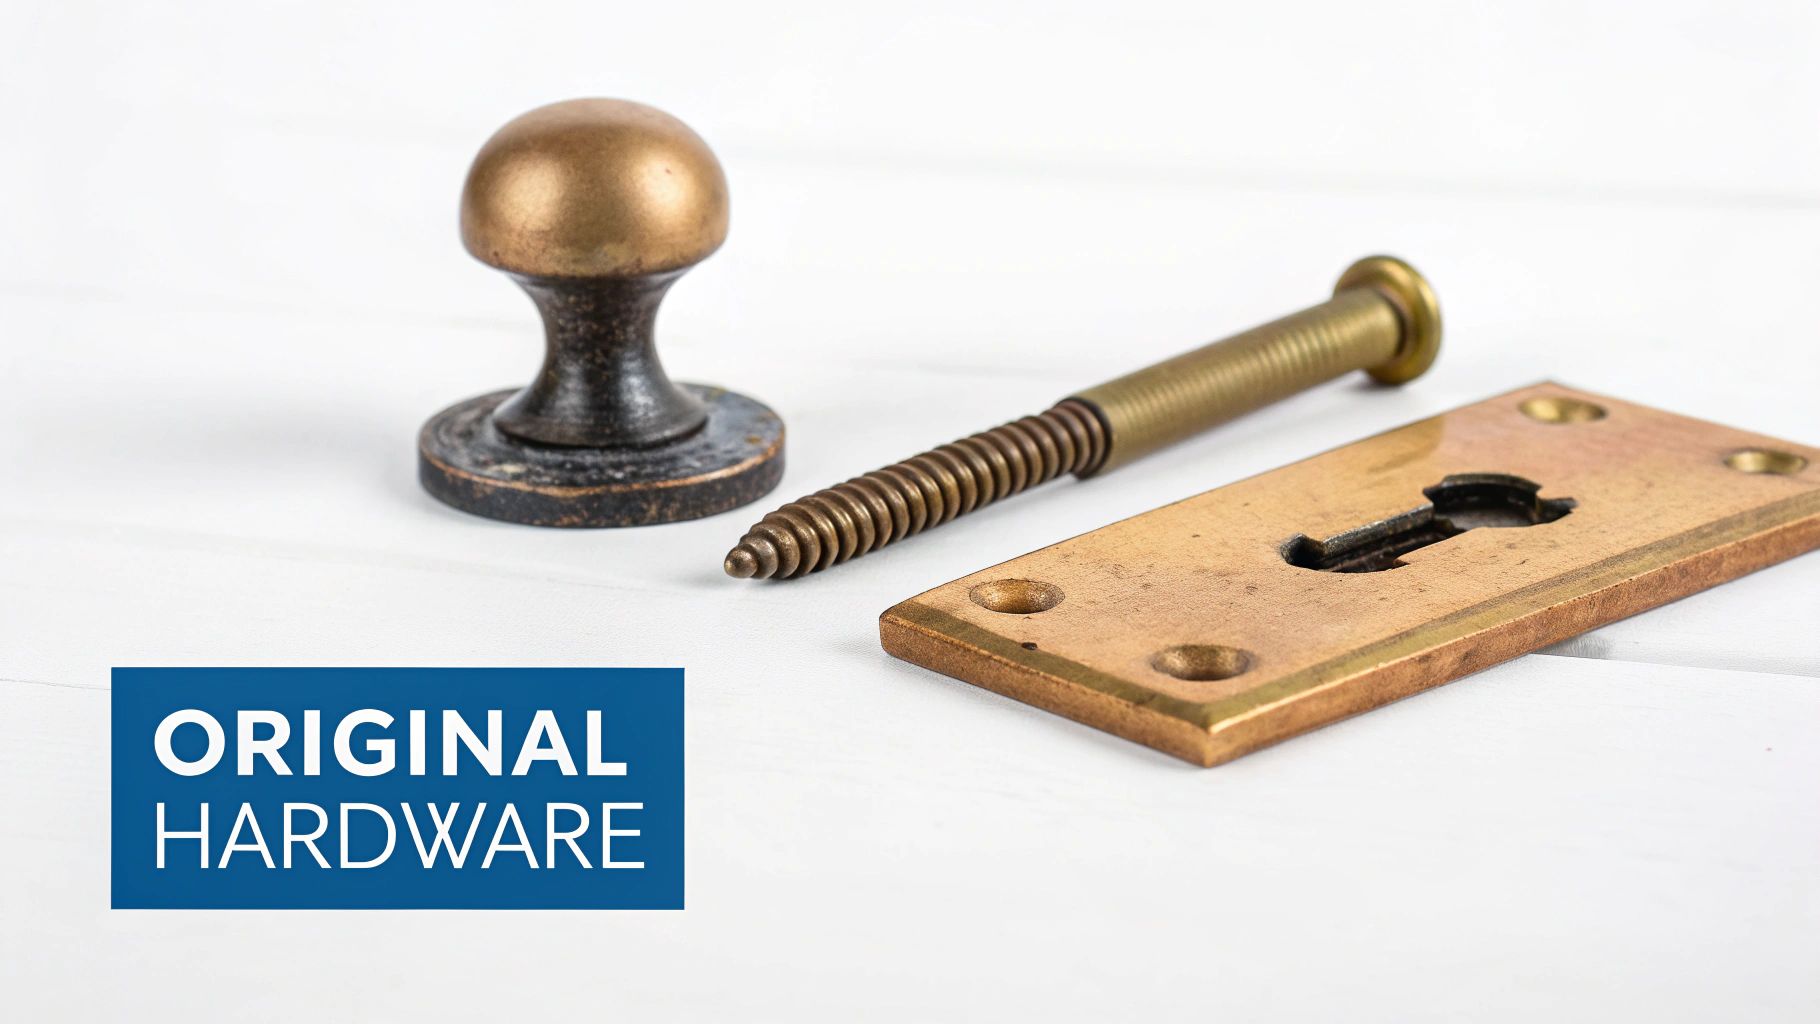
- Hardware: Check out the knobs, pulls, and locks. Are they original? Handmade screws with off-center slots are a fantastic clue. Older hardware often shows slight irregularities and wear consistent with the rest of the piece.
- Finish and Patina: An original finish will have a soft, deep glow called patina. Look for wear in logical places—around handles, on the edges of tabletops, and where feet would rest. Reproductions often have a uniform, sprayed-on "distressed" look that just doesn't feel right.
A crucial takeaway is that authenticity lies in the sum of these parts. A single old screw doesn’t prove a piece is antique. But when you have hand-cut dovetails, secondary woods, original hardware, and a genuine patina all telling the same story, you’re almost certainly looking at the real thing.
If you're focusing on a specific item, like a bar cabinet, this guide on identifying antique drinks cabinet styles offers great specialized tips for confirming age and authenticity.
To help you remember these points during your next treasure hunt, here’s a quick reference table.
Quick Antique Furniture Checklist
This table sums up the key signs to look for when you're doing that initial, on-the-spot assessment of a piece.
| Indicator | What to Look For (Antique) | What Suggests It's Newer or a Reproduction |
|---|---|---|
| Dovetail Joints | Slightly irregular, uneven spacing, and not perfectly sharp. | Perfectly uniform, machine-cut with sharp, identical pins and tails. |
| Wood | Mix of primary (visible) and secondary (hidden) woods. | Single wood type used throughout the entire piece. |
| Screws & Nails | Handmade screws with off-center slots; square-headed nails. | Phillips-head screws; round, wire-cut nails. |
| Symmetry | Slight imperfections; drawers may not be perfectly interchangeable. | Perfect symmetry; all parts are precisely identical and interchangeable. |
| Finish & Patina | Natural wear patterns in high-contact areas; deep, mellow glow. | Uniform distressing; shiny or overly perfect finish. |
| Overall Feel | Solid wood construction; feels heavy and substantial. | Lightweight; use of veneers on particleboard or MDF. |
Think of this as your field guide. Having these points in your back pocket will make your assessments much quicker and more accurate.
Common Misconceptions to Avoid
It’s easy to get fooled, especially when you're just starting out. Many reproductions are incredibly well-made, designed specifically to look like the real thing. To sharpen your skills, check out our deeper guide on how to spot fake antiques.
One of the biggest traps? A maker's mark or a label. While finding one is exciting, they are notoriously easy to fake. Never take a label at face value. Always cross-reference it by making sure the construction, materials, and style of the piece actually match the work of that maker from that specific time period.
This initial survey is all about building your confidence. By learning what to look for, you can start making smarter, more informed decisions on your own.
What the Wood Tells You About a Piece's Age
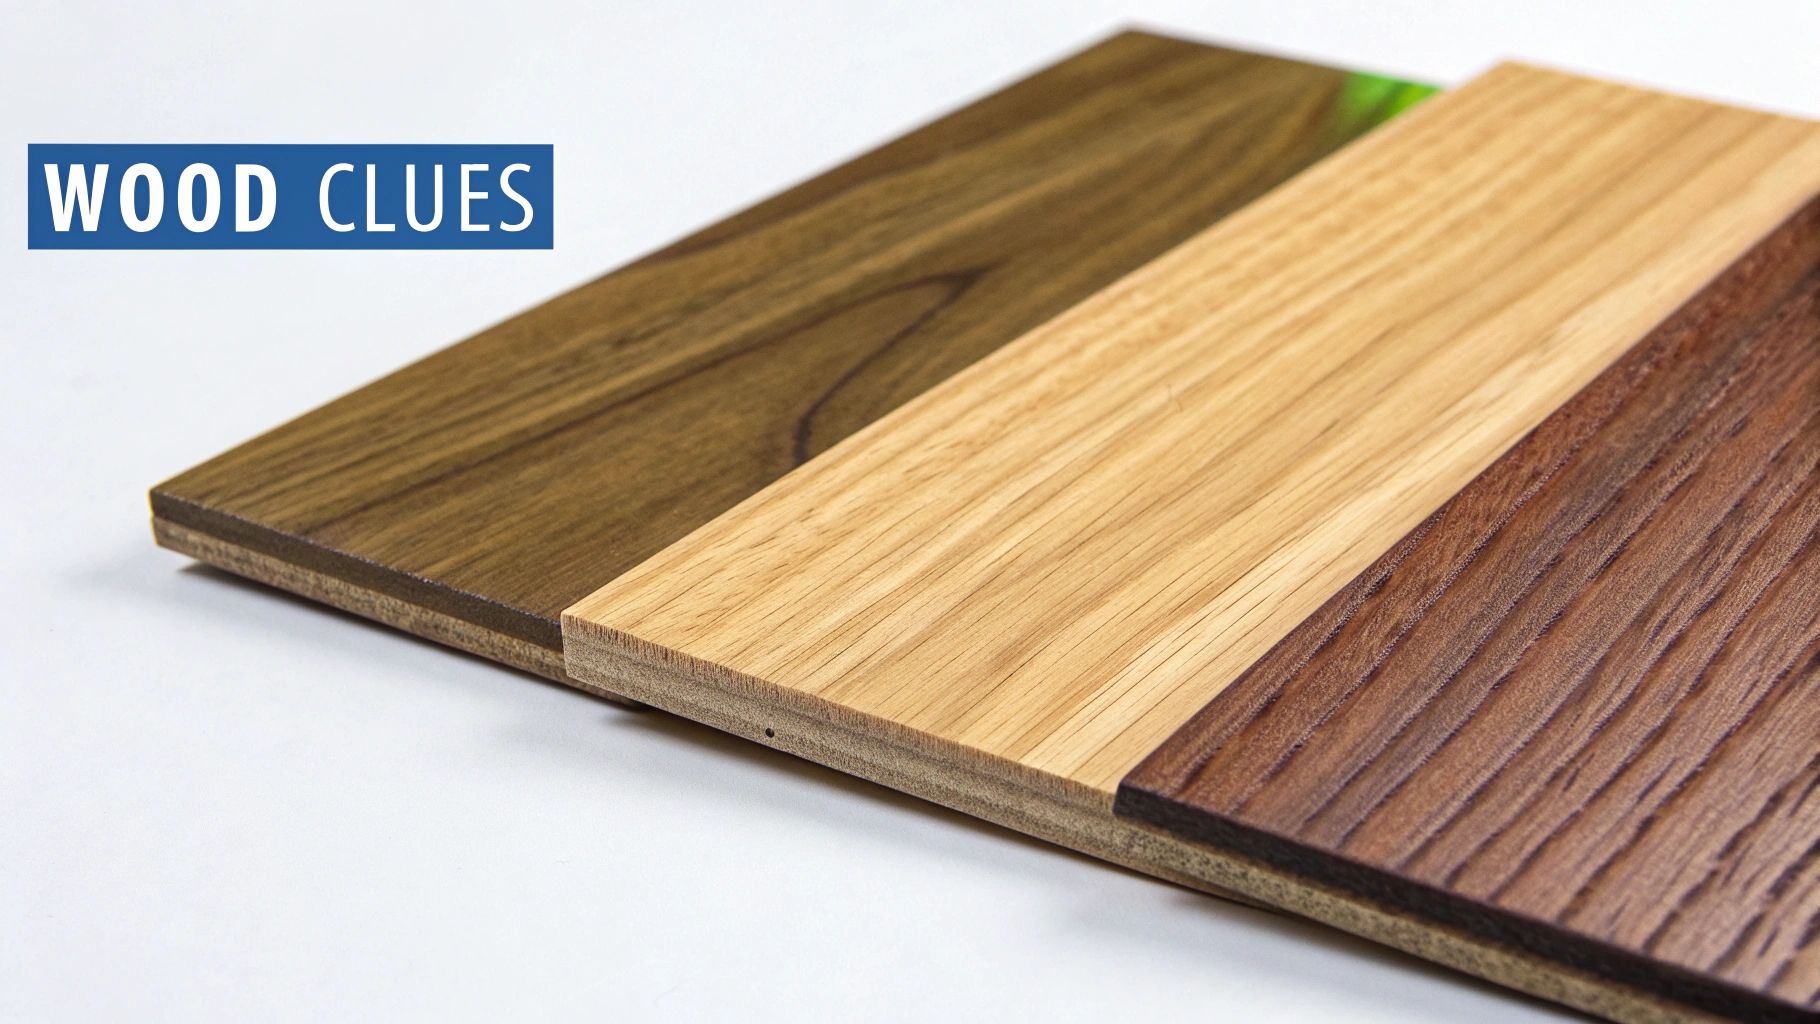
Before a single screw was turned or a dovetail joint was cut, every piece of furniture began its life as a tree. The type of wood a craftsman used is one of your most powerful clues for figuring out if that piece is a true antique. It’s like a time capsule, telling you secrets about the technology, trade routes, and popular styles of a bygone era.
Think about it this way: certain woods were either unavailable or simply out of fashion at different points in history. Early American colonial furniture, for instance, was built from whatever was on hand—oak, maple, pine, and cherry. If you found a piece supposedly from 1680s New England but made from a tropical wood like mahogany, that’s a massive red flag.
Primary Woods and Historical Trends
The go-to woods for furniture makers changed dramatically over the centuries, and these shifts are like signposts that help you date a piece.
Oak was king in the 17th century. Its sheer durability and prominent grain made it the perfect choice for the heavy, sturdy chests and tables popular during the Jacobean era.
As tastes shifted toward more elegant, refined designs, walnut took over. Its deep, rich color and smooth grain were ideal for the graceful curves of Queen Anne furniture in the early 18th century. But then came a major change. After about 1720, mahogany started arriving from the Caribbean. Its strength, reddish-brown hue, and how beautifully it could be carved made it the ultimate luxury wood for Chippendale and other Georgian and Federal styles.
Knowing this timeline is a game-changer. For example, walnut was the top choice for high-end cabinets in Europe during the 17th-18th centuries, but once mahogany hit the market post-1720, it quickly became the new standard. This knowledge is crucial for valuation; in fact, market data shows that correctly identifying the wood and era can lead to 40-60% higher valuation accuracy. You can dive deeper into wood identification and dating with a tool like Curio.
The Secret of Secondary Woods
While the primary wood—the one you see on the surface—tells a great story, the hidden woods often tell an even better one. Antique cabinetmakers were incredibly frugal and resourceful. To save money, they used cheaper, plainer woods for the parts of a piece that no one would ever see.
This is a classic sign of authentic antique construction that modern reproductions almost never bother with.
When you’re inspecting a piece, always check these spots:
- Drawer Bottoms and Sides: Pull a drawer all the way out. Are the bottom and sides made of a different, plainer wood like pine, poplar, or cedar? That's a fantastic sign.
- Backboards: Run your hand along the back of a chest or cabinet. You’ll often find rough-sawn, unfinished pine or another common local wood.
- Interior Frames: Look inside a cabinet or under a table. The internal supports were almost always made from a sturdy but inexpensive secondary wood.
The presence of secondary woods is one of the strongest indicators of an authentic antique. A piece made entirely of a single, uniform wood—especially a pricey one like mahogany—is far more likely to be a modern reproduction.
Reading the Grain and Patina
Beyond just the type of wood, its condition gives you a ton of information. Over a hundred years or more, wood develops a character that’s almost impossible to fake. That beautiful, mellow glow on the surface is called patina. It’s the result of decades of sunlight, dusting, waxing, and human touch.
Real patina is never perfectly even. It’s darker in crevices and lighter or more worn on high-traffic spots like the arms of a chair, the edges of a desk, or the area around a keyhole. Modern "distressing" techniques often look repetitive and artificial because they lack that subtle, organic variation that only comes from true age. Getting familiar with the grain patterns of different types of wood for dining tables and other furniture will sharpen your eye for what’s real and what’s not.
Look for the small signs of a long, well-lived life. Minor nicks, shrinkage cracks, and a slightly uneven surface are all part of its story. These aren't flaws; they're proof of its journey through time.
How Antique Furniture Was Put Together
If the wood in a piece of furniture is its DNA, then the way it’s assembled is its fingerprint. Before automated factories and power tools, every joint was a testament to a craftsman’s skill and patience. These old construction methods are some of the most reliable clues you have for dating a piece.
Modern furniture often relies on staples, glue, and Phillips-head screws—all quick and efficient. Antique furniture, on the other hand, was built to last using interlocking joinery that relied on precision and the natural strength of the wood itself. Spotting these old-world techniques is like finding a maker’s signature hidden in plain sight.
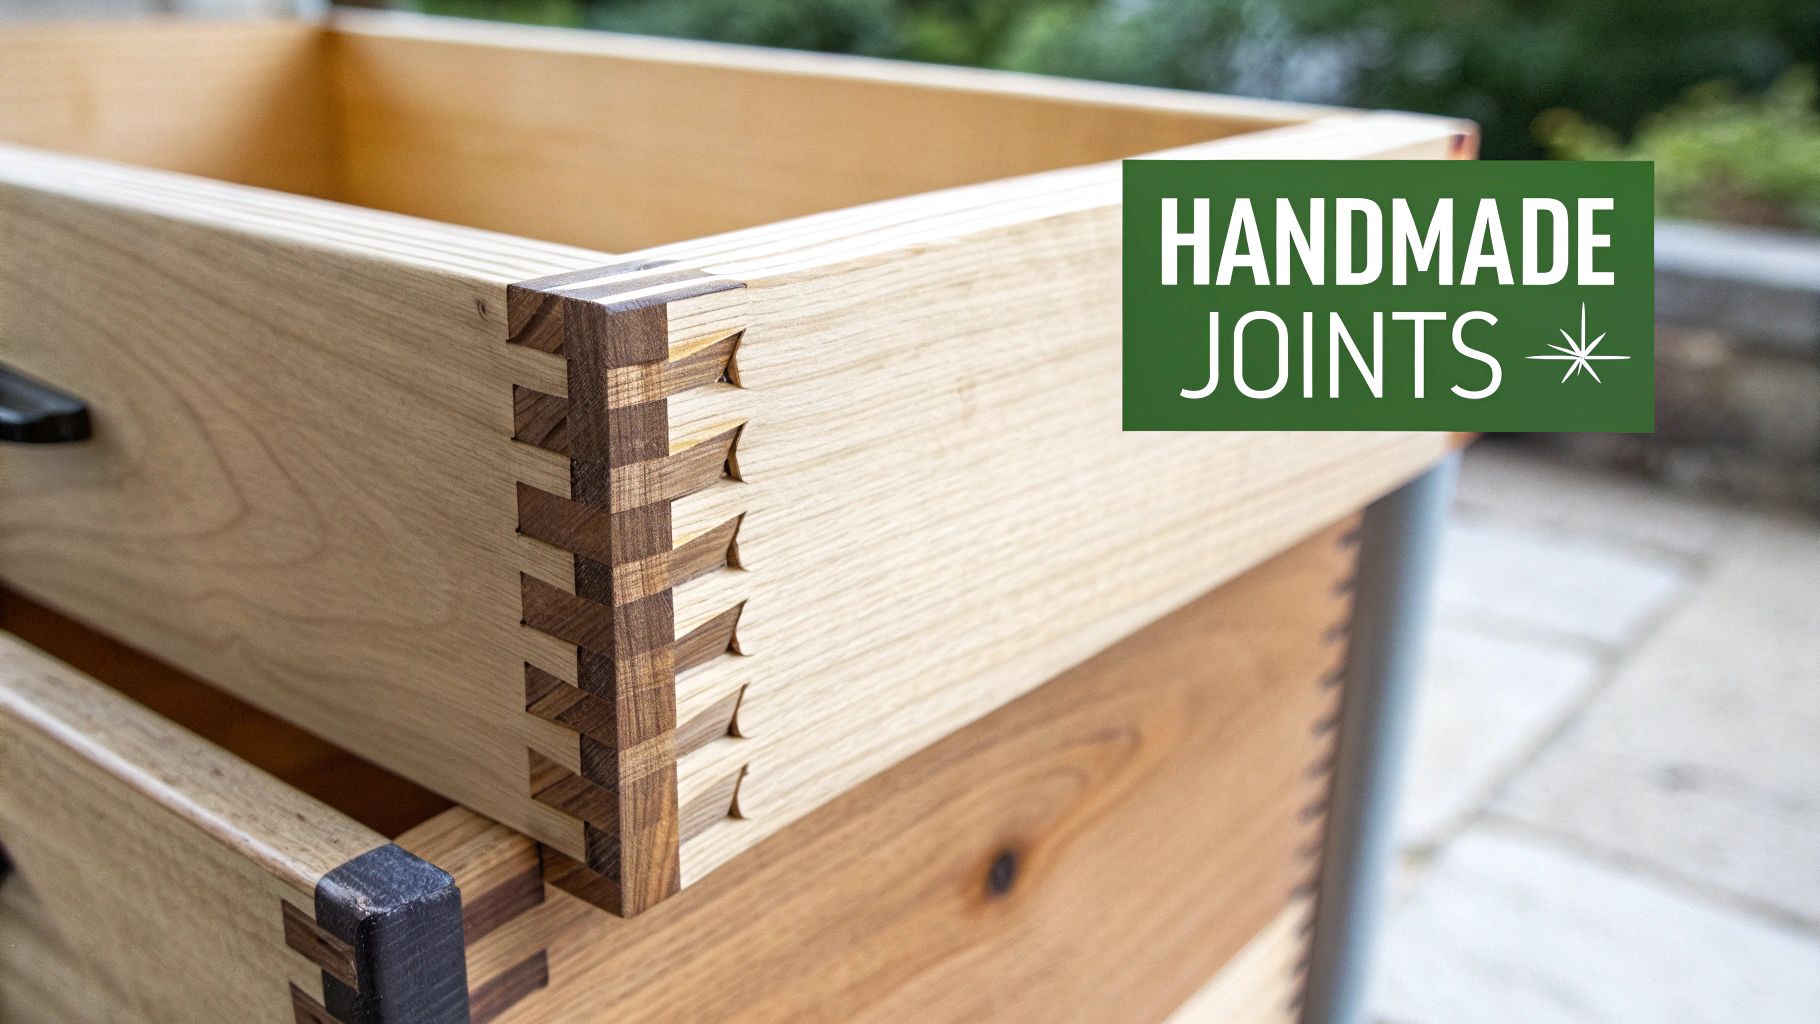
The All-Important Dovetail Joint
Perhaps the most famous—and revealing—clue in antique furniture is the dovetail joint. You'll almost always find it holding drawer boxes together. To get a good look, pull a drawer completely out of its housing and flip it over. The corners where the front and sides meet tell a massive story.
Examining these joints is one of the most reliable ways to separate the genuinely old from the old-looking. Before about 1850, dovetails were painstakingly cut by hand with a chisel and saw, leaving them with a charmingly irregular look. After that, machinery took over, creating perfectly uniform joints. Auction data consistently shows that pieces with authenticated hand-dovetailed construction can fetch 30-50% higher prices than their machine-made counterparts.
The takeaway is simple: imperfect is perfect. Run your fingers along the joint. If the pins and tails are slightly different sizes, unevenly spaced, and not perfectly sharp, you’re likely holding a pre-1850 piece.
To really see what I mean, let’s compare them side-by-side. Mastering this one detail will dramatically improve your eye for antiques.
Hand-Cut vs Machine-Cut Dovetails at a Glance
This table breaks down the key differences you can spot between dovetails made by hand and those cut by a machine.
| Feature | Hand-Cut Dovetails (Pre-1850) | Machine-Cut Dovetails (Post-1850) |
|---|---|---|
| Spacing | Irregular and uneven between pins and tails. | Perfectly uniform and evenly spaced. |
| Shape | Pins are visibly thinner than the tails, creating a delicate look. | Pins and tails are the same size and shape, often with a rounded look. |
| Edges | Slightly soft edges with minor scribe marks from the craftsman's tools. | Sharp, clean, and precise edges with no imperfections. |
| Quantity | Typically features fewer, larger dovetails. | Often has many small, identical dovetails close together. |
Recognizing these subtle differences is a game-changer when you're out in the field.
Beyond the Dovetail: Mortise and Tenon Joints
While dovetails are the star of the show for drawers, another workhorse of antique construction is the mortise-and-tenon joint. This ancient technique involves cutting a square or rectangular hole (the mortise) into one piece of wood and shaping a corresponding peg (the tenon) on another to fit snugly inside.
This method was the backbone of furniture for centuries, used everywhere from table legs and chair frames to cabinet doors. On true antiques, you'll often see this joint secured with a small wooden peg driven through the side, locking the tenon firmly in place. Finding these pegs instead of modern screws or nails is an excellent indicator of age.
Check these key spots for mortise-and-tenon construction:
- Chair and Table Legs: Look right where the legs meet the frame or seat. You might just spot the end of the tenon or the little peg holding it all together.
- Cabinet Doors: The rails and stiles that form the door's frame were almost always joined this way on older pieces.
- Bed Frames: The side rails often connect to the headboard and footboard using a large-scale version of this powerful joint.
Understanding these structural elements gives you a much clearer picture of a piece's history. For a deeper dive into the visual characteristics of different eras, take a look at our guide on identifying antique furniture styles. It will help you connect these construction details to specific design movements.
Checking the Hardware, Finishes, and Wear
While the big things like wood and joinery tell you a lot, the real story of a piece is often hidden in the details. The hardware, finish, and the little dings and scratches of daily life are a piece’s biography, revealing its true age and the journey it's been on.
Modern fakes can get the overall style right, but it's incredibly tough to fake a century of honest use. A shiny, brand-new screw holding a drawer pull that’s supposed to be 150 years old is a dead giveaway. Learning to spot these small details is one of the fastest ways to tell a real treasure from a clever reproduction.
Reading the Story in the Hardware
The metalwork on a piece of furniture—its drawer pulls, knobs, hinges, and locks—is one of the best clues you have. Hardware styles and the way they were made changed dramatically over the years, giving you a tangible timeline to follow.
For instance, early brass hardware was often made using sand casting. This process left behind tiny imperfections called casting pits. If you look closely at the back of an 18th-century brass handle, you'll often see a slightly rough, almost grainy texture. That's the sign of a handmade original. Modern hardware, by contrast, is machine-made to be perfectly smooth.
Screws are another massive clue. Before the early 1800s, screws were painstakingly made by hand, one at a time. This gives them a few tell-tale signs:
- Off-Center Slots: The slot for the screwdriver was cut by a person, not a machine, so it’s rarely perfectly centered.
- Irregular Threads: The threads were filed by hand, so they aren't uniform like modern screws.
- Blunt Ends: Old screws don't taper to a sharp point like the machine-made ones we use today.
If you find a Phillips-head screw on a piece that’s supposedly from 1820, it’s an immediate red flag. It means the piece has been repaired, or it’s not as old as you think.
Understanding Original Finishes
The finish is the protective skin of a piece of furniture, and an original finish is what collectors really look for. The materials used to finish wood have changed a lot, and each has a distinct look and feel.
Before the Victorian era, furniture makers used finishes like shellac, milk paint, or a simple oil-and-wax rub. Shellac, made from the resin of the lac bug, gives wood a warm, amber glow that’s much softer and thinner than what you see today. Milk paint often develops a unique crackled or "alligatored" texture over time that’s hard to fake.
The key thing to remember is that an original finish is rarely perfect. It will show its age with a soft patina, gentle crazing, or fading from sunlight. If a piece looks too flawless or has a thick, plastic-like gloss, it’s probably coated in modern polyurethane or has been refinished, which can seriously lower its value.
Go ahead and touch it. A truly old finish feels different—it’s softer, almost like it’s become part of the wood itself, not just a layer sitting on top.
Spotting Real Wear vs. Fake Distressing
This is where you get to play detective. A genuine antique earns its wear and tear honestly, through a lifetime of use. This creates a pattern of aging that just makes sense.
Think about how furniture is actually used. The wear should always be in high-contact areas.
- On a desk: You'll see smoothed, slightly lighter edges where arms rested for decades. The wood around the keyhole will have tiny scratches from keys missing their mark.
- On a dresser: The drawer pulls and the wood right around them will be worn from thousands of openings and closings. The feet might be scuffed up from vacuum cleaners or shoes.
- On a chair: The arms will be polished smooth by hands, the front edge of the seat might show wear from people's legs, and the very tips of the feet will be worn down.
Artificial distressing, on the other hand, usually looks random and too uniform. You might see perfectly round "wormholes" spaced evenly apart or sanding marks applied all over the piece without any logic. Fake wear doesn't tell a story; authentic wear is a history of human touch.
Using Modern Tools for Confident Identification
Even with a good eye for wood grain and dovetail joints, there are times when you're just not sure. We've all been there: standing in a packed estate sale or a dusty corner of a thrift shop, wondering if that chest of drawers is a hidden gem or a clever reproduction. That little bit of doubt can be paralyzing.
This is where technology can be a huge help. Think of it less as a replacement for your own knowledge and more as a powerful second opinion you can get on the spot. It's the sanity check you need before pulling the trigger on a big purchase or the tool that helps you write a more accurate, compelling listing for an online sale.
How AI Can Help You Identify Antiques
Modern apps use AI to do the heavy lifting in seconds. You snap a few photos of a piece, upload them, and the technology gets to work. It analyzes the shape, style, carvings, and other details, then scours a massive database of historical furniture to find a match.
The process is surprisingly simple. The AI will typically suggest a style—like Chippendale, Queen Anne, or Art Deco—along with a likely time period and country of origin. Some even provide a ballpark market value. This is information that could otherwise take hours of sifting through reference books or websites. Getting that instant context is a game-changer when you're trying to figure out how to tell if furniture is antique right then and there.
Modern identification apps are like having an antiques expert in your pocket. They provide the instant data and historical context needed to turn a hesitant guess into a confident assessment, bridging the gap between your observations and a verifiable conclusion.
Getting Started with an Identification App
You don't need to be a tech wizard to use these tools. They're designed to be intuitive. An app like Curio, for instance, breaks down the complex process of identification into just a few simple taps.
After you upload a photo, a good app will give you a clear, organized result. You’ll typically see a title, a brief description, and some historical notes.
This kind of immediate feedback is what makes these tools so valuable. You get more than just a label; you get a bit of the piece's story, which helps you appreciate its journey and significance. For anyone looking to sharpen their skills, using an antique identification app is a fantastic way to learn, connecting the physical clues you see in front of you with a huge library of historical data.
Practical Scenarios for Using Tech
Let’s put this into a real-world context. You’re at a flea market and a strange-looking chair catches your eye. The carvings are unique and the hardware looks old, but you can’t quite place the style. Instead of walking away, you pull out your phone and take a picture.
A few seconds later, the app suggests it’s an Eastlake-style chair from the 1880s, showing you similar examples and an estimated value. Armed with that information, you can now make an informed offer.
Or, imagine you're helping clear out a relative’s house—an overwhelming task. You can go room by room, photographing each piece of furniture. An app can help you quickly triage everything: here are the valuable antiques that need a professional look, these are vintage pieces worth selling online, and the rest can be donated. It turns a massive, often emotional project into a manageable one, ensuring no family treasures are lost in the shuffle.
A Few Common Questions Answered
As you start digging into the world of old furniture, you're bound to hit a few stumbling blocks. You can learn to spot a hand-cut dovetail from a mile away, but real-world scenarios at a dusty flea market or an estate sale can still throw you for a loop. Let's tackle some of those common questions head-on.
Think of this as your quick reference guide for those moments of uncertainty. I’ve pulled together some of the most frequent questions I hear from newcomers and even seasoned collectors to help you clear up the confusion and feel more confident in your judgment.
What’s the Real Difference Between Antique and Vintage?
People throw these terms around all the time, often using them interchangeably. But in the collecting world, they mean very different things. Getting this right is the first step in learning how to tell if furniture is antique and accurately describing its age and potential value.
It's pretty simple, actually. For a piece of furniture to be officially considered an antique, it needs to be at least 100 years old. That's the gold standard used by professional dealers, auction houses, and even customs officials.
Vintage, on the other hand, is a broader term. It usually refers to something that's at least 20 to 40 years old but hasn't yet hit that 100-year mark. Think of a classic Eames chair from the 1960s—it’s an iconic, highly collectible piece of design, but it's vintage. A Victorian dresser made in 1910, however, has crossed the century threshold and earned its antique status.
Can a Signature or Label Be Faked?
Oh, absolutely. And it happens more than you'd think. Finding a maker’s mark or an old paper label feels like hitting the jackpot, but it’s also one of the easiest things for a forger to fake. It’s not unheard of for someone to slap a Stickley or Chippendale label onto a generic piece to trick a buyer into paying a premium.
That’s why you can never rely on a label alone. Treat it as just one clue in your investigation, not the final word.
So, how do you spot a fake?
- Look for Consistent Aging: Does the label look as old as the rest of the piece? The ink should be naturally faded, the paper brittle or yellowed, and any scuffs should match the wear on the surrounding wood.
- Check the Construction: The most important tell is the piece itself. The style, materials, and joinery must align with the known work of that maker from that period. A fancy label doesn't mean a thing if the piece has machine-cut dovetails but is supposedly from 1780.
Does Refinishing Furniture Really Destroy Its Value?
For a true antique, the answer is almost always a resounding yes. Most serious collectors and professional appraisers will tell you that stripping the original finish can slash its market value, often by 50% or more. That original finish and the patina—the soft, warm glow that wood develops over a century of life—are part of the furniture's story.
Collectors prize authenticity above all else. The original surface tells the story of the piece's life, and once it's stripped away, that history is gone forever.
Now, there are a few rare exceptions. If a piece has been horribly damaged, is in truly terrible shape, or was already subjected to a bad refinishing job decades ago, a careful, professional restoration might be an option. But for exceptionally rare or historically important furniture, you should almost always leave the finish alone, warts and all.
I Think I Have Something Valuable. What Now?
If your gut feeling and initial inspection tell you that you're looking at something with real historical or monetary value, it's time to call in a pro. Learning the signs of an antique is a fantastic skill, but the final verdict on a potentially high-value item should always come from an expert.
Your best move is to get a formal appraisal. Look for a certified appraiser from a reputable organization like:
A certified appraiser won't just glance at it. They'll perform a thorough examination, dig into the piece's history, and compare it against recent sales of similar items at auction. This gives you the validation you need to understand its true market value, whether it's for insurance, resale, or just for your own peace of mind.
Feeling a bit stuck on a potential find? Let technology lend a hand. With an app like Curio, you can just snap a photo to get instant insights into an item's style, origin, and an estimated value. It’s a great tool for turning that flicker of curiosity into real confidence. Download Curio today and start uncovering the stories hidden in your furniture.