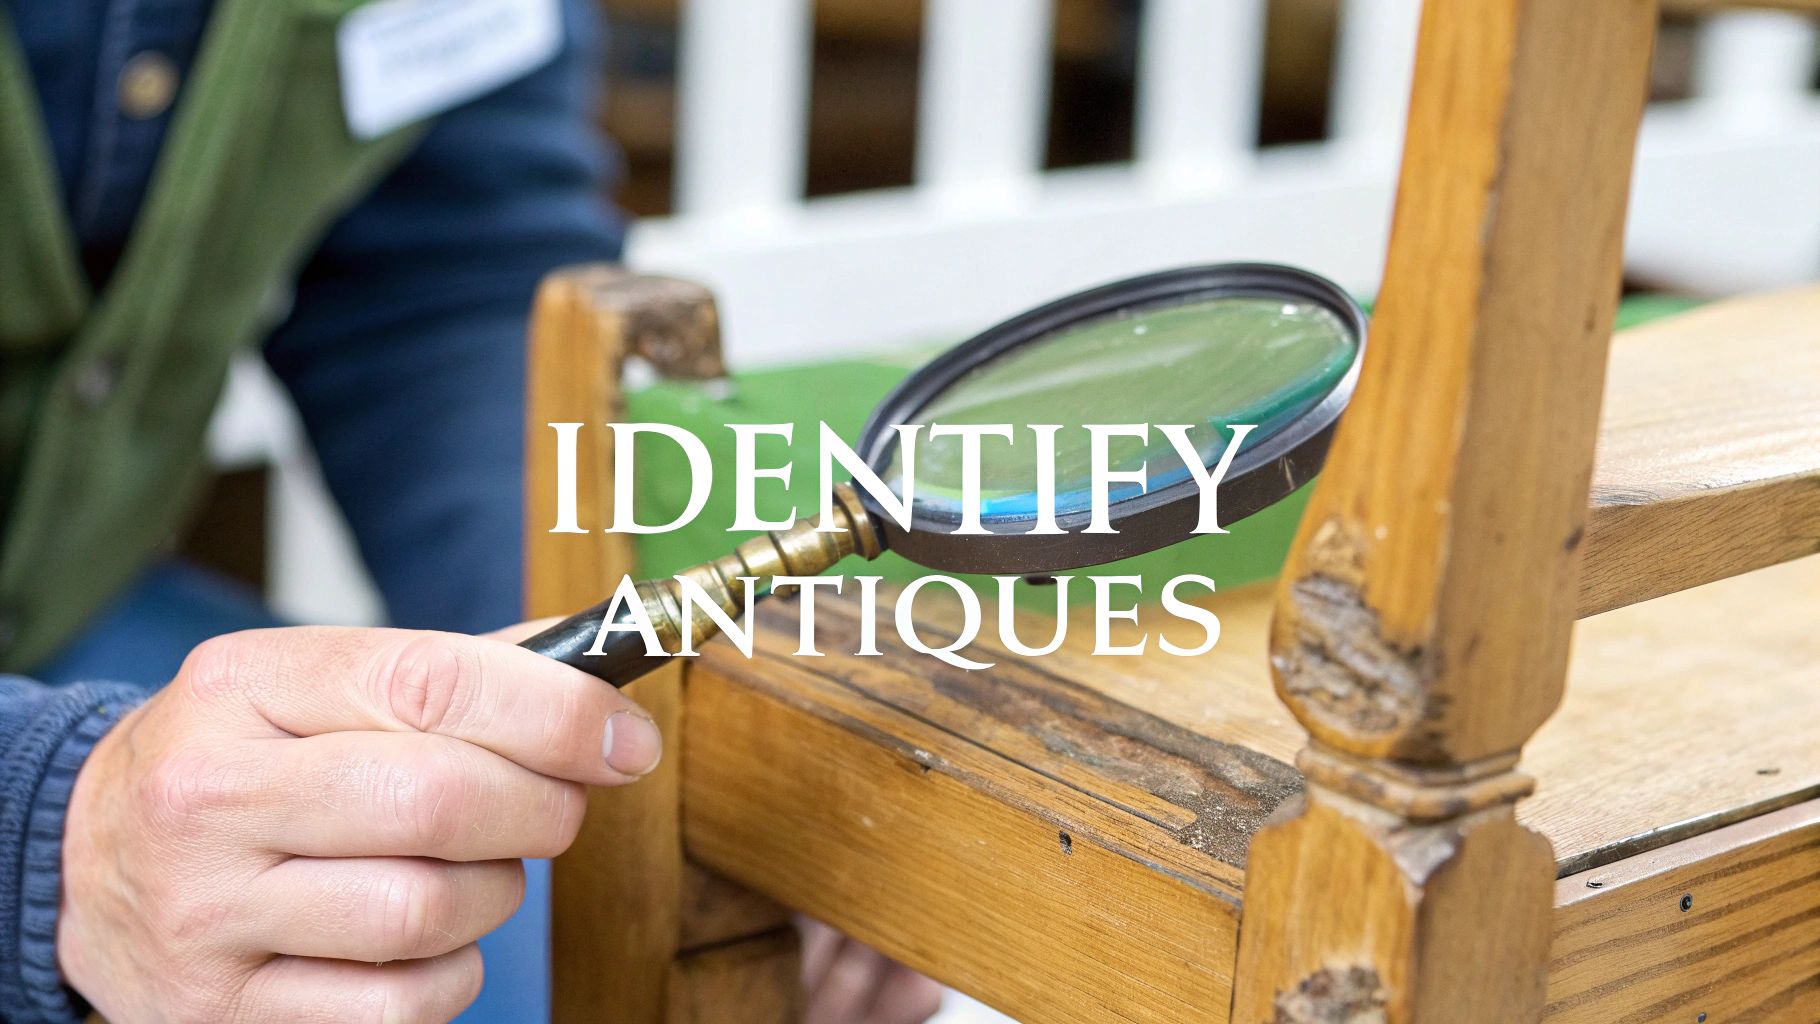
Learning how to identify antique furniture isn't about memorizing dates and styles right off the bat. It's about learning how to really look at a piece. The process starts with a simple once-over to get a feel for its overall shape and style. After that, you can start digging into the nitty-gritty details that tell its real story. Think of it like building a quick mental sketch before you start filling in the technical details like wood types or maker's marks.
Your First Steps in Identifying Antique Furniture
Getting into antique furniture can feel like learning a new language. You’re not just looking at a chair; you're reading a story told through wood, wear, and workmanship. This first phase is all about training your eye to spot the little things that separate a true antique from a modern look-alike. It’s a skill that sharpens with every flea market visit and estate sale, turning them into a genuine treasure hunt.
It's a great time to be interested, too. The global market for second-hand and antique furniture has ballooned to roughly USD 39.54 billion. This boom is driven by people wanting unique, sustainable items with a bit of history. For you, that means more opportunities for discovery, but it also means you need a sharp eye to sift through it all. You can read more about this trend and what it means for the antique world.
Begin with the Big Picture
Before you start pulling out drawers to check the dovetails or hunting for a hidden label, just stop and look. Take a step back. The first real step is to size up the piece from a distance.
Ask yourself a few basic questions:
- What’s the overall shape? Are you seeing the curvy, elegant lines of a Queen Anne piece, or the straight, blocky forms of the Arts and Crafts movement?
- What's its presence? Does it feel heavy and solid, or is it light and delicate? The silhouette and proportions are your first big clues.
- Does the style hold together? A real antique should look like it belongs together. If the legs scream one era but the top looks like another, you might be looking at a "married" piece or something that was altered later on.
This first, holistic view helps you slot the item into a general style category. For instance, a heavy, dark, and ornately carved chest of drawers just shouts "Victorian" to someone who knows what to look for, long before they've checked a single detail.
Key Takeaway: Always start your assessment from a few feet away to get a sense of the furniture's overall form and style. This high-level view gives you crucial context before you zoom in.
Move in for a Closer Look
Once you've got a feel for the piece's general character, it's time to get up close and personal. Let your hands and eyes do the detective work. This is where you'll start to notice the tell-tale signs of age and real craftsmanship.
Pay attention to the surface and its wear patterns. A genuine antique that's been part of a home for over a century will show its history. Look for the little dings, the scratches on drawer fronts from years of use, or the soft, worn-down corners of a tabletop. These aren't flaws—they're badges of honor and authenticity.
Decoding the Clues in Wood and Materials

Before you ever start hunting for a maker's mark, the wood itself has a story to tell. Learning to read the clues in the timber is one of the most essential skills you can develop. It can immediately tell you if a piece has potential or if it's a modern reproduction masquerading as an antique.
The first thing I always look for is the difference between the primary and secondary woods.
Primary woods are the "show" woods—the beautiful, often expensive timbers used on the parts you're meant to see. Think of a gleaming mahogany tabletop or the rich walnut front of a drawer. Secondary woods, on the other hand, are the workhorses. These were cheaper, locally available woods used for the parts that stay hidden, like drawer bottoms, backboards, and the internal frame.
For instance, an old cabinetmaker wouldn't waste precious imported wood on a part no one would ever see. They’d use pine, poplar, or whatever was plentiful and sturdy. So, if you find a chest of drawers with fancy fronts but plain, different wood on the sides and back, that’s a fantastic sign of authentic, period construction.
Primary vs. Secondary Woods
This mix-and-match approach is a huge clue. An 18th-century American desk might be crafted from stunning cherry wood (primary), but when you pull out a drawer, you'll find the bottom and sides are made of humble white pine (secondary). A modern reproduction, on the other hand, will often use the same wood all over, or worse, use plywood or particleboard for those hidden parts.
Expert Tip: Always pull a drawer all the way out. Flip it over. Run your hand along the bottom. The use of a simpler, less-finished wood for these unseen parts is one of the most reliable tells of a genuine antique.
This wasn't about being cheap; it was just plain sensible. This practical mindset is a signature of pre-industrial craftsmanship and a dead giveaway for age.
Spotting Telltale Surfaces and Materials
Beyond the type of wood, look at how it was worked. Before the mid-19th century, everything was done by hand. Boards were painstakingly smoothed with hand planes.
To see this, get down low and look across a large, flat surface (like a tabletop) toward a light source. Do you see faint, subtle ripples or waves in the wood? Those are the telltale marks left by a hand plane. A modern, machine-planed surface will be perfectly, unnaturally flat. This one little trick can help you distinguish a piece from 1820 from one made in 1920.
Veneers are another fantastic source of clues. While veneering is an ancient art, the how tells you everything.
- Antique Veneers: Early veneers were saw-cut by hand and are noticeably thicker than modern ones. After a century or two, you’ll often see signs of age like hairline cracks, some light bubbling, or that classic "alligator skin" pattern in the old varnish. These are the beautiful imperfections of time.
- Modern Veneers: Today’s veneers are peeled paper-thin by machines and bonded to a stable core like MDF. They tend to look a little too perfect and lack the depth and character that only real aging can provide.
By looking closely at the wood choices, the tool marks on the surface, and the character of the veneers, you can build a strong case for a piece's age. These are the foundational clues that will give you the confidence to make an accurate assessment.
How Construction and Joinery Reveal an Item's Age
While the style of a piece gives you a great starting point, the real story of its age is often hidden in plain sight—in how it was put together. The construction methods and joinery are like a time machine, offering clues that are often more reliable than surface-level aesthetics.
This is because construction techniques evolved directly with technology. Styles can be copied and revived, but a craftsman in 1780 simply didn't have the tools to build a drawer the same way a factory in 1880 could. Learning to spot these differences is one of the most powerful skills you can develop for identifying antique furniture.
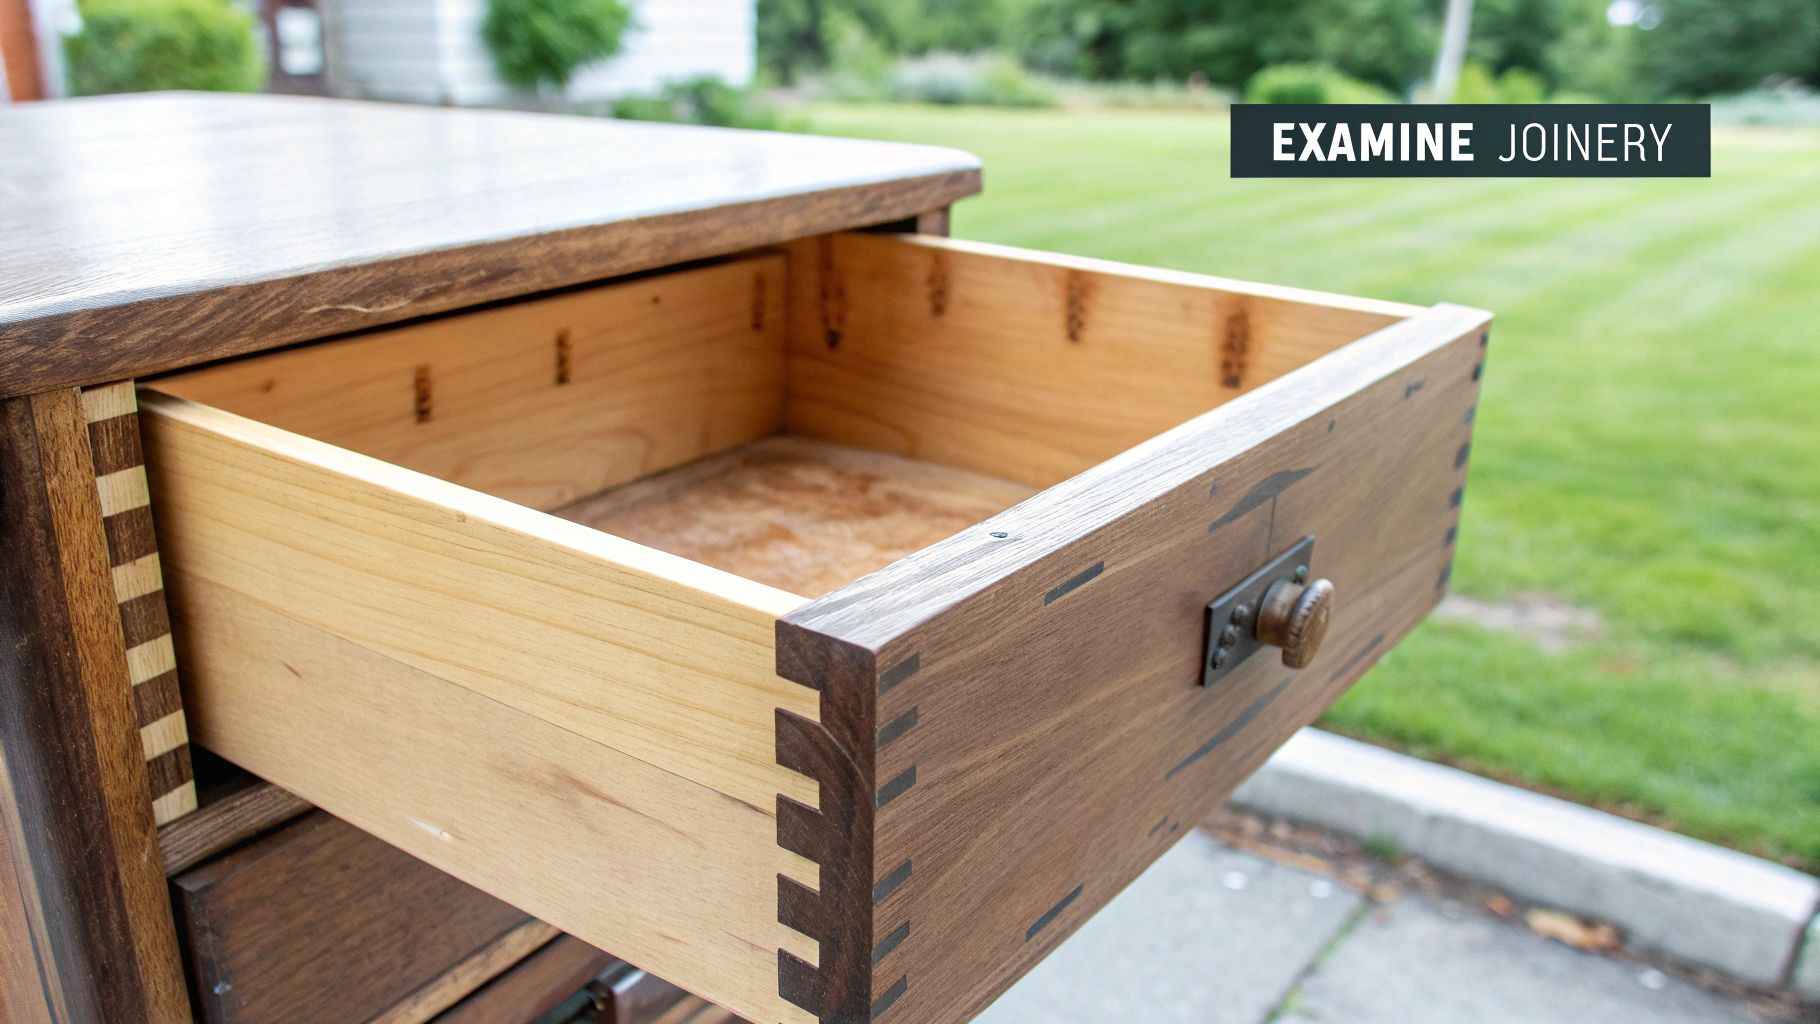
Reading the Story in Dovetail Joints
Dovetail joints—those interlocking "pins" and "tails" you see at the corners of well-made drawers—are perhaps the single most useful type of joinery for dating furniture. Their shape, size, and uniformity can tell you almost everything you need to know about when a piece was made.
Before the late 19th century, every single dovetail was cut by hand with a saw and chisel. This means they were never perfect.
Look for these telltale signs of hand-cut dovetails:
- Irregularity: The pins and tails will vary slightly in size, shape, and spacing. No two are exactly alike.
- Narrow Pins: True artisans often showed off their skill with very thin, delicate pins connecting the wider tails.
- Scribe Lines: You might spot faint scratches or lines near the joint where the cabinetmaker marked his cuts before picking up the saw.
As machine production took over around the 1880s, dovetails became flawless and uniform. If you see a drawer where every dovetail is a perfect, identical clone of its neighbor, you’re almost certainly looking at a piece from the late Victorian era or later. This is one of the clearest indicators of machine assistance.
Nails and Screws as Telltale Clues
Something as small as a nail or screw can be another dead giveaway for an item's age. The evolution from hand-forged hardware to mass-produced fasteners left a clear timeline in the furniture itself.
Early nails, used before roughly 1800, were hand-forged. They have squared, irregular heads and taper down on all four sides to a point. Then, from about 1790 to the 1880s, cut nails became the standard. These were machine-cut from a sheet of iron, so they only taper on two opposite sides and have rectangular heads. Round, modern wire nails didn't show up until the tail end of the 19th century.
Screws tell a similar story. Before the 1850s, screws were handmade, often with off-center slots and blunt, uneven ends. If you see a perfectly pointed screw with a uniform head, it's either a modern replacement or a sign of post-1900 construction.
Learning to spot these details is crucial. Forgers have gotten very good at mimicking styles, so understanding the manufacturing tells can help you spot fake antiques that might otherwise fool you.
Antique Joinery Identification Guide
To make things a little easier, I've put together a quick reference table. Use this as a cheat sheet when you're out in the field examining a new find. It connects common construction features to their typical time periods.
| Construction Feature | Appearance | Typical Time Period |
|---|---|---|
| Hand-Cut Dovetails | Large, slightly uneven pins and tails. Faint scribe lines may be visible. | Pre-1880 |
| Machine-Cut Dovetails | Small, perfectly uniform, and evenly spaced pins and tails. | Post-1880 |
| Hand-Forged Nails | Square, irregular heads. Tapered on all four sides. | Pre-1800 |
| Cut Nails | Rectangular heads. Tapered on only two sides. | c. 1790-1890 |
| Wire Nails | Round, uniform shafts and heads. | Post-1890 |
Keep in mind that these are general guidelines. Dates can overlap, and old parts were sometimes reused. But when you see these features consistently throughout a piece, you can be much more confident in your assessment.
Finding and Researching Maker's Marks
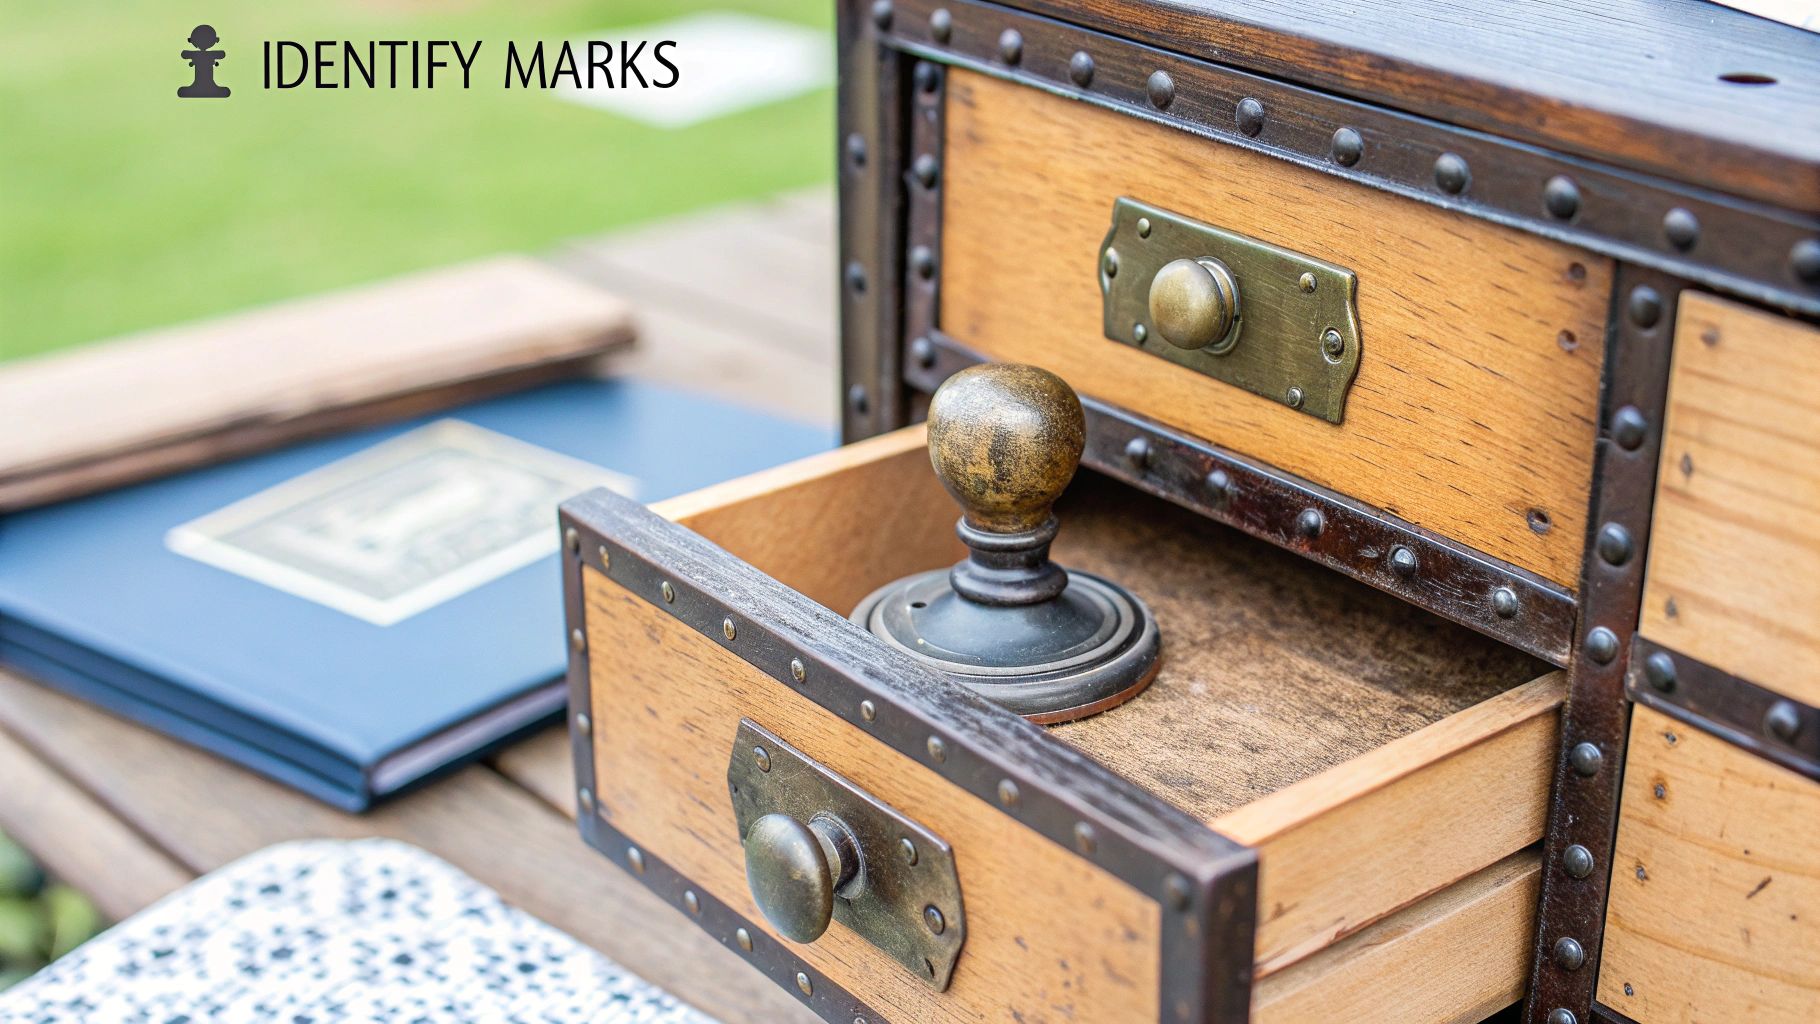
Finding a maker’s mark is that "aha!" moment every antique hunter lives for. It's like discovering an artist's signature on a painting. Suddenly, an anonymous old table isn't so anonymous anymore. You have a direct link to the craftsman, the workshop, and a specific point in time.
These marks are the fingerprints of history, left behind by the people who poured their skill into the piece. They can transform an old chair from a simple piece of furniture into a documented artifact with a story, often boosting its value and desirability. Of course, cabinetmakers were subtle—they didn't want their stamp to spoil the aesthetic, so they often tucked them away in hidden spots.
Where to Look for These Hidden Clues
Time to play detective. Get a good flashlight and a patient eye, because finding these marks requires a thorough search. Cabinetmakers had their favorite hiding spots, so start with the usual suspects:
- Inside or on the bottom of drawers: This is hands-down the most common place. Pull every drawer all the way out and check the sides, back, and even the underside.
- On the back of the piece: Run your hands and flashlight over the back panels of cabinets, dressers, and chests. Sometimes a faint paper label or ink stamp is all that’s left.
- Underneath tabletops and seats: Carefully flip over tables and chairs to inspect the frame. The underside is prime real estate for a maker's mark.
- On the inner legs or stretchers: You might find a small stamp tucked away on a structural part of the furniture.
Don’t get discouraged if your search comes up empty. The truth is, not all antique furniture was marked, especially items made by smaller, rural workshops. If you're struggling to tell if a piece is a true antique or just a newer look-alike, you might find our guide on how to identify vintage furniture helpful.
Decoding Different Types of Marks
Maker's marks come in all shapes and sizes, not just a simple signature. The type of mark you find can tell you a lot about the era and how the piece was made. You might discover a delicate paper label, a simple ink stamp, or something literally burned into the wood.
A mark is more than just a name; it’s the key to the furniture's provenance—its documented history of ownership. A piece with a clear, traceable history is almost always more valuable.
For instance, those Ivorine labels, made from an early plastic that looks like ivory, were quite popular in the late 19th and early 20th centuries. Other times, you'll find marks that were branded with a hot iron, impressed with a metal die, or even hand-carved by the artisan.
While the antique furniture market is seeing a resurgence, price trends have been up and down over the last 20 years. However, rare pieces with clear provenance consistently hold their value. As the Antiques Trade Gazette points out, exceptional items buck the trends. This is precisely why researching a maker’s mark is so critical—it helps you build that all-important history.
Get to Know the Key Furniture Styles and Periods

Learning historical styles is like having a secret decoder ring for identifying antique furniture. It helps you put a piece in its proper context, turning a quick glance into a solid clue about its age and story. Each design movement was more than just a look; it reflected the culture, technology, and even the social norms of its day.
When you can spot the tell-tale signs of an era—from the curve of a chair leg to the style of a drawer pull—you can instantly narrow down the timeline. It’s a fundamental skill that comes before you even think about checking for dovetails or maker’s marks.
From Queen Anne Grace to Chippendale Drama
Two of the earliest and most influential styles you'll come across are Queen Anne and Chippendale. At first, they might seem similar, but once you know what to look for, the differences become obvious.
The Queen Anne style, which was all the rage from about 1720 to 1760, is defined by its graceful curves and refined simplicity. Its most famous calling card is the cabriole leg—a beautiful S-curved leg that bows out at the knee and tapers at the ankle, usually ending in a simple pad foot. The whole vibe is delicate and understated.
Then came the Chippendale style (popular around 1750-1785), which took the Queen Anne form and dialed up the drama. The most iconic feature here is the ball-and-claw foot, where the leg ends in a powerful bird’s talon gripping a sphere. Chippendale pieces feel more substantial, more masculine, and far more ornate than their Queen Anne cousins.
Expert Tip: When in doubt, check the feet. The shift from a subtle pad foot (Queen Anne) to a bold ball-and-claw foot (Chippendale) is one of the fastest ways to tell these two major 18th-century styles apart. It’s a trick I use all the time.
The Over-the-Top Victorians and Sleek Mid-Century Moderns
Fast forward a century, and you land in the Victorian era (roughly 1837-1901), a time that threw subtlety out the window. Fueled by the Industrial Revolution, furniture makers could suddenly mass-produce intricate designs. The prevailing attitude was "more is more," resulting in furniture that's often heavy, made of dark woods, and loaded with ornate, machine-assisted carvings. Think tufted upholstery, elaborate details, and a truly commanding presence.
In a complete turnaround, Mid-Century Modern (roughly 1945-1965) stripped everything back to basics. This style was all about clean lines, functionality, and organic shapes. You'll instantly recognize it by a few key features:
- Simple, uncluttered lines and geometric forms.
- A mix of traditional woods with modern materials like plastic, vinyl, and metal.
- The signature tapered, peg-like legs that make pieces look light and almost as if they're floating.
Today's antique market is a fascinating mix of these styles. Current trends show a strong demand for Mid-Century Modern, Art Deco, and even Victorian wicker pieces. Depending on its provenance and condition, you might find a blanket chest for $300 or a rare spindle-leg table valued at over $10,000.
Getting a feel for these major style shifts is a huge step in your journey. To put it all together, our complete guide on how to identify antique furniture will show you how to connect these visual clues with the nuts and bolts of construction for a truly expert eye.
Your Top Antique Questions, Answered
As you start diving into the world of antique furniture, you'll find the same questions pop up again and again. Getting these fundamentals down is the best way to build your confidence, whether you're browsing a dusty antique shop or trying to figure out the story behind that old family chest.
So, What's Actually an Antique?
This is probably the most common question I hear, and the answer is surprisingly straightforward. For a piece of furniture to be considered a true antique, it generally needs to be at least 100 years old. That's the industry standard.
Anything younger than that, but still old enough to feel like it's from a bygone era—think a cool Danish modern credenza from the 1960s or an Art Deco vanity—falls into the vintage category. Knowing the difference isn't just about semantics; it helps you frame your research and speak the same language as dealers and collectors.
What if I Can't Find a Maker's Mark?
Don't panic! It’s incredibly common to find beautiful, well-made furniture with no label, stamp, or signature. Hitting this "dead end" can feel frustrating, but it's often just part of the process.
Before mass production took over, many master craftspeople never marked their work. Their reputation was built on quality and style, not a brand name. This is where your detective skills really come into play. You have to look at the piece itself for the story.
Pay close attention to the other clues:
- Joinery: Are the dovetails a little irregular, pointing to hand-cut craftsmanship?
- Materials: Look at the wood on the back or inside a drawer. Do you see a less expensive secondary wood, like pine or poplar?
- Tool Marks: Can you spot the faint, uneven lines left by a hand plane?
- Wear and Tear: Does the patina look honest? Are the scuffs and scratches in places that make sense, like on drawer fronts or the feet?
A missing mark doesn't mean a piece is worthless. It just means the furniture's construction and history have to speak for themselves.
When Is It Time to Call a Professional?
Developing your own eye for antiques is a fantastic skill, but there are definitely times when you need to bring in an expert. If you suspect a piece might have serious monetary or historical value, it's time to call a professional appraiser. This is especially true if you're planning to insure it, sell it, or handle it for estate purposes.
An appraiser brings a level of expertise that a hobbyist just can't match. They can provide a certified valuation, uncover hidden details about an item's provenance, and authenticate it with authority.
Disclaimer: The information in this article is for educational and entertainment purposes only. It is not intended to be a substitute for professional appraisal, legal, or financial advice. For matters involving significant financial transactions, insurance, or estate settlement, always consult a certified professional appraiser or qualified advisor.
Ready to turn your curiosity into discovery? With Curio, you can snap a photo of any item and instantly learn its story, from its origin to its estimated value. Stop guessing and start knowing. Download Curio at the official website and bring your treasures to life today.