That old bottle you found isn't just a piece of glass—it's a time capsule. Bringing back its original sparkle takes a bit more than a quick rinse, though. It’s a delicate process, a mix of gentle soaking and smart scrubbing to clear away everything from surface dust to that stubborn, milky film that can build up over decades. Let's walk through how to safely clean that fragile glass and make it shine again.
Bringing a Piece of History Back to Life
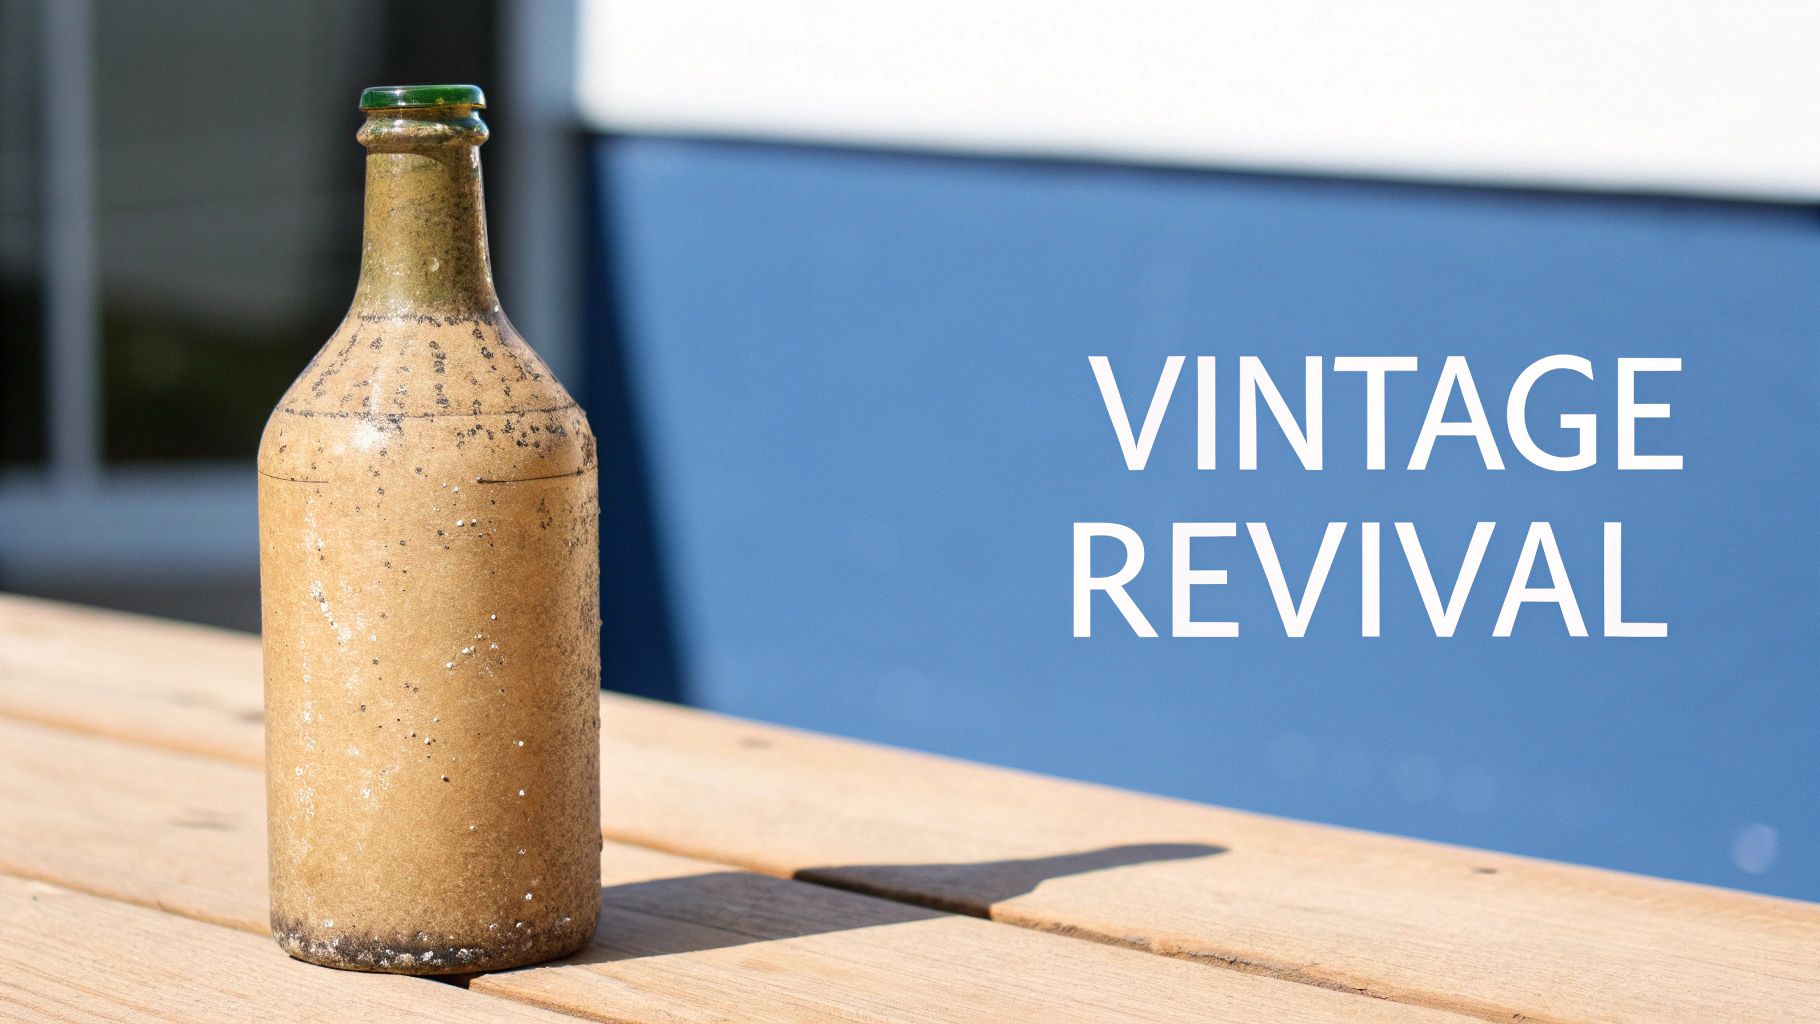
Whether you’ve stumbled upon a gem at a flea market or unearthed a dusty treasure in the attic, knowing the right way to clean it can transform it from a grimy relic into a beautiful display piece. Every bottle has a story, and cleaning it is like turning the pages. You start to notice the little things—the embossed logos, the unique shape, the subtle imperfections—that give vintage glass its charm.
More Than Just a Container
These old bottles were built to last. Long before our throwaway culture took hold, glass containers were meant to be used again and again. Dealers would collect, wash, and refill them for the next customer. Even after the automatic bottle-making machine arrived in 1903, it's estimated that about half of all bottles were reused. Thinking about that adds a whole new layer of appreciation for the piece in your hands.
What We’ll Cover
This guide will give you the practical, hands-on steps to get your bottle from grimy to gleaming. We'll get into:
- The initial soak: The first and safest step for any piece of vintage glass.
- Scrubbing the inside: Smart techniques to clean out that hard-to-reach gunk.
- The final polish: How to get that crystal-clear, brilliant finish.
Before you even start, half the fun is figuring out what you've got. If you're curious about its origins, our guide on antique glass bottle identification can help you uncover the story behind your find.
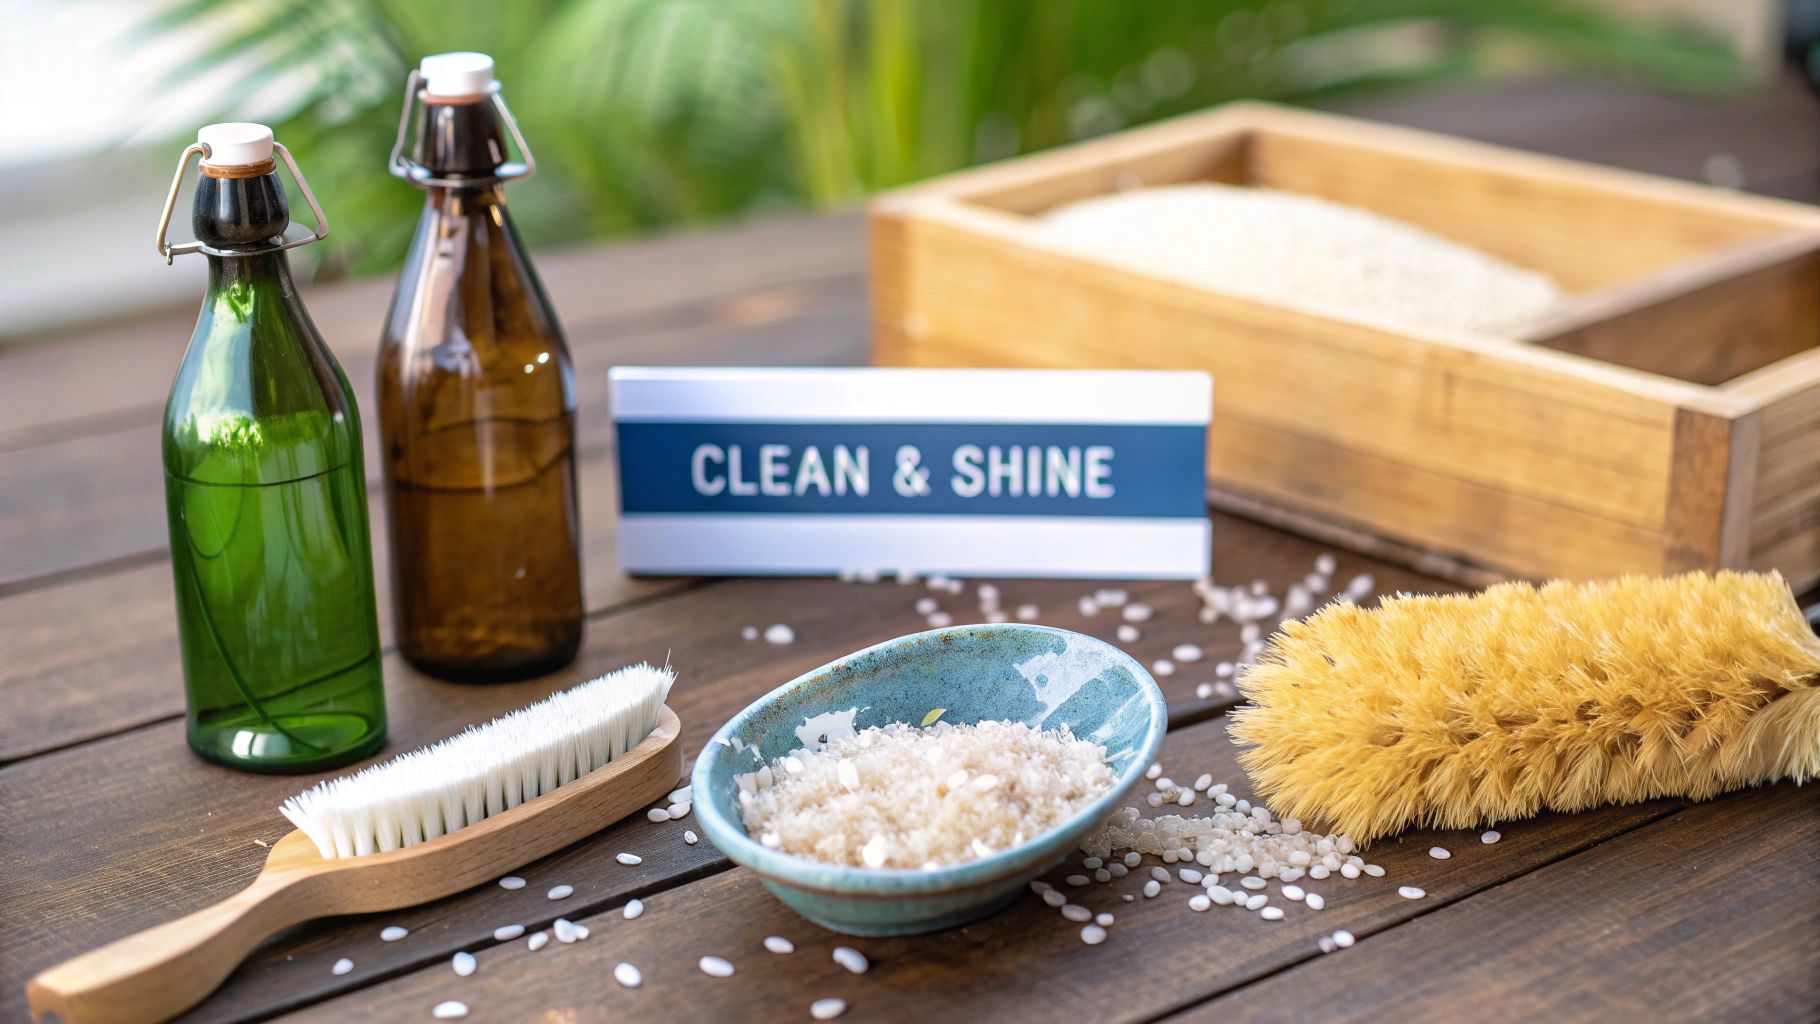
Assembling Your Bottle Cleaning Toolkit
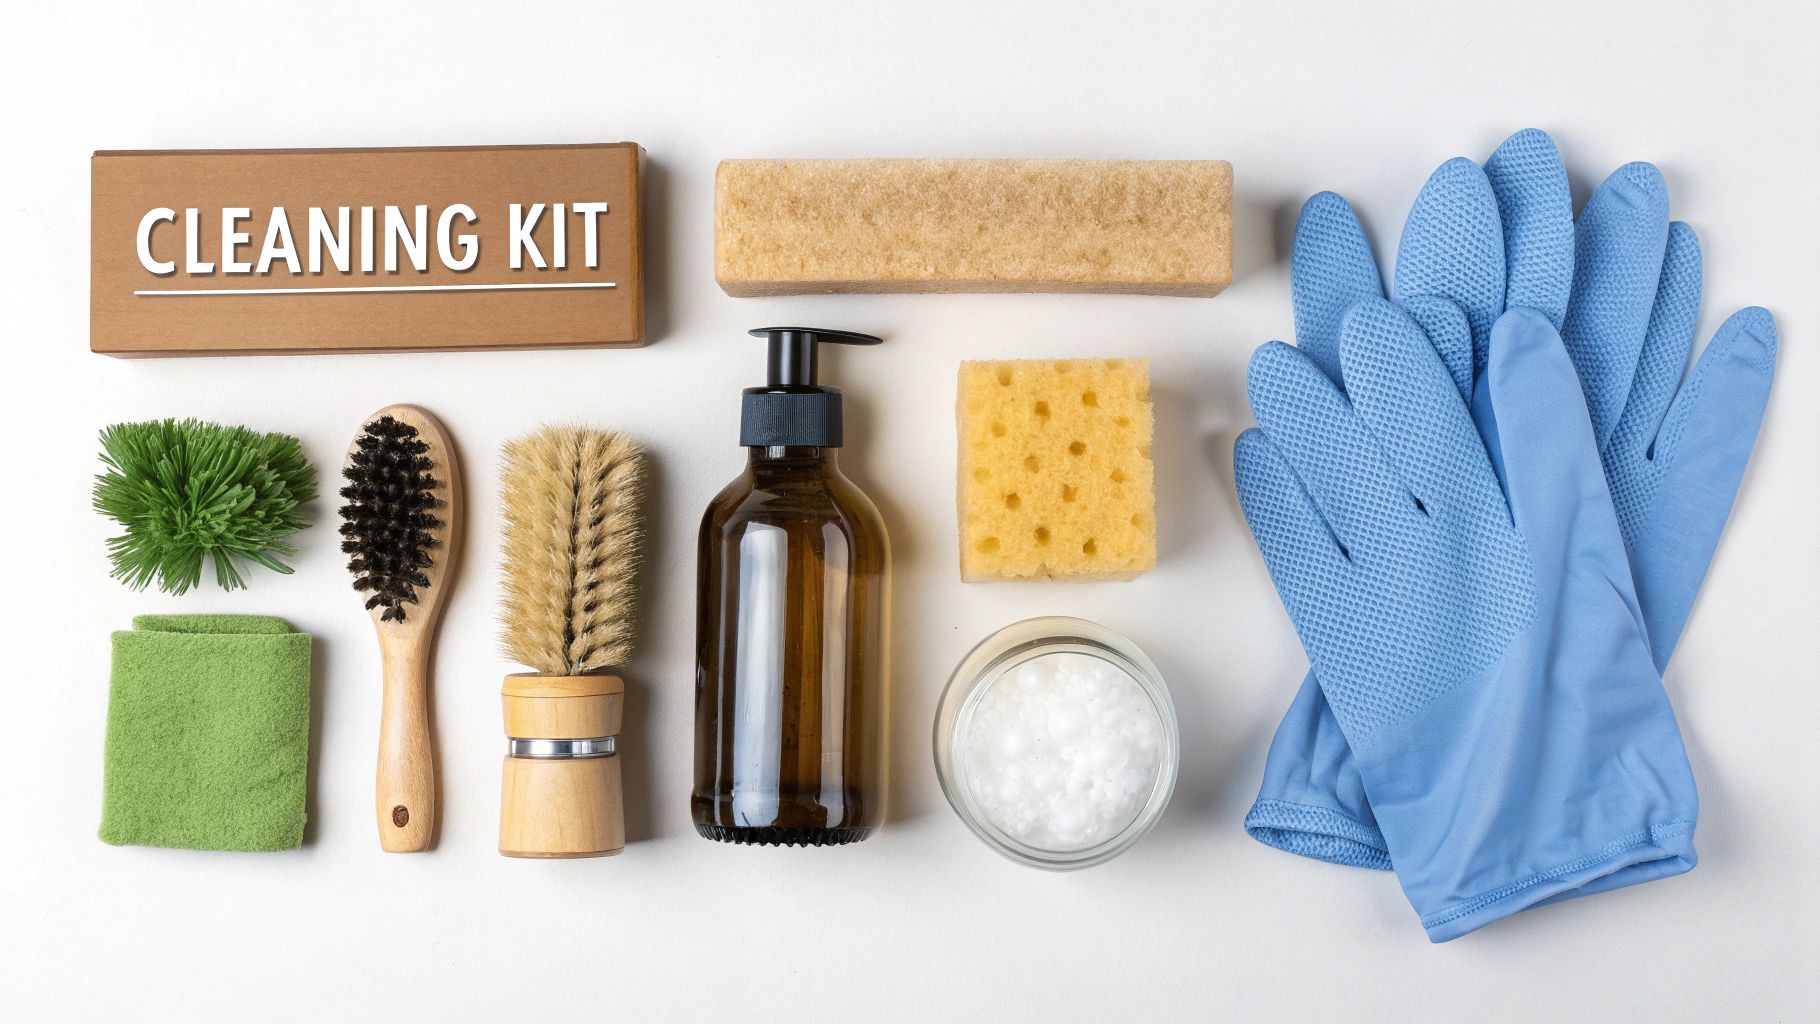
Before you even think about getting that first bottle wet, let's get your supplies in order. Having everything you need laid out and ready to go makes the entire process smoother and, honestly, a lot more enjoyable.
The good news? You probably have most of this stuff in your kitchen already. There’s no need for fancy, expensive equipment to get these old treasures sparkling again.
Your Core Cleaning Crew
Think of this as your essential kit. These are the non-negotiables that will handle about 90% of the grime you’ll come across.
- Soft-Bristled Bottle Brushes: I can't stress this enough—get a set with different sizes and flexible necks. This is your secret weapon for getting into those impossibly tight corners and narrow necks without a single scratch.
- Mild Dish Soap: Any gentle, non-abrasive liquid soap will do the trick. It's the perfect first step for breaking down surface-level dirt.
- Microfiber Cloths: These are your finishing touch. They're amazing for drying and polishing the outside of the bottle, leaving a brilliant shine with zero lint or streaks.
Tackling Tough Interior Stains
Sometimes a brush just can’t reach the caked-on residue at the bottom of a strangely shaped bottle. This is where we get a little creative and make a simple, effective scrubbing solution right inside the glass.
My Go-To Trick: For stubborn buildup, nothing beats a handful of uncooked rice or coarse salt. Pour it in, add a splash of soapy water or vinegar, and give it a good, vigorous shake. The grains act like thousands of tiny scrubbers, dislodging grime from places a brush could never touch.
For Deeper Cleaning and Protection
When you’re dealing with more stubborn mineral deposits or just want to take care of your hands, a couple of extra items make a world of difference.
- White Vinegar: That cloudy film you often see on old glass? That’s usually from mineral deposits. The mild acidity in white vinegar cuts right through it, restoring clarity.
- Rubber Gloves: A simple but essential item. A good pair of gloves will save your skin from drying out after being in water and protect you from whatever decades-old gunk you’re cleaning out.
With these items on hand, you’re well-equipped to bring almost any vintage bottle back to life. It’s all about having the right tool for the job.
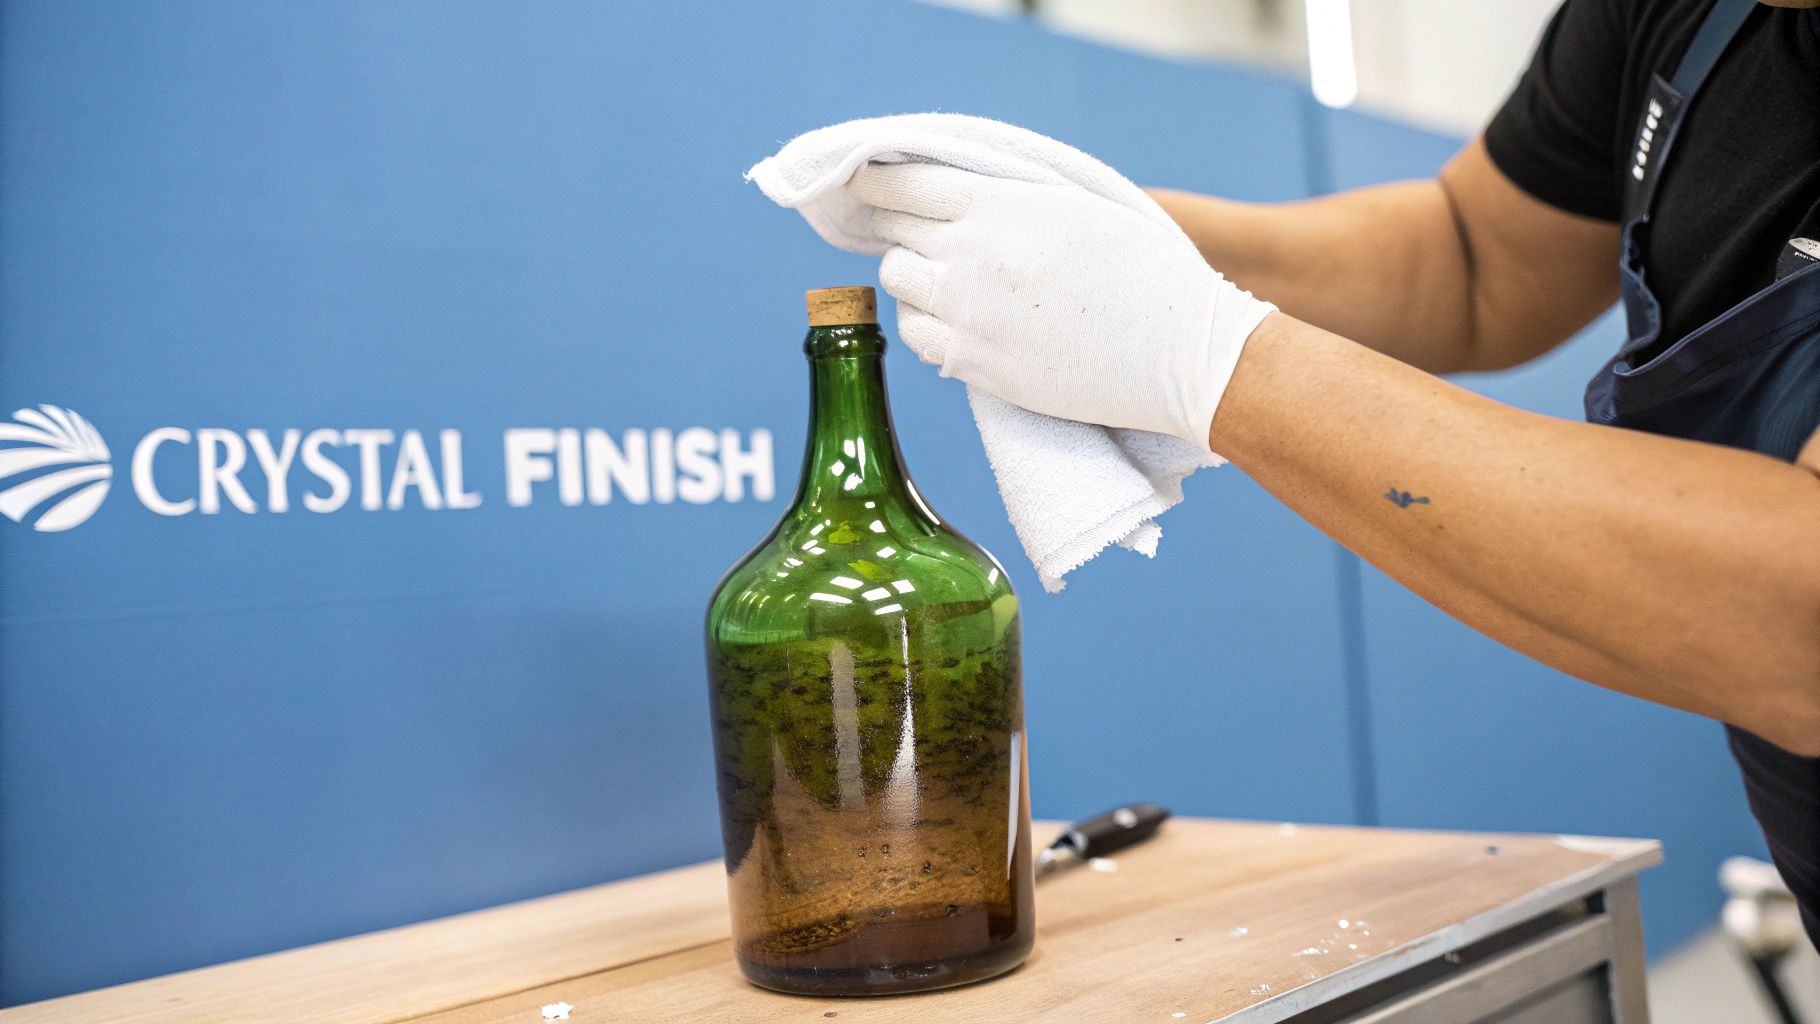
Start With a Gentle Soak
Every good bottle cleaning project starts with patience. Before you even think about scrubbing or breaking out the fancy cleaning tools, the first and most important step is a simple, gentle soak. This is your safest bet for loosening up decades of caked-on dust and grime without putting the fragile glass at risk.
Think of it as a pre-wash. This initial bath softens the stubborn layers of dirt that have settled in over the years, making the real cleaning work much easier. Honestly, sometimes a good long soak is all it takes to bring a bottle back to life, revealing its true condition and showing you what, if any, stubborn spots are left to tackle.
How to Prepare the Perfect Soaking Bath
The golden rule here is to avoid extreme temperatures. Never, ever use hot water straight from the tap or ice-cold water. That sudden temperature change can cause thermal shock, which is a fancy way of saying your beautiful old bottle could crack or shatter right in your hands.
Instead, fill a plastic basin or your sink with lukewarm water. It's the sweet spot—gentle on the glass but still effective enough to start breaking down the gunk.
- Add just a few drops of a mild dish soap. You're not looking for a bubble bath, just enough to help lift the dirt.
- Submerge the bottle completely and just let it be.
- How long? I'd recommend at least a few hours, but for really dirty bottles, letting them soak overnight can work wonders.
A Quick Word of Caution: If your bottle has a paper label you’re trying to preserve, this method is a no-go. You'll need to clean the inside very carefully without getting the outside wet, which is a more delicate process we’ll get into later.
Once the soak is done, give the bottle a gentle rinse. You’ll probably be surprised at how much grime just washes away. Now your bottle is prepped and ready for the next stage, where you can focus on any stubborn interior stains or that cloudy film that just won't quit.
Removing Stubborn Stains from Inside the Bottle
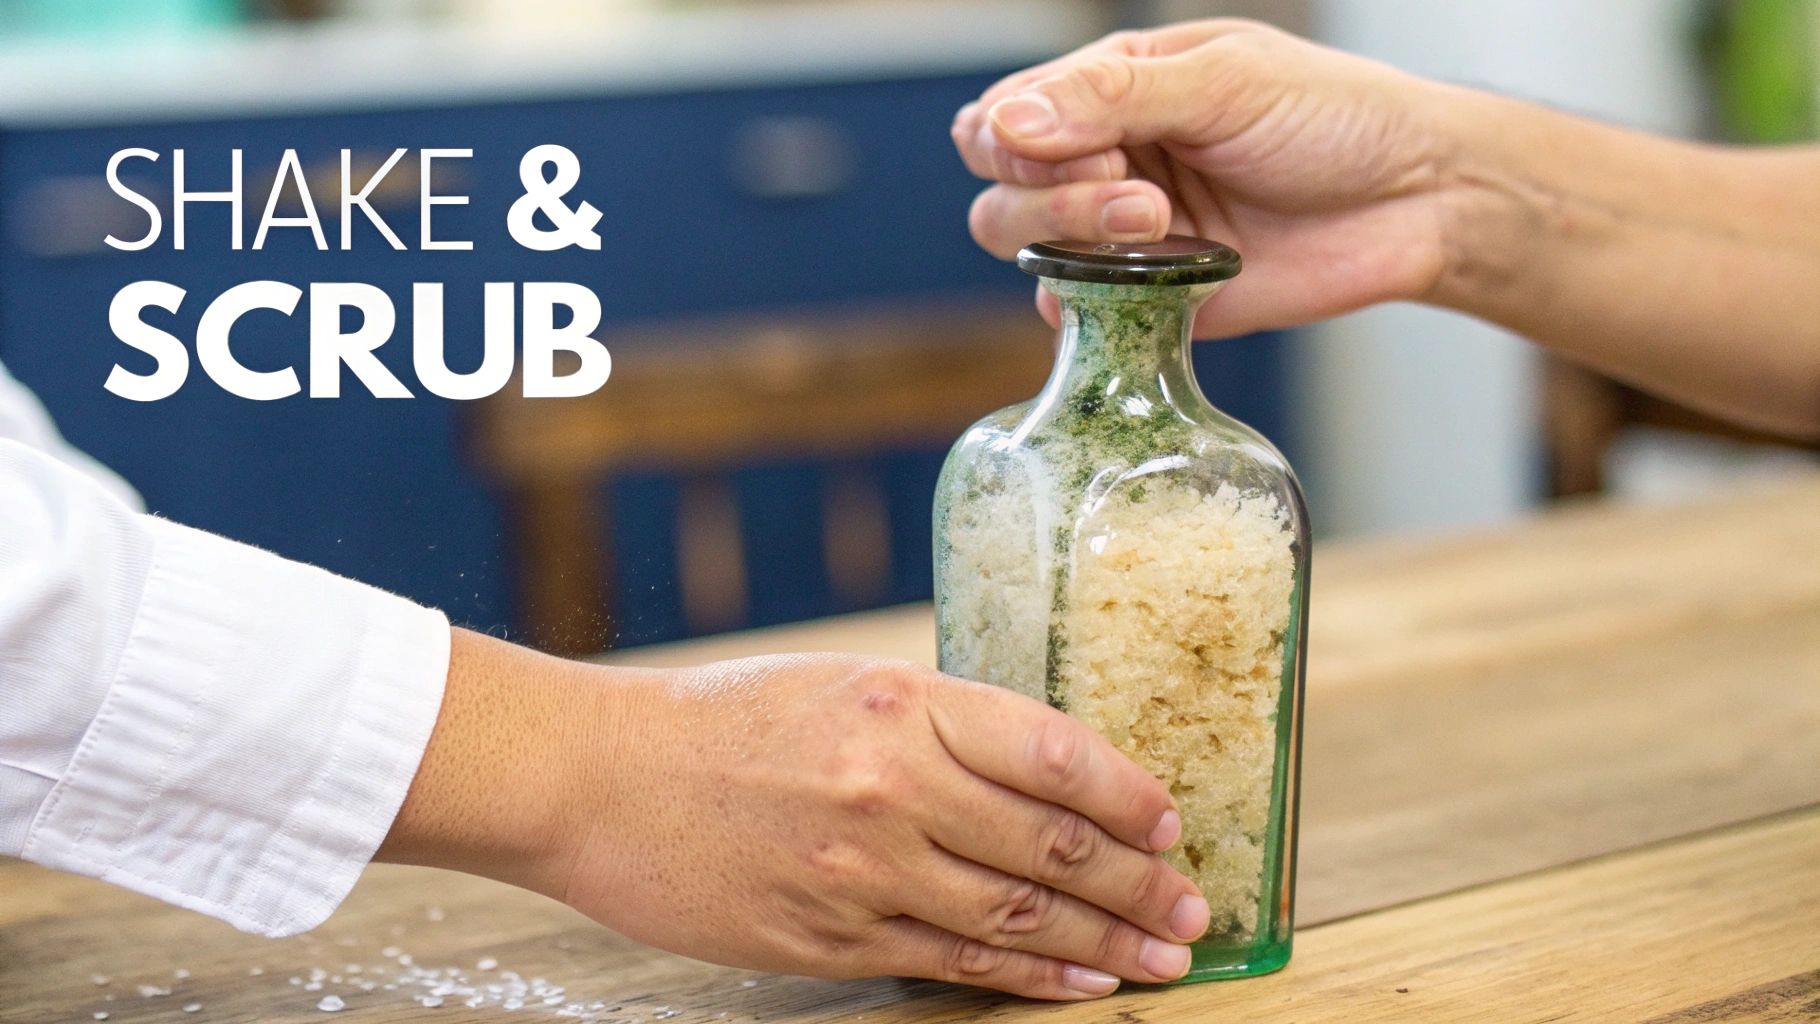
When a simple soak just won’t cut through years of caked-on residue or that stubborn cloudy film, it’s time to get a bit more hands-on. Don't worry, this doesn't mean resorting to harsh chemicals. The best approach is often a gentle mechanical cleaning method that scrubs the bottle from the inside out.
I call this the "shake and scrub" technique, and it’s a classic for a reason. It's my go-to for dislodging grime in those impossible-to-reach places inside narrow-necked bottles. You’re essentially creating a mini, contained sandblaster that’s gentle enough not to harm the glass.
The Gentle Abrasive Method
The secret here is using common household items as tiny, internal scrubbers. You probably have what you need in your pantry already.
- Uncooked Rice: A small handful is perfect. The grains are just hard enough to knock gunk loose but won’t scratch the glass.
- Coarse Salt: This works just like rice but has the added benefit of dissolving for an easy rinse.
- Small Aquarium Gravel: For the really tough jobs. Just be sure it’s clean and that you shake gently to avoid any risk of scratching.
Just pour your chosen abrasive into the bottle, add a few drops of mild dish soap, and fill it about a quarter of the way with warm water. Pop the lid on (or use your thumb) and give it a good, vigorous shake. The combination of the soap, water, and the gentle scrubbing action works wonders on that stubborn buildup.
Pro Tip: Don't just shake up and down. Swirl the bottle to create a vortex inside. This helps the abrasive reach every single curve and corner, ensuring a much more thorough clean.
Creating a Custom Cleaning Tool
Sometimes, you’ll find a few stubborn spots that just won’t budge, especially in bottles with awkward shapes. For those, you might need a more direct approach. It's funny to think that early bottle cleaners used all sorts of labor-intensive wire contraptions to scrub interiors.
You can fashion a much simpler version yourself. Gently bend a piece of wire—a metal coat hanger works great—and securely attach a small piece of sponge or microfiber cloth to the end with a rubber band. This simple DIY tool lets you apply direct pressure to specific stains the shake method might have missed.
If you’re dealing with etching or what looks like hard water damage, you may need a different strategy. Getting educated on removing stubborn water spots and mineral buildup from glass can offer some more specialized solutions for those particularly tricky situations.
The Final Polish for a Flawless Finish
Getting all that stubborn grime out feels great, but the job isn't truly done until your bottle gleams without a single streak. The final steps—drying and polishing—are what elevate a clean bottle to a showpiece. I've seen it time and again: rushing this part is the top reason for frustrating water spots and leftover haze.
After you've given it a good final rinse, the key is patience. Avoid the temptation to stuff a towel inside. Instead, let the bottle air-dry by placing it upside down on a rack or a soft towel to let gravity do the work. If you're dealing with a bottle with a skinny neck, propping it at a slight angle can really help the air circulate and speed things up.
Achieving a Crystal-Clear Shine
Once the inside is completely dry, you can turn your attention to the exterior. Grab a soft, lint-free microfiber cloth and gently buff the outside of the glass. This simple move is what gets rid of any lingering water spots or fingerprints, revealing a brilliant shine that lets the bottle’s true character and shape pop.
Pro Tip: If you notice a stubborn, cloudy film after everything is dry, that’s almost certainly mineral buildup from hard tap water. The easy fix? Give the bottle one last quick rinse with distilled water before letting it air-dry. It’s the secret weapon for a perfectly clear finish.
Part of the joy of collecting is figuring out what you've found. If you’re curious about your bottle’s history, you can explore the differences between antique glassware and crystal.
Now that your bottle looks incredible, you'll want to display it properly. For ideas on how to best showcase your treasures, look into choosing a display cabinet with glass. Putting in that little bit of extra effort at the end makes all the difference and ensures your vintage find looks its absolute best.
A Few Common Questions About Cleaning Old Glass
Even when you've got your process down, cleaning old glass can throw you a curveball. It’s all part of the fun, but knowing how to handle these little challenges is key to keeping your finds safe. Let's walk through some of the most common issues I see collectors run into.
Right off the bat, people always ask: "Can I just toss it in the dishwasher?" I get it, but the answer is a hard no. Antique glass is not the same as the stuff we use today. The intense heat and aggressive detergents in a modern dishwasher can cause thermal shock, cracking the glass instantly. It can also permanently etch the surface, leaving it with a cloudy film you’ll never get off. Always stick to cleaning by hand; it's the only way to be sure.
What About Stuck Stoppers and Corks?
It’s incredibly common to find a beautiful bottle with a stopper or cork that just won't budge. The secret here is patience and a gentle touch, not brute force.
- For a stubborn cork: I’ve had good luck soaking just the neck of the bottle in warm water for a few minutes. This can make the glass expand just slightly, often enough to loosen the cork's grip. After that, use a corkscrew with a slow, steady wiggle.
- For a glass stopper: Try wrapping a warm, damp cloth around the neck of the bottle. Just like with a cork, that little bit of warmth is often all you need to break the seal. Whatever you do, don't try to twist or pry it with force—that's a quick way to snap the neck.
How to Tell if a Stain is Permanent
Sometimes, no matter what you try, a stain or haze just won't lift. You might be dealing with what collectors call "sick glass."
That rainbow-like, iridescent sheen you sometimes see on excavated bottles isn't a stain you can scrub away. It's actually permanent deterioration caused by a chemical reaction from being buried in damp soil for a long, long time. The layers of the glass have started to separate.
While you can certainly clean the surface dirt off a piece of sick glass, that rainbow effect is now part of the bottle's story. It can’t be removed.
Speaking of a bottle's story, figuring out where it came from is the next step. Learning to read antique glass makers marks is a fascinating journey that can tell you so much about a bottle's age, origin, and history.
Uncovering the history behind your vintage finds is easier than ever. Curio can instantly identify your antiques, provide historical context, and give you an estimated value right from your phone. Download the app and let your treasures tell their story. Find out more at Curio.