Before you even think about picking up a polishing cloth, take a moment to really look at your antique silver.This first step—a careful assessment—is the most important one. It’s what separates a careful restoration from a costly mistake. Getting this right ensures you’re preserving a piece of history, not just making something shiny.
What to Know Before You Clean Antique Silver
Cleaning an heirloom isn't just about wiping away grime; it's a delicate dance with the past. Your goal should always be to enhance the silver's beauty while keeping its integrity, story, and value completely intact.
So many people rush this part. I've seen it happen time and again: someone takes a household remedy to a silver-plated tray and scrubs too hard, only to wear right through the thin silver layer. What’s left is the dull base metal underneath, and the piece is instantly devalued.
Distinguish Sterling Silver from Silver Plate
The first thing you need to figure out is whether you're dealing with solid sterling silver or a plated piece. It's the most critical distinction you can make. Sterling is an alloy made of 92.5% pure silver, so it's silver all the way through. Silver plate, on the other hand, is just a whisper-thin layer of silver over a base metal like copper or nickel.
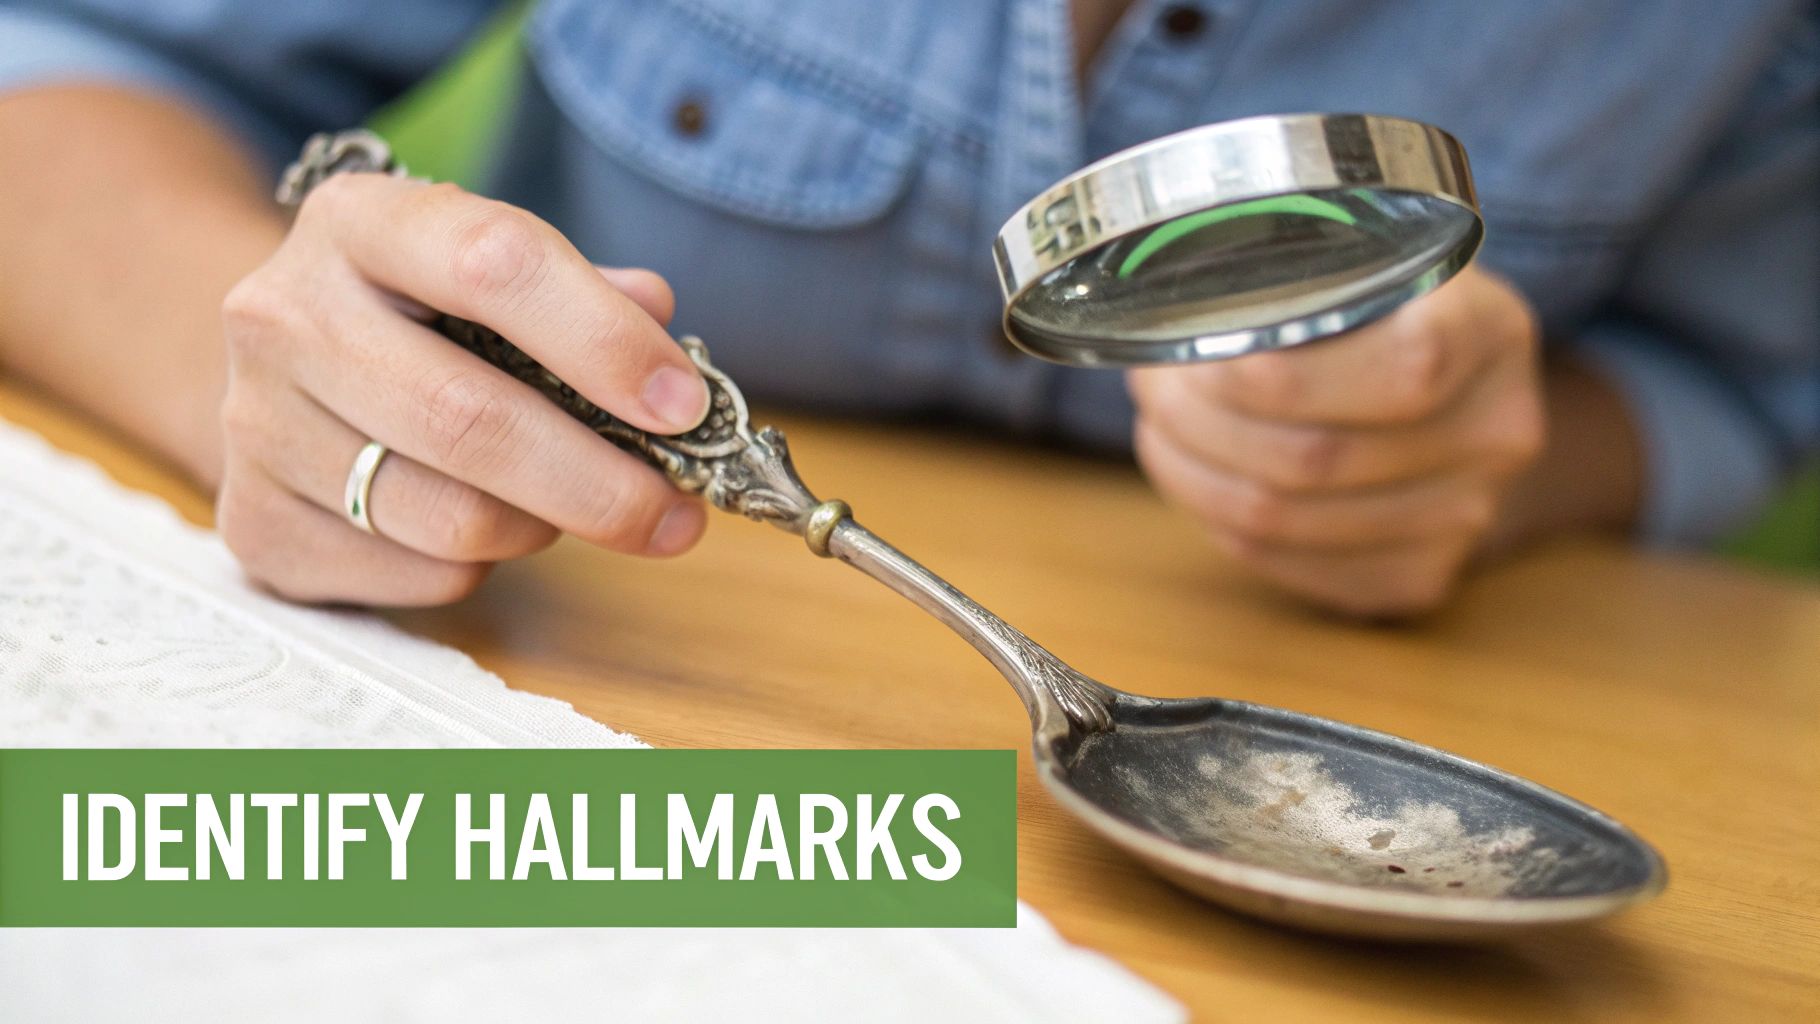
Flip the item over and look for small stamps called hallmarks. These tiny marks tell you everything you need to know.
- Sterling Hallmarks: You’ll see words like "Sterling," "STER," or the number "925." These are your guarantee that the piece is solid sterling silver.
- Silver Plate Hallmarks: Common marks include "EP" or "EPNS" (which stands for Electroplated Nickel Silver). You might also see "A1" or brand names known for plating, like "Rogers Bros."
Knowing the difference dictates your entire approach. Sterling silver is pretty robust and can handle a gentle polish. But with silver plate, you have to be incredibly careful—one wrong move and you could wear through the coating. If you have any doubt, always err on the side of caution and treat it as if it's plated. To dig deeper into this, you can learn more about what hallmarks on silver mean and how to read them.
Understand the Value of Patina
In the world of antiques, tarnish isn't always the enemy. That soft, dark shading you see in the crevices and ornate details of an older piece? That's called patina. It’s the result of decades of slow, natural oxidation, and collectors absolutely love it.
Patina is the visible proof of an object's journey through time. It's a key part of its history. Wiping it away is like erasing chapters from its story, and it can seriously diminish an antique's value.
Aggressive chemical dips or over-polishing will strip this history right off, leaving the piece looking harsh and new. This can slash its value by 15-30% or even more. The true art of cleaning antique silver is lifting the surface tarnish while carefully preserving the deep, defining patina that gives it character.
Assess the Overall Condition
Finally, give the piece a good, honest look. Is it structurally sound? Are there any delicate parts, like the spout of a teapot or the tines of a fork, that could be bent or broken? Look for subtle signs of old repairs, like solder marks, which can be weakened by chemicals or too much pressure.
You also need to check for any non-silver materials. Things like ivory handles, wood inlays, or gemstones need to be protected from cleaners. If you spot any serious issues—cracks, loose handles, or major damage—it's best to stop right there. Don't attempt to clean it. Instead, consult a professional conservator who knows how to handle fragile heirlooms.
Choosing the Right Cleaning Method for Your Silver
Okay, you've figured out what kind of silver you have and taken a good look at its condition. Now comes the moment of truth: how to clean it. This is where a lot of people go wrong, because the goal isn't just to make it shiny. It's about choosing the safest path for your specific piece. A method that works wonders on a modern sterling tray could absolutely ruin a 19th-century plated teapot.
The internet is flooded with silver cleaning "hacks," from old household tricks to potent commercial polishes. Your job is to ignore the noise and think like a conservator. That means a gentle, controlled approach that preserves the silver itself and, just as importantly, its valuable patina.
Comparing Silver Cleaning Methods
Before we dive into the specific "how-to," let's compare the most common options side-by-side. This will help you see why experts lean so heavily towards gentle, non-chemical methods for valuable antiques and why some popular DIY tricks are a huge risk.
| Method | Best For | Risk to Patina/Value | When to Use |
|---|---|---|---|
| Mild Soap & Water | Light dust, fingerprints, recent smudges on any silver type. | None. Completely safe. | The very first step, always. Often, it's all you need. |
| Calcium Carbonate Slurry | Light to moderate tarnish on sterling or high-quality plate. | Very Low. Lifts tarnish without removing the historical patina. | When soap and water aren't enough. The professional's choice for safe tarnish removal. |
| Commercial Polish (Cream/Foam) | Moderate to heavy tarnish on sturdy, modern sterling. | Medium to High. Can be abrasive and strip desirable patina if not used carefully. | With extreme caution on non-heirloom pieces. Always test a hidden spot first. |
| Chemical Dips | Heavily tarnished, simple items with no intricate details. | Very High. Aggressively strips all tarnish, including patina, devaluing antiques. | Almost never recommended for antiques. Avoid completely on plated or detailed items. |
| Baking Soda/Foil Bath | N/A | Extremely High. A harsh chemical reaction that strips patina and can damage the surface. | Never. This is the fastest way to ruin an antique's finish and value. |
As you can see, the methods that offer the quickest results often pose the greatest danger to your antique's integrity and value. Gentle and slow is always the better route.
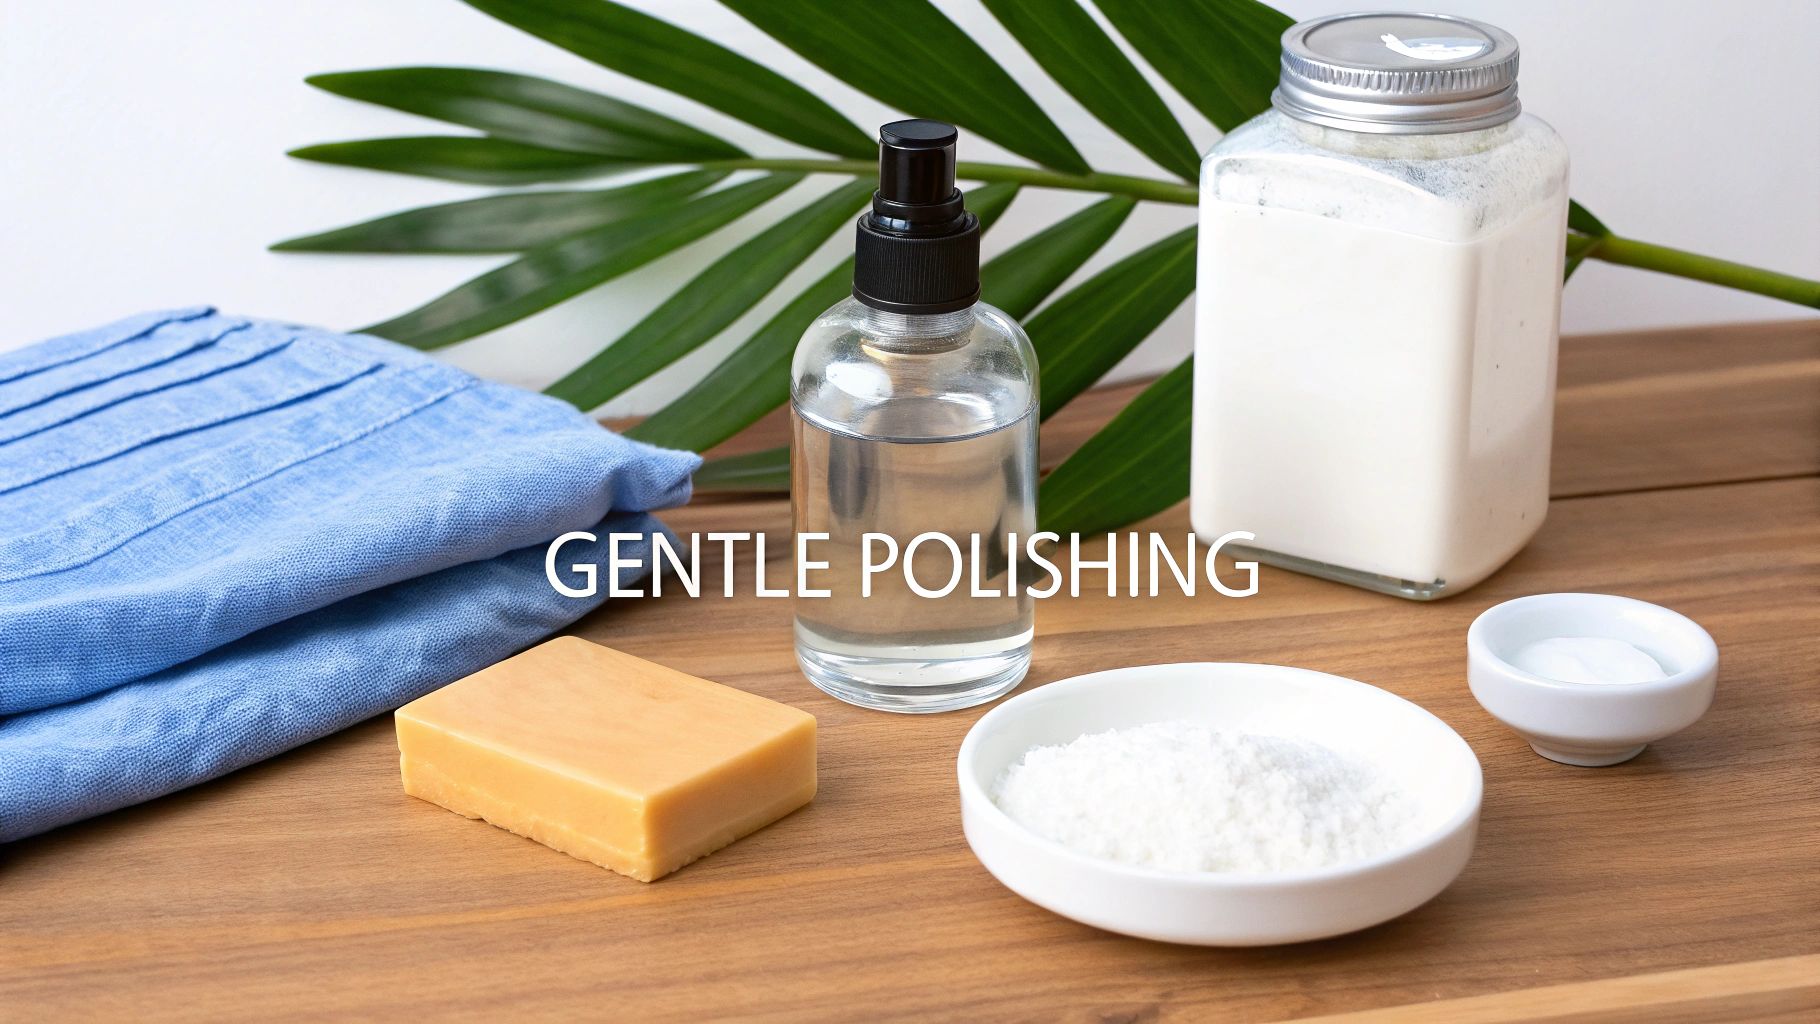
Gentle At-Home and Professional-Grade Options
For antique silver, the safest methods almost always involve gentle mechanical action, not harsh chemicals. The first thing you should always try is a simple wash with lukewarm distilled water and a few drops of a mild, phosphate-free soap. You'd be surprised how much luster this can restore on its own, with zero risk.
If tarnish remains, the method I and other museum professionals trust is a calcium carbonate slurry. You just mix precipitated calcium carbonate (a very fine, non-abrasive chalk) with distilled water to create a thin paste. It gently lifts the tarnish without scratching the delicate silver beneath.
This is worlds away from risky DIY methods you see online, like using toothpaste (it’s far too abrasive) or the dreaded baking soda and aluminum foil dip (which is an aggressive chemical reaction that strips away everything, including the good patina).
"Over-cleaning is a far greater risk to antique silver than under-cleaning. Each time you polish, you remove a microscopic layer of metal. For silver plate, this can be catastrophic. For sterling, it's a slow erosion of detail and history."
This less-is-more approach is backed by serious research. A 2021 study by English Heritage found that some museum departments only clean their silver every 17 years to protect its historical finish. Their work showed that aggressive chemical dips can slash an antique's value by 15-30% by destroying its patina. It’s a powerful reminder of why a gentle hand is so critical.
Understanding Commercial Polishes and When to Avoid Them
I generally steer people away from commercial silver polishes for delicate antiques, as most are simply too harsh. The danger comes from two things: harsh abrasives and chemical dips.
- Abrasive Polishes: Many common products contain silica or other hard particles that leave microscopic scratches, dulling the finish over time.
- Chemical Dips: These liquids dissolve tarnish in seconds. While they sound efficient, they are indiscriminate. They remove all tarnish, even the desirable patina in the crevices, leaving a piece looking sterile, flat, and new.
If you feel you must use a commercial product, please choose a high-quality cream from a reputable brand known for archival-quality products. And always, always test it on a small, hidden spot first. If you're working with silver plate, the stakes are even higher. For more specific advice, check out our guide on how to properly clean silver-plated silverware.
The principles of gentle cleaning apply across the board, from large platters to small, delicate items. You can find more helpful context in a simple and safe guide to cleaning sterling silver jewelry, as the core concepts are the same.
When to Call a Professional Conservator
Sometimes, the best decision is to not touch it at all. A DIY approach is not worth the risk if your silver falls into any of these categories. It's time to call a trained professional conservator.
- High Monetary or Sentimental Value: If it’s an irreplaceable family heirloom or a museum-quality piece, don't experiment.
- Visible Damage: Any cracks, dents, corrosion, or old, failing repairs need an expert's skilled hand.
- Mixed Materials: Pieces that incorporate ivory, bone, wood, or delicate gems require specialized care to avoid ruining those components.
- Severe Tarnish: We're talking about that black, crusty tarnish that looks like it's been there for a century. This often requires techniques and tools that are far beyond the scope of a home cleaning kit.
A professional has the experience and equipment to assess what your piece truly needs, ensuring it's stabilized and preserved for generations to come.
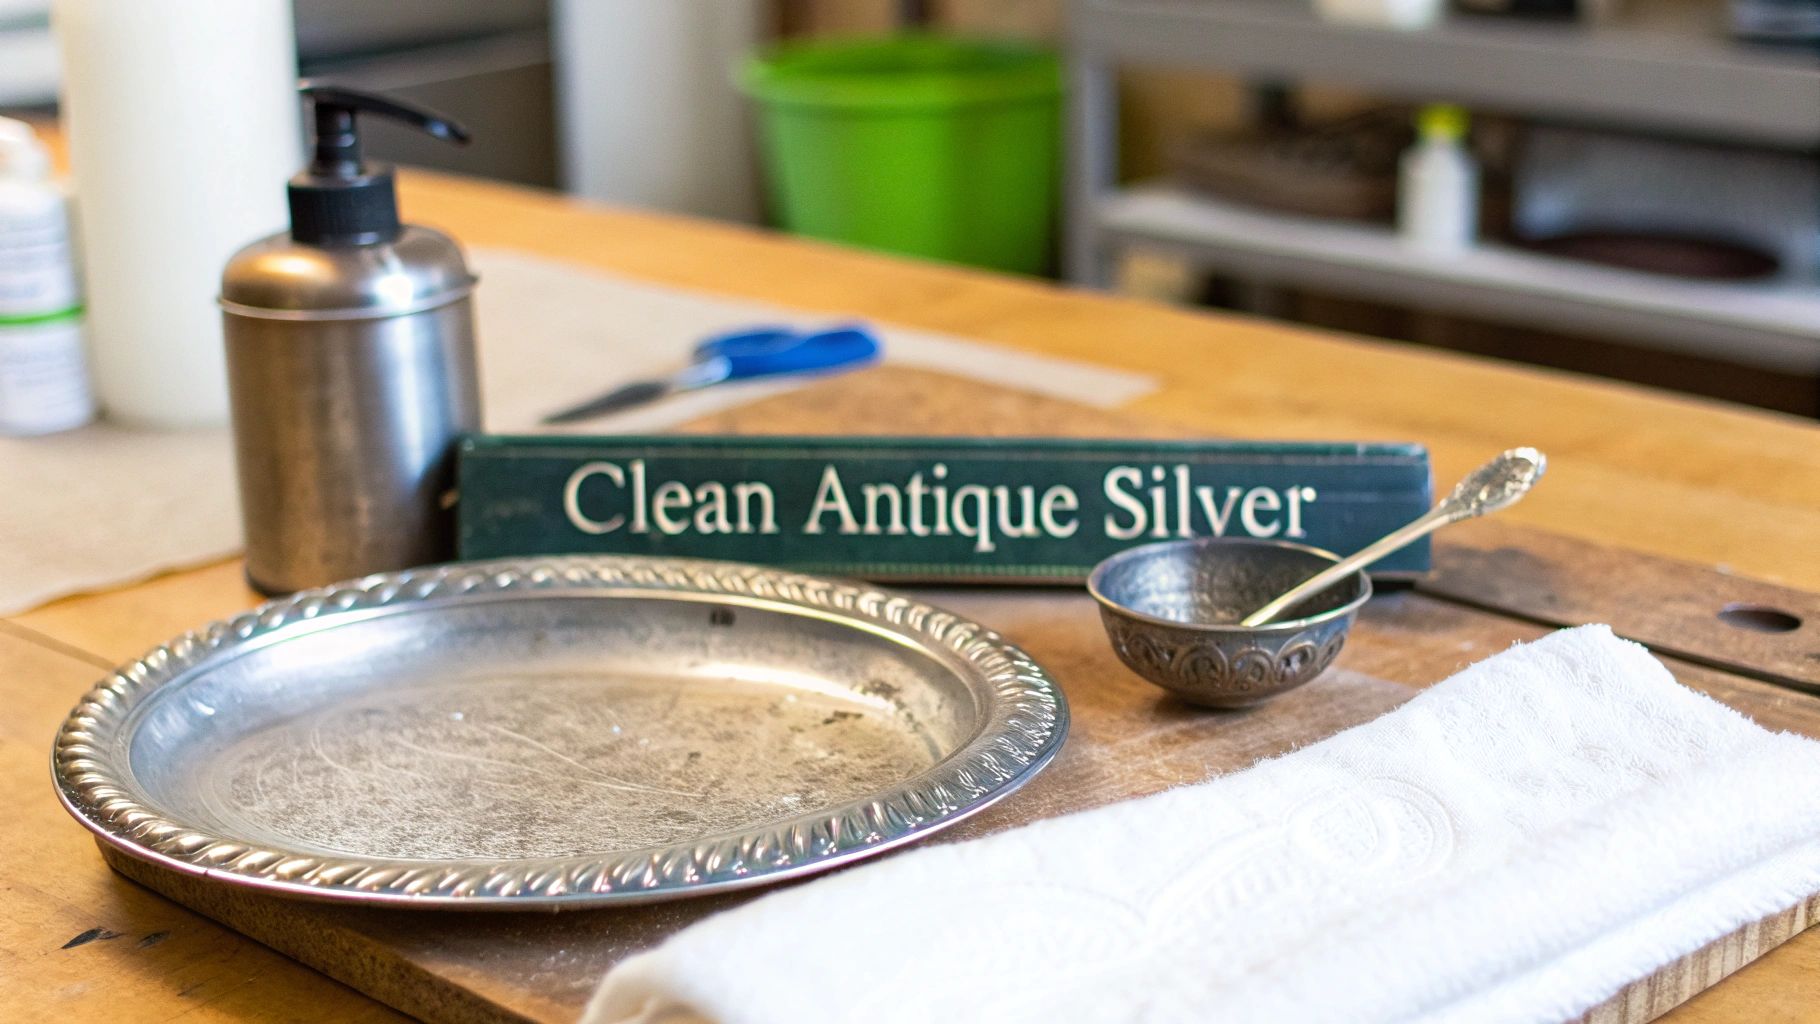
A Practical Guide to Gently Cleaning Your Silver
Now that you've assessed your piece, it's time for the best part—the cleaning itself. We're going to use a mild abrasive slurry method, the same gentle approach trusted by museum conservators. This isn't about getting it done fast; it's about patience, precision, and preserving the unique story your silver has to tell.
Before you even think about getting your silver wet, set up a proper workspace. Lay down a soft, padded towel to prevent any accidental scratches or dings. It’s a good idea to gather everything you need before you start so you aren't fumbling around with wet hands later.
Getting Your Materials and Workspace Ready
Your success really hinges on using the right tools. I can't stress this enough—using harsh chemicals or even plain old tap water can create more problems than they solve. Stick to this list, and you'll be on the right track.
Here’s your shopping list:
- Distilled Water: Tap water has chlorine and minerals that can leave spots or cause discoloration on silver. Distilled water is pure, so you avoid those reactions.
- Non-Ionic Detergent: Just a few drops of a gentle, phosphate-free soap are all you need. Stay away from anything with citrus, bleach, or harsh degreasing agents.
- Precipitated Calcium Carbonate: This is the magic ingredient. It's an incredibly fine, soft chalk that works as a very mild abrasive, lifting tarnish without scratching the silver underneath.
- Soft, Lint-Free Cotton: Think cotton balls, cosmetic pads, or even a clean, old cotton t-shirt. Paper towels are surprisingly abrasive, so avoid them.
- Soft Bristle Brush: An extra-soft baby brush or some cotton swabs work perfectly for getting into those tiny, detailed areas.
Once you have your materials, you can start the first wash. This is all about removing surface-level dust, oils, and general grime so your polishing paste can work directly on the tarnish. Fill a plastic basin (never a metal sink) with warm distilled water and add a few drops of your detergent.
The Initial Wash
Carefully place your silver piece into the soapy water. Use your fingers or a soft cotton cloth to gently wash the entire surface. This isn't scrubbing; it’s more like giving it a gentle bath to lift off any loose dirt.
Pay a little extra attention to crevices, handles, or anywhere else grime tends to collect. For pieces with intricate engravings or filigree, use your soft brush or a cotton swab to lightly work the suds into those details. When you’re done, rinse it thoroughly with clean distilled water. This is a critical step because any soap left behind can interfere with the polishing.
Now, your silver is prepped and ready for the main event.
Mixing and Applying the Polishing Slurry
This is where you'll see the biggest transformation. In a small bowl, mix a bit of the calcium carbonate with just enough distilled water to create a thin, creamy paste. You're aiming for a consistency like yogurt or heavy cream—smooth, not watery or clumpy.
This method isn't just a home remedy; it's backed by serious research. The Getty Conservation Institute published a landmark study in 1990 identifying calcium carbonate as one of the best mild abrasives because it removes tarnish with minimal scratching or silver loss. Interestingly, that same research found that improper polishing can actually make silver tarnish 20-30% faster by creating micro-abrasions on the surface. You can learn more about these conservation findings and techniques from the source.
Take a cotton ball or pad and pick up a small amount of the slurry. Start on a small, less visible spot and apply the paste using gentle, straight, back-and-forth motions.
Pro Tip: If you can see a grain in the metal, always polish in that direction. Avoid aggressive circular scrubbing at all costs—it's the fastest way to create swirl marks and unintentionally strip away that desirable patina. I find it’s best to work methodically in small, one-to-two-inch sections.
As you work, your cotton will turn dark grey or black. That’s the silver sulfide—the tarnish—lifting off the surface. It's a great sign! Just be sure to switch to a clean cotton pad frequently so you’re not just rubbing the tarnish you removed back onto the piece.
The Final Rinse and Dry
Once you're happy with how the tarnish has lifted, it’s time for the final, crucial steps. Rinse the piece completely under a gentle stream of warm distilled water. Any leftover calcium carbonate can dry into a white film that will cause problems down the road.
Use your soft brush one last time to make sure you've flushed the slurry out of all the crevices and detailed areas. A final, thorough rinse is your best defense against future issues.
Lastly, and this is non-negotiable, gently pat the item dry immediately with a clean, lint-free cotton or microfiber cloth. Never let it air dry, as that will guarantee water spots. Make absolutely certain the piece is 100% dry, especially in the nooks and crannies, before you even think about putting it away. Any trapped moisture is just an open invitation for tarnish to return.
Troubleshooting Common Cleaning Problems
Even when you're being careful, cleaning old silver can throw you a curveball. You might follow all the rules only to find a stubborn patch of tarnish that won’t budge or, even worse, uncover damage that was hidden under the grime. This is your game plan for when things don't go perfectly.
The absolute key is not to panic. Don't reach for a stronger chemical or start scrubbing harder. When you hit a snag like this, patience becomes your most important tool, and a calm, measured response is what will protect your silver's integrity and value.
Dealing With Stubborn Tarnish
Sometimes, one pass just isn't enough, especially on a piece that's been tucked away in a cabinet for decades. You’ll do your first gentle polish and see that some dark, shadowy areas are still there. I know the temptation is to just bear down and scrub until it's gone. This is the single biggest mistake you can make.
Instead of more force, try more patience. Mix up a fresh batch of your calcium carbonate slurry and gently go over the area again with the same soft, back-and-forth motion. It might take two or three of these gentle applications to finally lift that deep-set tarnish. It's a slow-and-steady approach, but it guarantees you won't scratch the silver or strip away that beautiful, desirable patina.
This isn't just my experience talking; it's backed by science. A 2016 UCL study found that while calcium carbonate is effective, it simply requires more time for heavily tarnished spots. That same study warned that getting too aggressive can alter the metal's surface alloy by as much as 5-10%. You can read more about these scientific silver cleaning insights to see why a gentle hand always wins.
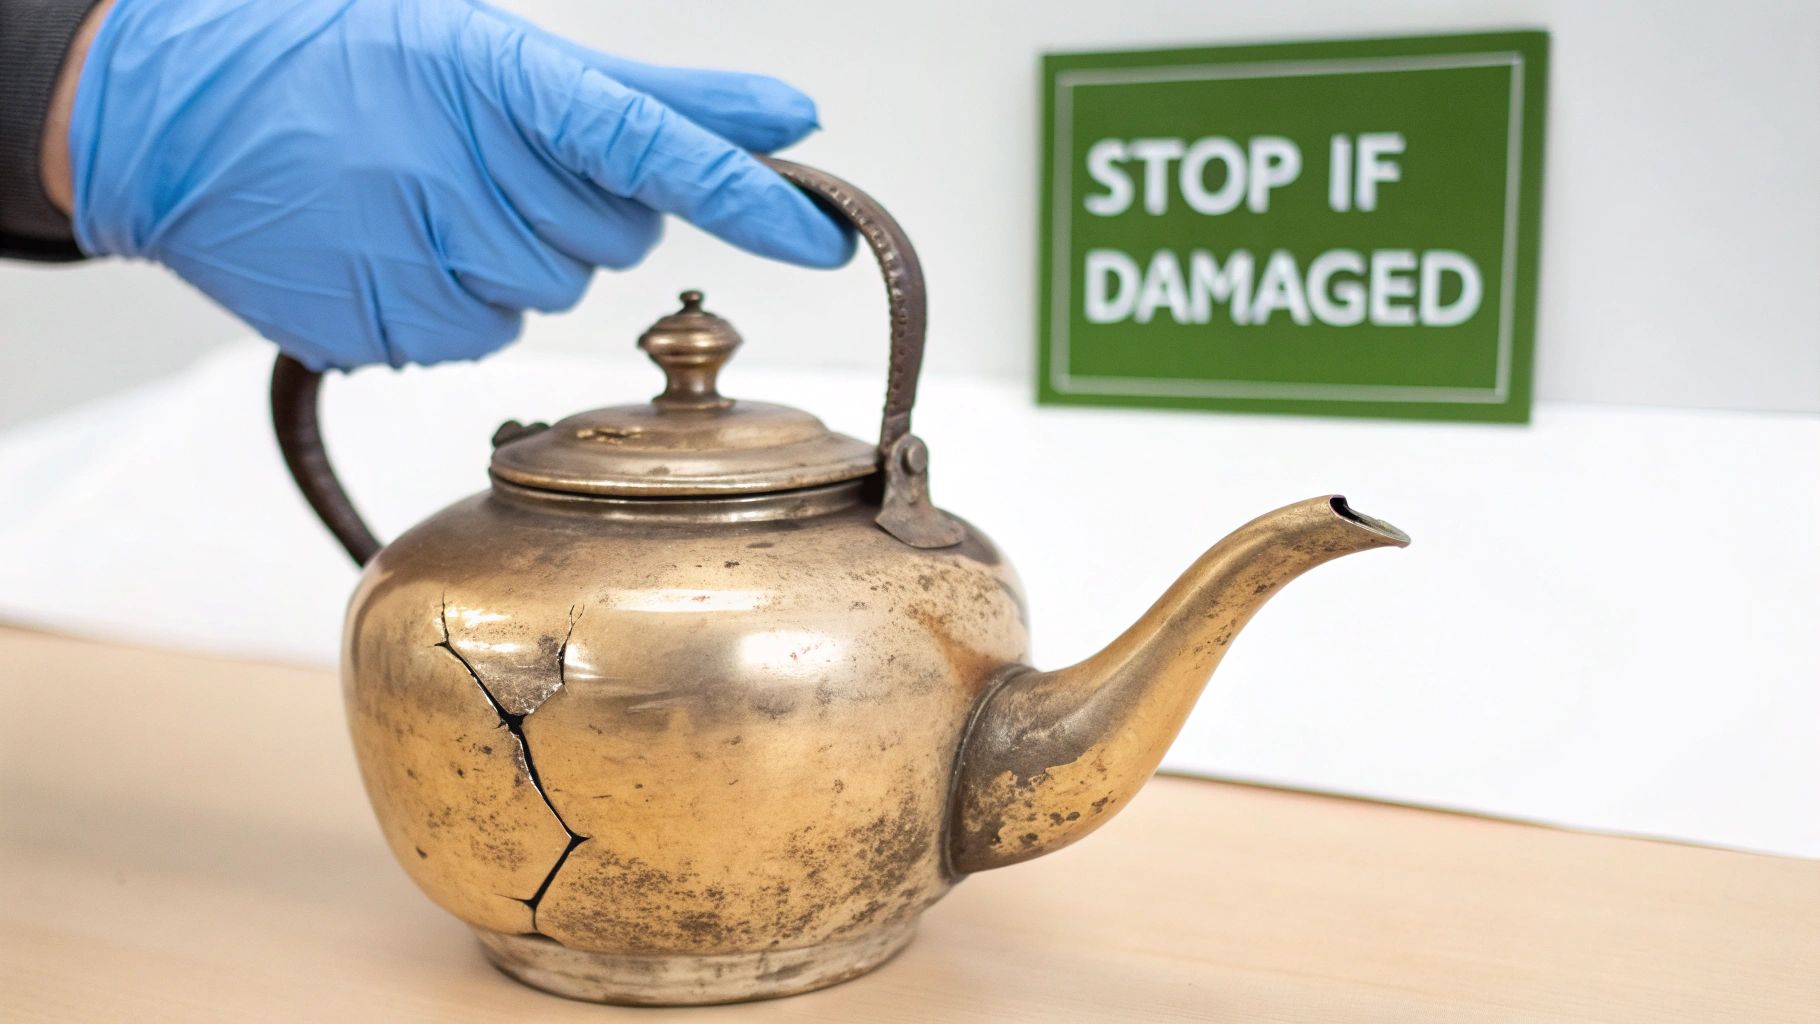
What to Do When You Uncover Damage
It happens. As you clean away years of buildup, you suddenly reveal a hidden crack, a loose handle, or a wobbly foot on a teapot. It can be a bit of a shock, but what you do next is simple and immediate: stop cleaning.
Do not try to fix it yourself. Don't bend it back into place or try to polish around it. The piece is fragile, and any more pressure could make the damage much, much worse.
Once you spot a problem, here’s what to do:
- Stop Immediately: Put your cloth and slurry down.
- Rinse Gently: Carefully rinse any cleaning residue off with distilled water.
- Dry Thoroughly: Pat the piece completely dry with a fresh, soft, lint-free cloth.
- Seek an Expert: Wrap the item carefully in acid-free tissue paper and find a professional silver conservator. They have the expertise to assess the damage and perform a safe repair.
Cleaning Intricate Details and Engravings
Those ornate pieces with beautiful filigree, deep engravings, and complex patterns are often the most challenging to clean. Tarnish loves to hide in all those tiny crevices where a cotton ball just can't reach.
For these detailed jobs, you need to switch to smaller tools. A simple cotton swab (like a Q-tip) dipped in your cleaning slurry works wonders for getting into tight spots. For even finer details, I often turn to an extra-soft baby toothbrush or a small, soft-bristled artist's brush. These can gently work the paste into the design without scratching the surface. Always, always use a light touch. For more hands-on advice, take a look at our guide on how you can remove tarnish from silver.
The Dangers of Over-Cleaning
It's surprisingly easy to get carried away and over-clean a piece, especially if you're working with silver plate. Over-cleaning isn't just about polishing too often; it’s about physically removing too much of the surface. You have to be on the lookout for the tell-tale signs that you've gone too far.
- Loss of Patina: If the dark, defining shadows in the recessed areas of the design start to look weak or disappear completely, you're stripping away the history. Stop.
- A Brassy or Coppery Hue: This is the big one. If you see a yellowish, pinkish, or coppery color peeking through, you are wearing through the silver plating to the base metal underneath.
If you spot either of these signs, stop cleaning that area immediately. Once plating is gone, it's gone for good, and more polishing will only make the exposed spot bigger. This is a clear signal that the piece needs a much lighter touch in the future—if it should even be cleaned at all.
How to Store and Preserve Your Antique Silver
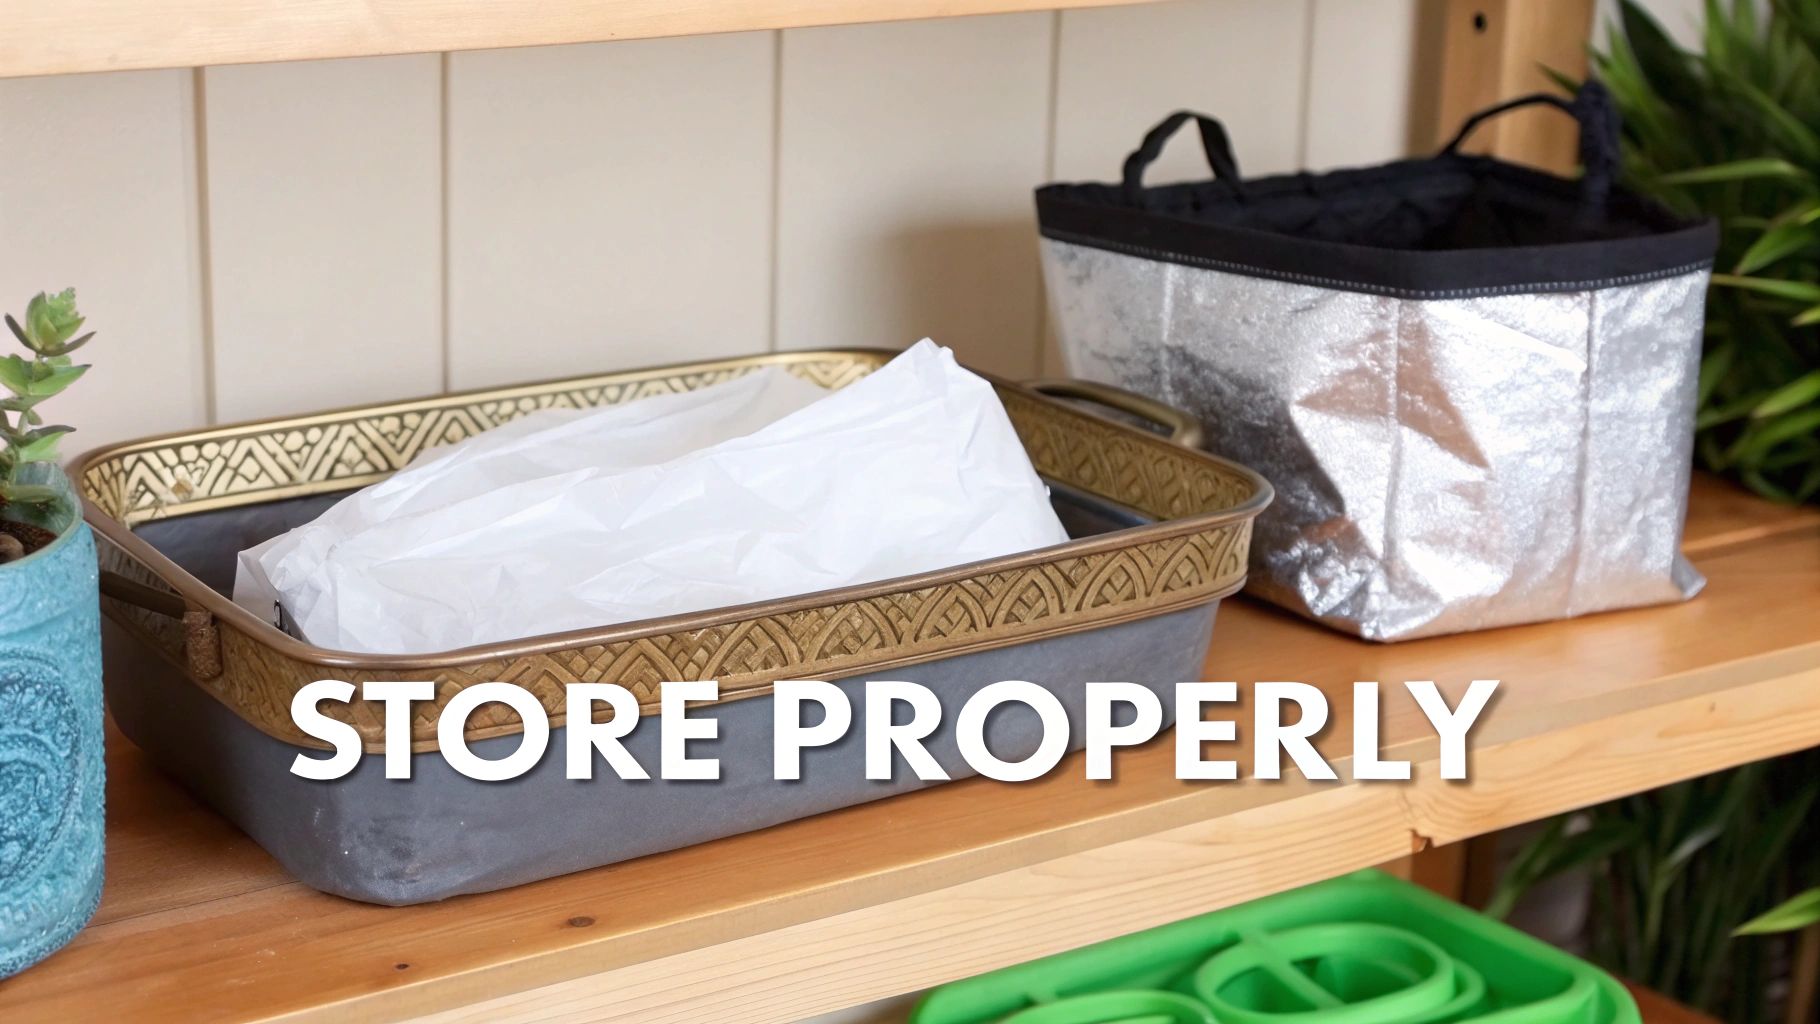
Once you’ve put in the work to carefully clean your antique silver, don't stop there. How you put your heirlooms away is every bit as important as how you polish them. Proper storage is your secret weapon against tarnish, drastically cutting down on cleaning time and protecting that delicate surface for future generations.
The whole point is to shield your silver from its two biggest enemies: air and moisture. The sulfur compounds floating around in the air are what cause that dreaded tarnish. If you can create a safe, stable environment, you can slow that chemical reaction to a crawl.
Create the Ideal Storage Environment
First things first, pick the right spot. You’re looking for a cool, dark, and dry place with low humidity. A linen closet or a drawer in your bedroom is usually a far better bet than a damp basement or a stuffy attic, where big temperature swings will only make your silver tarnish faster.
You also have to be careful about what your silver is stored in. Some very common storage solutions can actually cause more harm than good, releasing chemicals that speed up the tarnishing process.
Storage Locations to Avoid:
- Oak Cabinets: Oak and other acidic woods can release fumes that are corrosive to silver.
- Cardboard Boxes: The glue and acids in cardboard will damage your silver over time.
- Newspaper: The ink can transfer, and the paper itself is highly acidic.
- Plastic Bins: Many types of plastic contain sulfur, which will cause your silver to tarnish shockingly fast.
Instead, stick with cabinets made from safer woods or line your drawers with a protective barrier. When it comes to preserving valuable items like fine china, many of the same principles about stable environments apply directly to your silver collection.
Choose the Right Protective Wraps
Whatever you do, don't leave your antique silver out in the open for long. Each piece should be wrapped up on its own to stop it from getting scratched and to create a little protective bubble away from the air. Not all wraps are created equal, though.
Using the wrong material can trap moisture right against the surface or release damaging chemicals. It’s critical to choose materials that are chemically stable and allow the piece to breathe.
A huge mistake I see people make is using plastic wrap or rubber bands. Plastic wrap traps condensation against the silver, creating a perfect storm for tarnish. And rubber bands? They're loaded with sulfur and will leave behind nasty black marks that are nearly impossible to get off.
Safe Wrapping Materials:
- Acid-Free Tissue Paper: This is the archival-quality stuff. It provides a safe, breathable barrier.
- Unbleached Cotton or Flannel: Soft, natural fabrics like these are fantastic for wrapping individual pieces.
- Pacific Silvercloth: This is the gold standard. It’s a special fabric infused with tiny silver particles that absorb tarnish-causing gases before they ever reach your heirlooms.
Use Anti-Tarnish Tools Proactively
Beyond just wrapping your pieces, you can take a more active role in fighting tarnish. There are some great products out there designed to absorb airborne pollutants, making your storage space even safer. They’re inexpensive and work wonders.
Think of these tools as a 24/7 security system for your silver. They’re always working to neutralize the threat of sulfur, which is lurking everywhere—in the air, in wool and felt, and even in some paints.
One of the easiest upgrades is to use silvercloth bags or drawer liners. This is the same Pacific Silvercloth I mentioned before, and it gives you constant protection. Another fantastic tool is anti-tarnish strips. These are just little paper tabs that absorb sulfur gases from the air. Just toss one or two inside your storage box or drawer and swap them out every six months.
By combining a stable location with the right protective wraps and a few anti-tarnish tools, you’ll build a powerful preservation strategy. This proactive approach means your silver stays brilliant for much, much longer, saving you a lot of polishing in the long run.
Your Antique Silver Questions, Answered
Stepping into the world of antique silver care can feel a little daunting. It's perfectly normal to have questions—after all, you're handling a piece of history. I've heard just about every question you can imagine over the years, so I've put together answers to the most common ones I hear.
Think of this as a final gut check before you roll up your sleeves. Getting these details right is about more than just making your silver shine; it's about preserving its story, its integrity, and its value for generations to come.
Can I Just Put My Antique Silver in the Dishwasher?
I get this one all the time, and my answer is always a firm, unequivocal no. You might know someone who throws their modern sterling flatware in the dishwasher, but for antiques, that's a recipe for disaster.
A dishwasher is a brutal environment. The high heat, aggressive detergents, and intense water pressure can cause damage you simply can't undo.
- Corrosive Detergents: Most dishwasher pods and powders are loaded with phosphates or citrus-based agents. These chemicals are far too harsh for silver and can cause pitting or permanent dark spots.
- Intense Heat: The drying cycle is especially dangerous. Many antique pieces, like knife handles or teapot spouts, are held together with a heat-sensitive resin or pitch. That intense heat can melt the adhesive, causing parts to become loose or fall off completely.
- Physical Harm: The water jets in a dishwasher are powerful. They can easily send a delicate fork clattering against a heavy platter, resulting in scratches, dings, and dents that are heartbreaking to see and difficult to fix.
When it comes to antiques, the only safe bet is a gentle hand-washing with a mild, phosphate-free soap.
How Often Should I Be Cleaning My Antique Silver?
Here’s a piece of advice that might surprise you: clean it as little as possible. In my experience, over-cleaning is a much bigger threat to antique silver than a bit of tarnish. Every time you polish, you're removing a microscopic layer of the metal. For solid sterling, that means a gradual loss of fine detail over many decades. For silver plate, a few too many aggressive cleanings can wear right through the plating to the base metal underneath.
A good rule of thumb is to clean for only two reasons:
- After it's been used. If you’ve served food with a piece, wash it gently by hand as soon as you can. Food acids and salts can be corrosive, so you want to get them off quickly.
- When the tarnish is truly distracting. A bit of tarnish is fine, even desirable. Only polish when it's built up to the point that it really obscures the beauty of the piece.
If you store your silver properly with anti-tarnish strips or cloths, you might only need to give it a light polish once a year, or even less.
The goal isn't to make your antique silver look brand new. It's to manage the tarnish while preserving the piece's health, its intricate details, and the historical character that makes it so special—patina included.
What’s All This Black Stuff on My Polishing Cloth?
When you start polishing, your cloth is going to turn black almost immediately. Don't panic! This is actually a good sign. You aren't rubbing the silver away. That black gunk on your cloth is silver sulfide—it's the chemical compound that forms when silver reacts with sulfur in the air.
Simply put, that black stuff is the tarnish. Seeing it on your cloth means you're successfully lifting the discoloration off the surface. Just be sure to keep turning your cloth to a clean spot so you aren’t just rubbing the old tarnish back onto your beautiful heirloom.
What About Using Toothpaste or Baking Soda?
This is a persistent DIY myth that makes conservators like me cringe. Never, ever use toothpaste or baking soda to clean antique silver. Yes, they'll remove tarnish, but they'll also cause permanent damage.
Toothpaste is designed to scrub tough tooth enamel and contains harsh abrasives like silica. Silver is a very soft metal, and these abrasives will cover the surface in a network of tiny scratches, leaving it with a dull, hazy finish and destroying its value. Baking soda is similarly problematic; its crystalline structure is far too coarse and will easily scratch the silver.
Stick with the tried-and-true products. A high-quality commercial polish or a conservator-grade material like precipitated calcium carbonate will remove tarnish safely, without harming the precious metal underneath. Your heirlooms have survived this long; they deserve that level of care.
Feeling overwhelmed by a box of inherited treasures? Don't know where to start? Curio is like having an antique expert in your pocket. Just snap a photo to instantly identify your items, learn their history, and get an estimated value. Download Curio today and turn your family's mysteries into cherished stories. Learn more at https://www.curio.app.