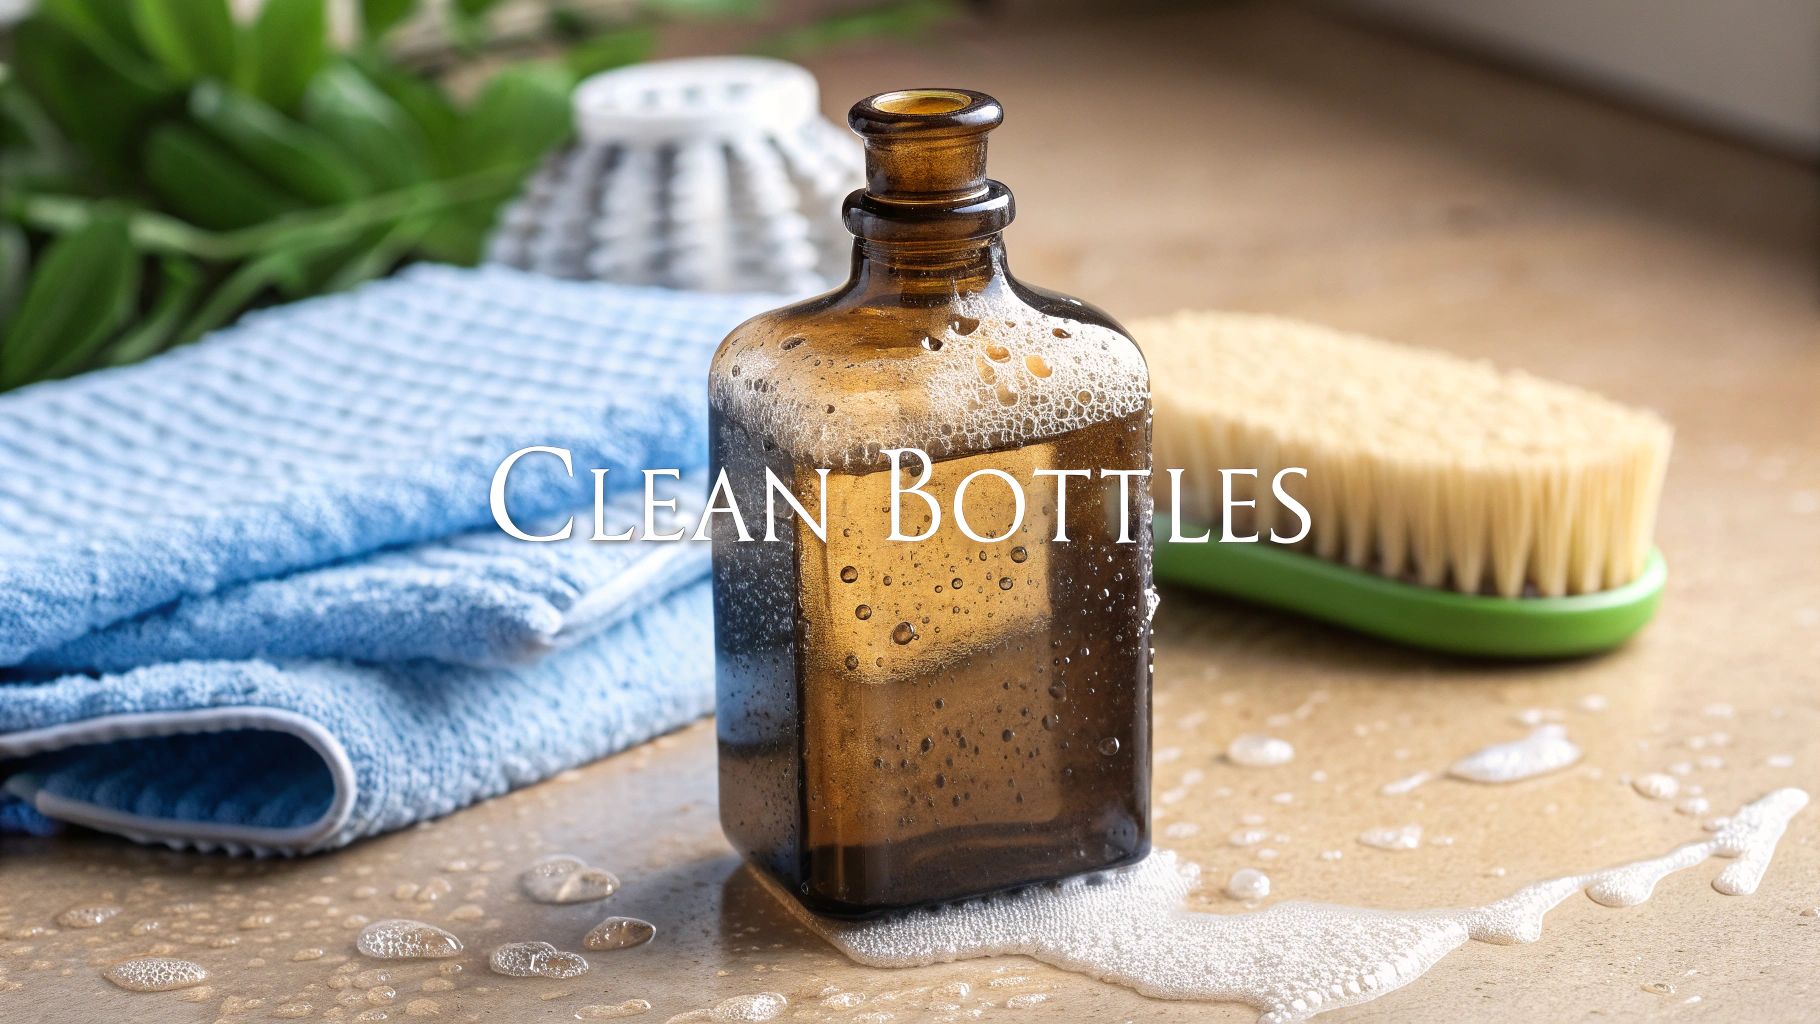
Cleaning vintage glass isn't about scrubbing away every trace of the past. It's a delicate balance—you want to remove the grime but preserve the character and history sealed in the glass. This process always starts with a gentle touch, a careful inspection, and soaking in warm, soapy water. Above all, remember the golden rule: never use a dishwasher or harsh chemicals. They can cause irreversible damage in an instant.
Your Starting Point for Cleaning Vintage Glass

Think of cleaning an old bottle less as a chore and more as an act of preservation. Every bottle tells a story, and our job is to bring its beauty back to the surface without erasing its journey.
Before you even think about soap or brushes, the most critical step is a thorough, patient assessment. This isn't just a quick glance; it's a careful examination that will prevent you from accidentally damaging a piece of history.
Inspecting for Fragility and Damage
Your first job is to play detective. Hold the bottle up to a bright light and slowly turn it over in your hands. You’re looking for the hidden dangers that could turn a simple cleaning into a catastrophe.
Keep a sharp eye out for hairline cracks, tiny chips around the rim, or stress fractures, which often hide near the neck or base. A crack that's nearly invisible to the naked eye can easily split wide open when exposed to warm water. Sometimes, you can feel what you can't see, so run a gloved fingertip gently over the entire surface to detect subtle imperfections.
Knowing a bit about the bottle's history also gives you clues about its sturdiness. For example, hand-blown bottles from before 1860 often have a rough pontil mark on the bottom and can be far more delicate than their machine-made counterparts. If you're unsure what you have, our guide on antique glass bottle identification is a great place to start deciphering its past.
Identifying the Type of Grime
Next, figure out what you’re up against. The type of dirt will dictate your cleaning strategy. Are you dealing with simple surface dust, or something more stubborn?
- Loose Debris: This is the easy stuff—surface dirt, dust, and cobwebs that will likely rinse right off.
- Interior Sediment: Often, you'll find a caked-on layer of dirt or old residue hardened at the bottom. This will require a bit more persuasion.
- Mineral Deposits: See a cloudy film or white, chalky stains? That’s likely hard water or calcium buildup that’s been sitting for decades.
- Organic Stains: Dark, stubborn spots could be from the bottle's original contents, and these can be the trickiest to remove.
Knowing your enemy helps you choose your weapon. For mineral deposits, for instance, a simple vinegar soak is a time-tested technique that collectors have trusted for generations. Experience shows that letting a bottle sit in vinegar for at least one hour can work wonders on loosening that stubborn calcium film.
Key Takeaway: The first five minutes you spend inspecting your bottle are more important than the 30 minutes you'll spend cleaning it. Rushing this initial step is the single most common reason valuable vintage glass gets damaged.
By taking a few moments to assess your bottle's condition and the grime it’s holding, you can move forward with confidence. This thoughtful approach is the best way to protect your treasure while revealing the beauty that’s been hiding underneath.
Gathering Your Bottle Cleaning Toolkit
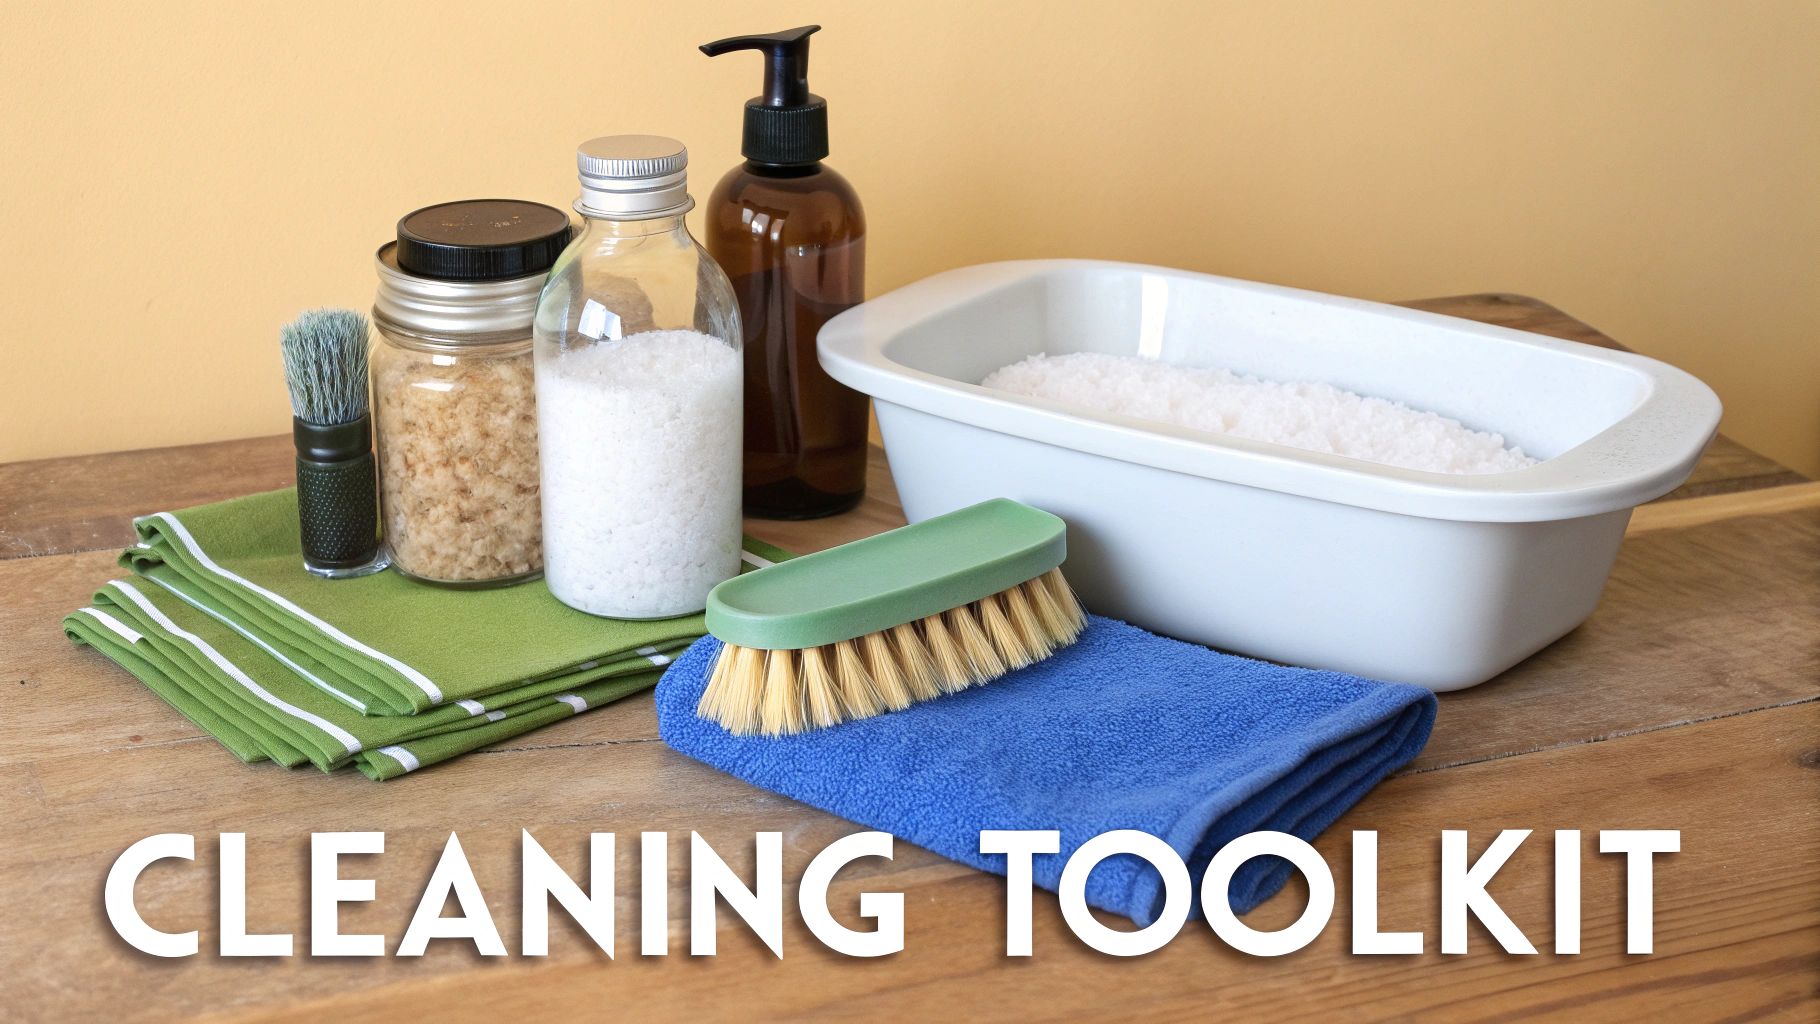
Before you even think about turning on the tap, let's talk about setting yourself up for success. When you're dealing with vintage glass, the goal is restoration, not destruction. That means ditching the harsh chemicals and scouring pads. The best approach I've found over the years is all about patience and using the right tools—gentle persuasion always wins over brute force.
First things first, create a safe workspace. I can't tell you how many heartbreaks I've heard about from a bottle slipping in a hard ceramic sink. The easiest fix? Just grab a simple plastic wash basin and place it in your sink. It provides the perfect cushion and has saved more than a few of my own prized finds from chips and cracks.
Essential Soft Tools for Gentle Cleaning
Your core toolkit doesn't need to be complicated. You're looking for soft, non-abrasive items that can handle surface grime without damaging the glass or any embossed details.
These are my go-to items for almost every bottle I clean:
- Soft Bottle Brushes: Don't just get one. Build a small collection of different sizes and shapes. The flexible ones are fantastic for getting into the weird curves of old medicine bottles. And make sure they have soft nylon bristles, not wire.
- Microfiber Cloths: These are indispensable for wiping down the outside and for that final polish that makes the glass gleam. They grab onto dirt and leave zero lint behind.
- Old Toothbrushes: A soft-bristled toothbrush is your best friend for getting into all those nooks and crannies—think detailed lettering, bottle lips, and old screw threads where grime loves to hide.
With just these three things, you can handle the vast majority of cleaning jobs safely.
Unconventional Items for Tough Jobs
So what do you do when a soft brush can't get to that layer of caked-on gunk at the bottom of a narrow-necked bottle? This is where you have to get a little creative. Over the years, collectors have figured out some clever tricks to scrub the inside without scratching the glass.
The basic idea is to use a mild abrasive that can swish around inside. Fill the bottle about a quarter of the way with warm water, add a drop of dish soap, and then toss in one of these:
- Uncooked Rice: Just a small handful is enough to gently knock sediment loose.
- Coarse Salt: Works just like rice, acting as a gentle scouring agent.
- Aquarium Gravel: For really stubborn crud, fine aquarium gravel does the trick. Just be gentle when you swirl it!
Once you've added your chosen abrasive, cover the top and give it a good, vigorous swirl for a minute or two. The little particles will scrub the interior walls, getting to spots a brush could never hope to reach.
A Collector’s Secret Weapon
Sometimes, the best tools are the ones you find in a hardware store, not a cleaning aisle. One of the best-kept secrets for getting into those really tricky interior curves is a simple fan pull chain.
Seriously, it works wonders. You just drop the flexible, beaded chain inside the bottle with some soapy water. By holding both ends, you can drag it back and forth along the inner walls, gently scraping off residue from even the most awkward spots. This little trick is a game-changer. It’s one of many collector secrets for cleaning narrow old bottles, proving that the simplest solutions are often the most effective.
Cleaning Grime From Inside Your Bottles
Wiping down the outside is one thing, but the real challenge is almost always on the inside. Years—sometimes decades—of sediment, mineral deposits, and who-knows-what-else can cling to the interior, hiding the glass’s true character. Getting that internal grime out takes a little patience and the right touch.
The best way to start is always the easiest: a long, slow soak. Fill the bottle with warm (never hot!) water and a few drops of a mild dish soap. Let it sit for a few hours, or even overnight, in a plastic dish tub. This simple step does most of the hard work for you, softening up residue that’s been caked on for ages.
Creating a Gentle Internal Scrubber
For the stubborn stuff that a simple soak won’t budge, you’ll need to add a bit of gentle friction. This is where you can get creative without worrying about scratching the glass. The idea is to create a scrubbing action inside the bottle that can get into all the nooks and crannies a brush could never reach.
Pour out most of the soapy water, leaving just an inch or so sloshing around at the bottom. Now, add one of these gentle abrasives:
- Coarse Salt: A tablespoon is usually enough to act as a mild scrubber.
- Uncooked Rice: Just like salt, a small handful of rice provides a great scouring action.
- Fine Aquarium Gravel: If you’re dealing with really tough residue, this gives you a little more scrubbing muscle.
With your abrasive inside, cover the opening securely with your thumb or a stopper and get ready to shake. It might seem old-fashioned, but it works. In fact, even with all the modern tools available, a study found that 73.50% of people still count on manual shaking as their main cleaning method. You can check out more about these traditional techniques in the full research about bottle reuse.
Pro Tip: Instead of a hard, back-and-forth shake, try a swirling motion. Think of creating a small vortex inside the bottle. This uses centrifugal force to press the rice or salt against the glass walls, giving you a much better clean with less risk of impact damage.
After a minute or two of vigorous swirling, pour everything out through a strainer to catch your rice or salt. Rinse the bottle well with clean, lukewarm water and take a look. Some bottles might need a second or third round, but you’ll be surprised at how well this works.
Neutralizing Persistent Odors
Every so often, you'll clean a bottle perfectly only to find a musty, unpleasant smell still lingering inside. This happens a lot with old medicine or perfume bottles where the original contents have left a lasting impression. Thankfully, you don't need harsh chemicals to fix it.
The classic duo of baking soda and white vinegar is your best friend here. Drop about a tablespoon of baking soda into the bottle, then pour in roughly a quarter cup of white vinegar.
You'll get an immediate fizzing reaction—that's the magic happening. The foam helps break down the compounds causing the odor. Let it do its thing for about 15-20 minutes, giving it a gentle swirl every now and then to make sure the solution coats the entire interior.
Finally, pour it all out and rinse the bottle thoroughly with warm water until the vinegar smell is completely gone. This little trick is often the final touch that leaves your vintage glass not just looking clean, but smelling fresh and ready for display.
How to Clean the Exterior Without Erasing History
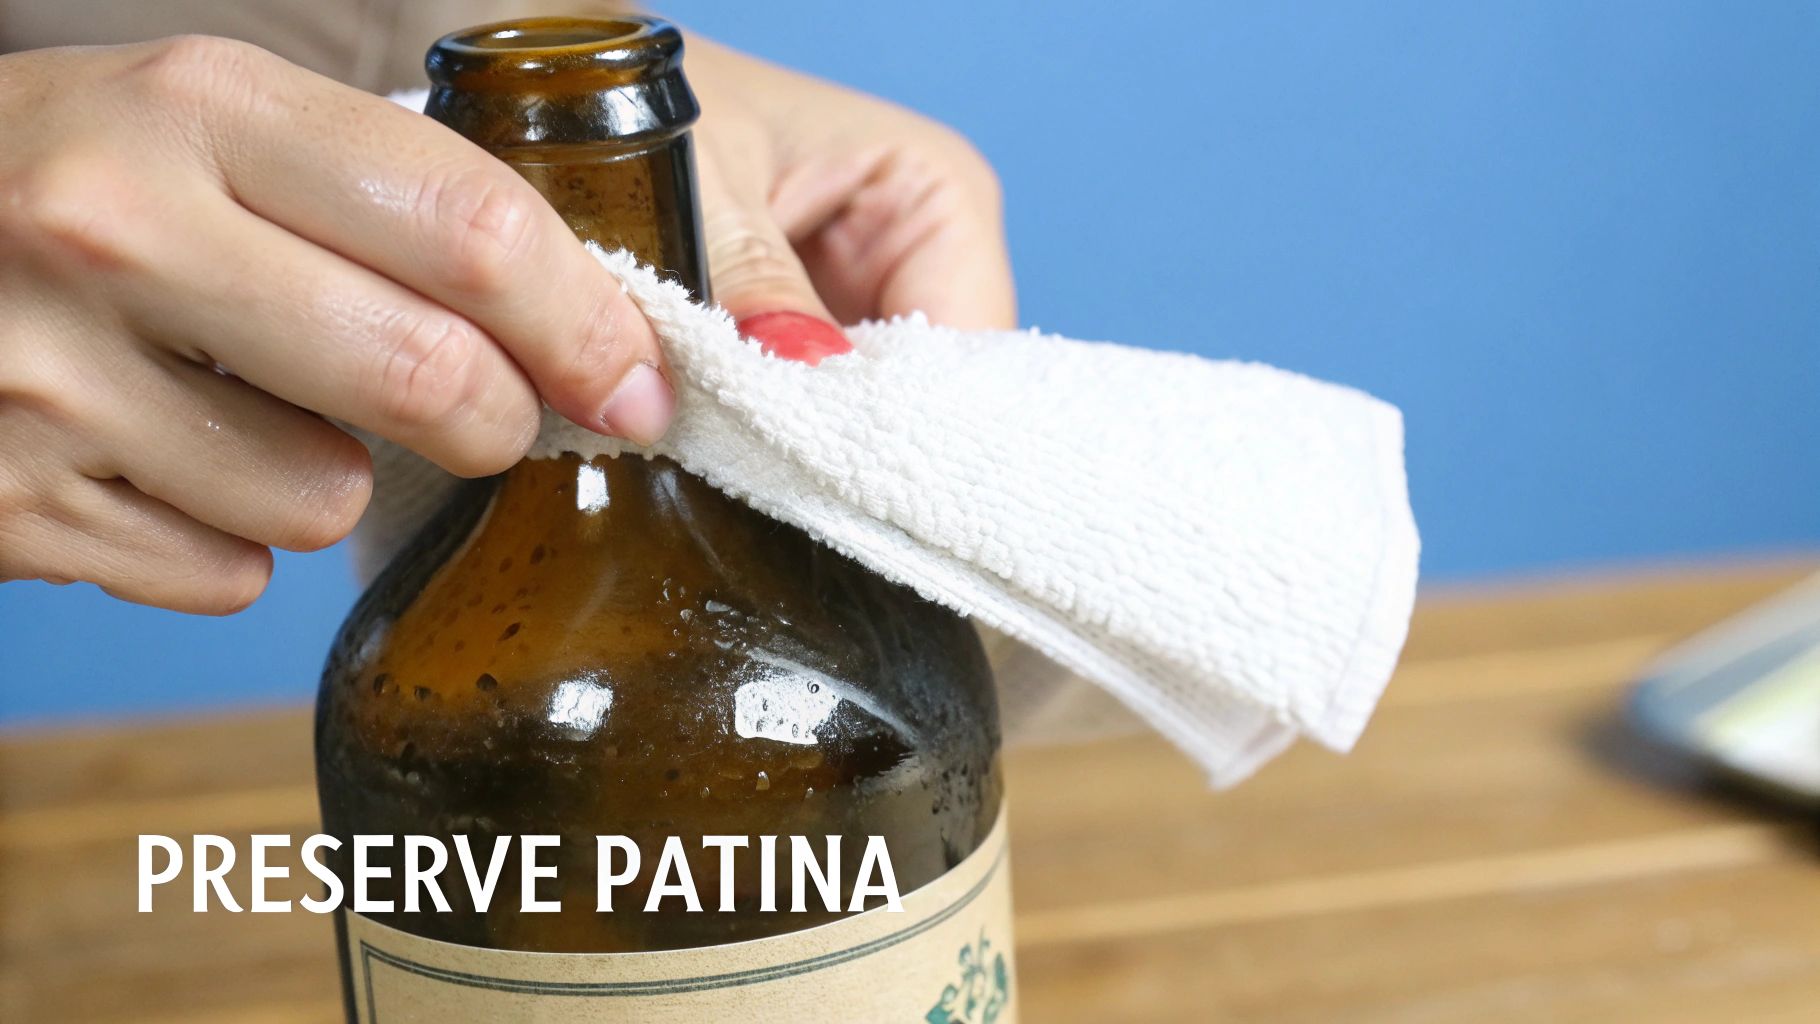
While cleaning the inside of a bottle is about bringing back its sparkle, the exterior is a whole different ballgame. This is where you have to be incredibly careful. A bottle's outer surface—with its labels, patina, and even some of its staining—tells its unique story. The goal isn't to make it look brand new; it's to gently lift the veil of time, not strip away its history.
Think of it as a delicate balancing act. You want to clear away the grime from years spent in a dusty barn or buried underground, but you have to leave the authentic signs of age that give the piece its soul and value.
Distinguishing Patina from Grime
First things first, you need to know what you're looking at. Is it valuable patina or just plain old dirt? Patina is that beautiful, often iridescent film that develops on glass over a very long time. It’s a genuine sign of age that many collectors actively look for.
Grime, on the other hand, is just that—dirt, dust, or caked-on mud. It usually looks dull and opaque. A good rule of thumb is if it’s hiding details like embossed lettering, it’s probably just grime that can be carefully removed.
Start simple. Take a soft, dry microfiber cloth and give the entire exterior a gentle wipe-down. You’d be amazed how much loose dust this removes, giving you a much better look at what you’re really dealing with.
Protecting Fragile Paper Labels
An original paper label is often the most valuable—and most vulnerable—part of an old bottle. One wrong move and it can fade, peel, or completely fall apart. If your bottle has a paper label, you need to work with surgical precision.
Never, ever submerge a bottle with a paper label in water. Instead, here’s a much safer approach:
- Grab a clean microfiber cloth and get it just barely damp. We’re talking almost dry, with no chance of a drip.
- Carefully wipe the glass around the label, making sure to stay at least a quarter-inch away from the paper's edge.
- For the label itself, use a dry, soft-bristled artist's brush to gently flick away any surface dust.
A Word of Warning: I once watched someone ruin a gorgeous, rare 1920s medicine bottle that had a perfect label. A single drop of water from a wet cloth made the ink run and the paper tear. Always treat old paper as if it’s made of dust.
Removing Stubborn Residue Safely
Sometimes you'll find residue that's clearly not part of the bottle's history—think sticky price tags from a flea market or ancient tape goo. This kind of stuff can almost always be removed safely without damaging the glass.
Steer clear of harsh chemical solvents. A much safer, and surprisingly effective, trick is to use a bit of natural oil.
- Olive Oil or Mineral Oil: Dab a small amount of oil directly onto the sticker or adhesive. Let it soak in for 15-20 minutes; this will soften the glue.
- Gentle Scraping: Use your fingernail or the edge of a plastic gift card to gently scrape away the gunk. It should lift off without a fight.
- Final Wipe-Down: Clean the oily spot with a soft cloth and a tiny drop of mild dish soap, then wipe it completely dry.
This method works wonders and poses zero risk to the glass. It ensures you're only removing modern blemishes, not the historical character you’re trying to preserve. Understanding the story behind the bottle, perhaps by researching the antique glass makers marks, gives you a deeper appreciation for the history you're working to protect.
Tackling Tough Stains and Cloudy Glass
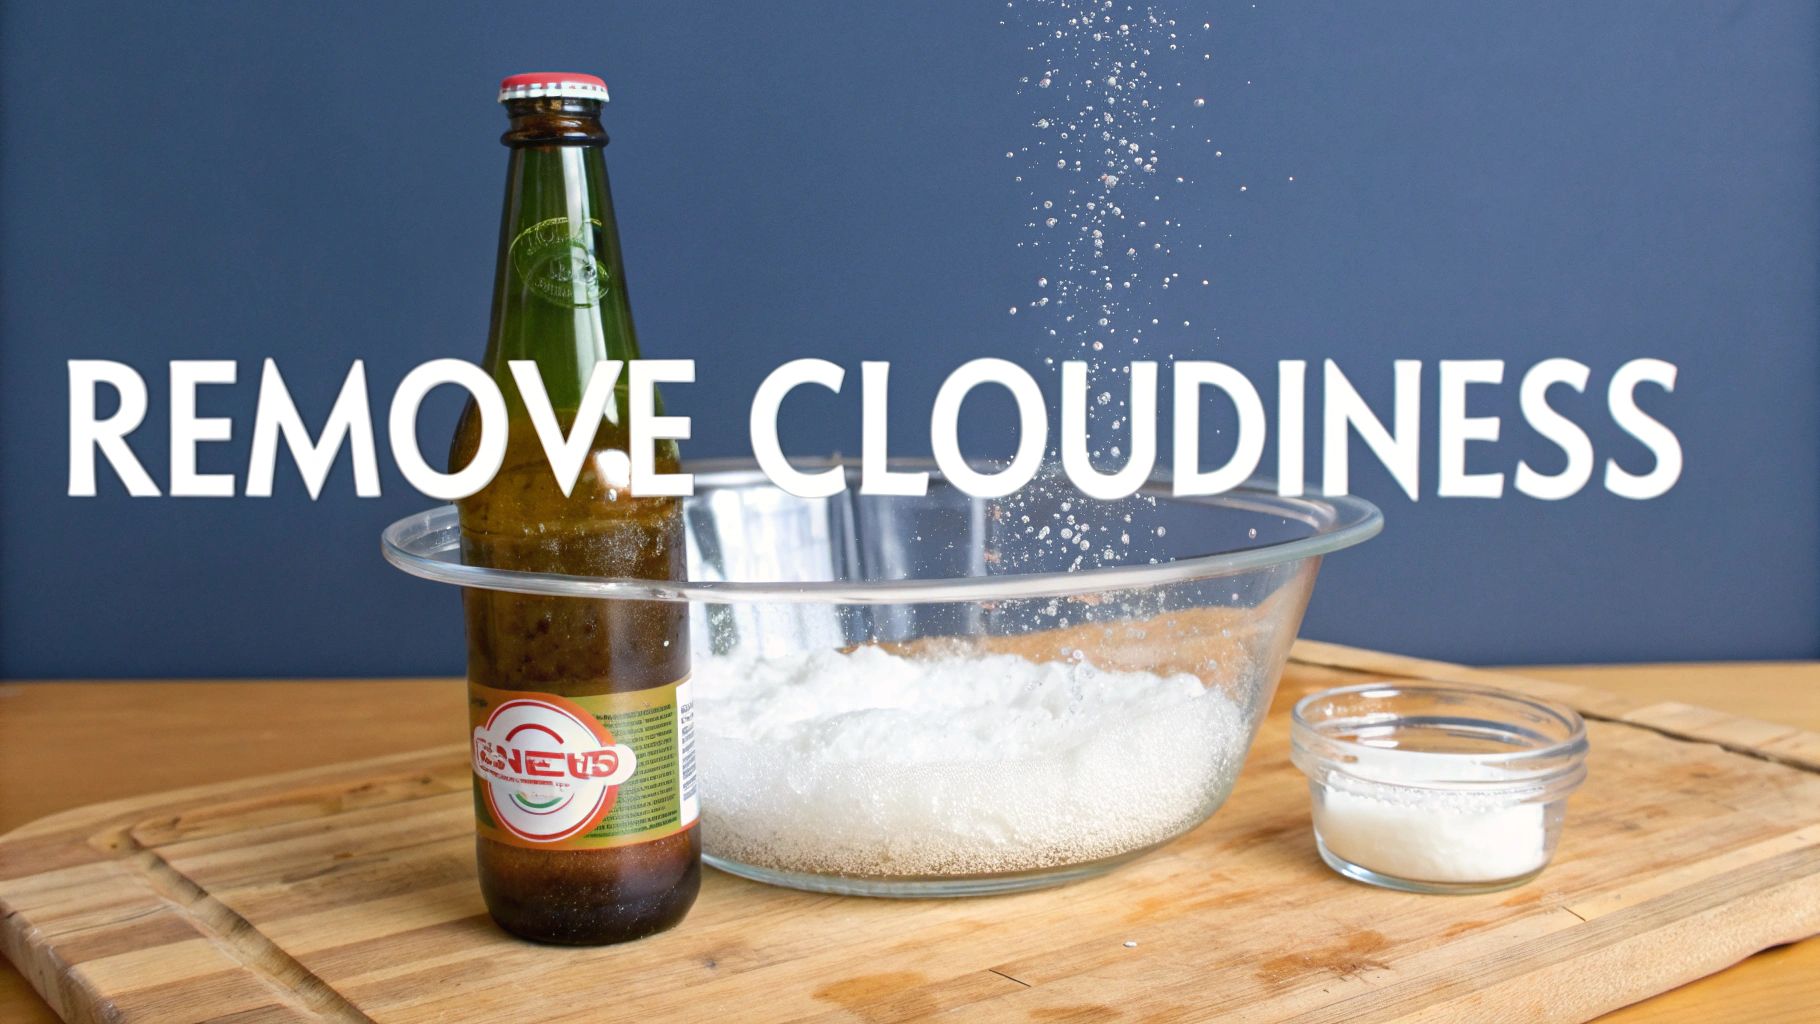
Sometimes, no amount of soaking in soapy water will get rid of that stubborn, milky haze or chalky film. If you've ever found a bottle that just won't come clean, you know what I'm talking about. This cloudiness is often from years of mineral deposits, but it can also be a chemical change in the glass itself—a condition collectors often call "sick glass."
When you hit this wall, it's tempting to grab something abrasive and start scrubbing. Don't. That's the quickest way to ruin a piece. Instead, a little patience and a couple of clever, gentle techniques are your best friends here.
The Fizzing Power of Denture Tablets
For that frustrating cloudiness or the calcium rings inside a bottle, my go-to trick is something you'll find in the dental aisle: denture cleaning tablets. It sounds strange, but they are specifically designed to dissolve mineral buildup safely and without any abrasion.
The process couldn't be easier:
- Fill the bottle with warm water, but leave an inch or two of space at the top for the fizz.
- Drop in one or two denture tablets.
- Let it sit for several hours or even overnight for really tough jobs. You'll see it bubbling away, breaking down all that gunk.
- Once the fizzing stops, just pour it out and give the bottle a good rinse with clean, warm water.
This is a fantastic, hands-off method for bottles with narrow necks where you could never hope to fit a brush. If you're facing particularly stubborn water stains, this guide to cleaning water-stained glass offers some great additional insights.
Buffing Away Stains with a Baking Soda Paste
If the problem is more of a surface stain or a light film on the outside of the bottle, a simple baking soda paste does wonders. Baking soda is a super-fine, mild abrasive that polishes the glass without leaving scratches.
Just mix a little baking soda with a few drops of water until you have a thick paste, kind of like toothpaste. Using a soft microfiber cloth or even just your fingertips, apply it to the stain.
Gently rub in small, circular motions. You're buffing, not scrubbing. After a minute or so, rinse the paste off with warm water and see how it looks. I find this method works especially well on certain types of colored glass, like the beautiful pieces you see in collections of https://www.curio.app/blog/antique-vaseline-glassware, because it's gentle enough to protect the color's integrity.
Stain Removal Method Comparison
When deciding which approach to take, it helps to match the method to the specific problem you're seeing. This table breaks down some common issues and the best ways to tackle them.
| Problem | Recommended Method | Effort Level | Risk/Caution |
|---|---|---|---|
| Interior Haze / Cloudiness | Denture Cleaning Tablets | Low | Very low risk. Just requires patience. |
| Light Exterior Film | Baking Soda Paste | Medium | Low risk. Use a soft cloth to avoid any potential for scratching. |
| Heavy Mineral Rings | Extended Denture Tablet Soak (24+ hours) | Low | Low risk, but may not remove all of the toughest deposits. |
| "Sick Glass" (Iridescence) | Professional Conservator | N/A | High risk of damage with DIY methods. This is chemical etching. |
Remember, these methods are for mineral and chemical buildup. For "sick glass," which is permanent etching, no amount of cleaning will reverse the damage, and trying to can often make it worse.
Crucial Reminder: Always, always start with the gentlest method first. Never jump straight to harsh chemicals, steel wool, or hard-bristled brushes. You can't undo scratches and etching, which will destroy a bottle's beauty and its value.
Achieving a Brilliant, Display-Worthy Shine
Once your bottle is perfectly clean and completely dry, there's one last thing to do: give it a final polish. This simple step is what takes a bottle from clean to truly sparkling.
Grab a clean, dry microfiber cloth for this. It's much better than a cotton towel because it won't leave any lint behind. Gently buff the entire outside of the bottle, paying a little extra attention to any embossed letters or patterns. This is the finishing touch that makes a vintage bottle look its absolute best on the shelf.
Troubleshooting: Your Vintage Bottle Cleaning Questions Answered
Sooner or later, every collector runs into a problem that a simple soap-and-water soak can't solve. It's just part of the journey. Whether you're dealing with a hopelessly stuck stopper or a mysterious haze that won't scrub away, don't worry—you're not the first to face it.
Let's walk through some of the most common head-scratchers that pop up when cleaning old glass. These are the real-world issues, and knowing how to handle them will make you a much more confident collector.
Can You Put Old Glass Bottles in the Dishwasher?
I'll make this one easy: absolutely not. Putting a vintage bottle in the dishwasher is probably the fastest way to turn a treasured find into a pile of shards. It might seem like a tempting shortcut, but it's a gamble you will eventually lose.
The intense heat and harsh detergents are a recipe for disaster. The sudden temperature shifts can cause thermal shock, turning invisible stress fractures into full-blown cracks. On top of that, the powerful water jets can easily wear away delicate embossing or other surface details. Always, always stick to cleaning by hand.
A Word of Warning: I've heard too many horror stories from collectors who thought a "sturdy" looking bottle could handle it, only to pull it out in pieces. It’s just not worth the risk.
How to Safely Remove a Stuck Cork or Stopper
A stopper that won't budge is incredibly frustrating. Your first instinct might be to pull harder, but that's a quick way to snap the neck of the bottle. Patience, not force, is the key here.
Before you get aggressive, try a gentler approach:
- Warm Water Trick: Submerge just the neck of the bottle in a bowl of warm (not hot!) water for about 10-15 minutes. The glass will expand ever so slightly, which is often just enough to break the seal.
- A Little Lubrication: If the soak doesn't do it, dry the area and apply a few drops of olive or mineral oil right at the seam between the stopper and the bottle. Give it an hour or more to work its way down into the gap.
Once you’ve prepped it, wrap a thick towel around the stopper for a better grip. Instead of twisting or yanking, gently wiggle it back and forth. This slow, rocking motion is far safer and more effective at breaking the seal.
What is "Sick Glass" and Can It Be Cured?
That cloudy, sometimes rainbow-like film you see on the inside of some old bottles has a name: sick glass. And unfortunately, it’s as bad as it sounds. This isn't just dirt or a mineral deposit; it's a chemical breakdown of the glass itself.
For decades, moisture sitting inside the bottle has slowly leached minerals out of the glass, causing permanent etching on the surface. For very mild cases, you might see a slight improvement by soaking it with a denture tablet or some diluted vinegar, but this rarely removes the haze completely.
It’s important to accept that severe sick glass is irreversible. The damage is physically etched into the glass and can't be washed away. Trying to scrub it with abrasives will only scratch the surface and make it look worse. Your best bet is to clean the bottle gently and embrace the iridescence as a unique part of its history.
Uncovering the history and value of your finds is part of the fun. With the Curio app, you can instantly identify, appraise, and learn the story behind your vintage glass bottles and other treasures right from your phone. Download Curio and let your antiques tell their story.