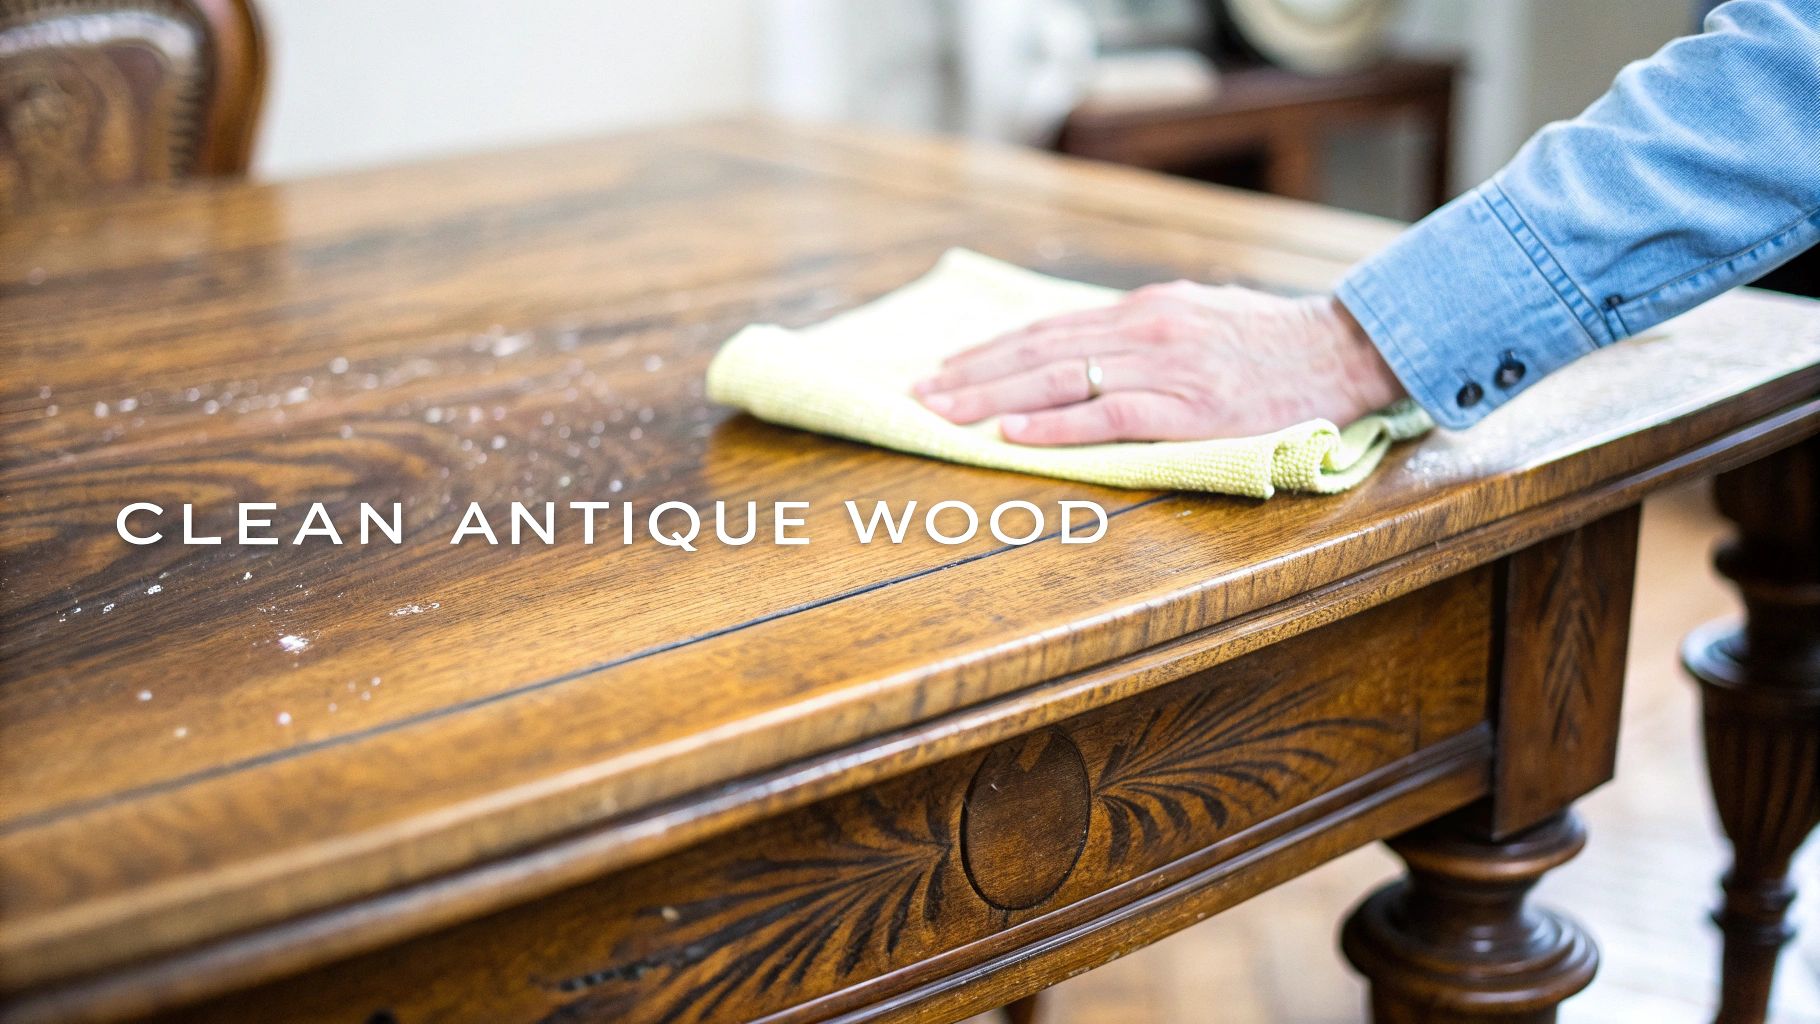
Here's the secret weapon for successfully cleaning antique wood: figure out the finish first, and then reach for the gentlest method you can. Most of the time, all an old piece needs is a light dusting with a pH-neutral soap and a barely damp cloth—no harsh chemicals required. This approach keeps that beautiful, aged patina and protects the story held within the wood.
What to Know Before You Clean Antique Wood
Before a single drop of cleaner touches that surface, take a moment to really look at the piece. The single most important step in this whole process happens before you even get the wood wet. Guessing wrong about the finish can cause real, irreversible damage, turning a quick clean-up into a nightmare restoration project.
Knowing what you’re dealing with is everything. Old-school finishes like shellac, varnish, and lacquer all have their own quirks and react very differently to cleaners and even water. A cleaner that’s perfectly safe for a tough varnish finish could melt a delicate shellac finish right off the wood.
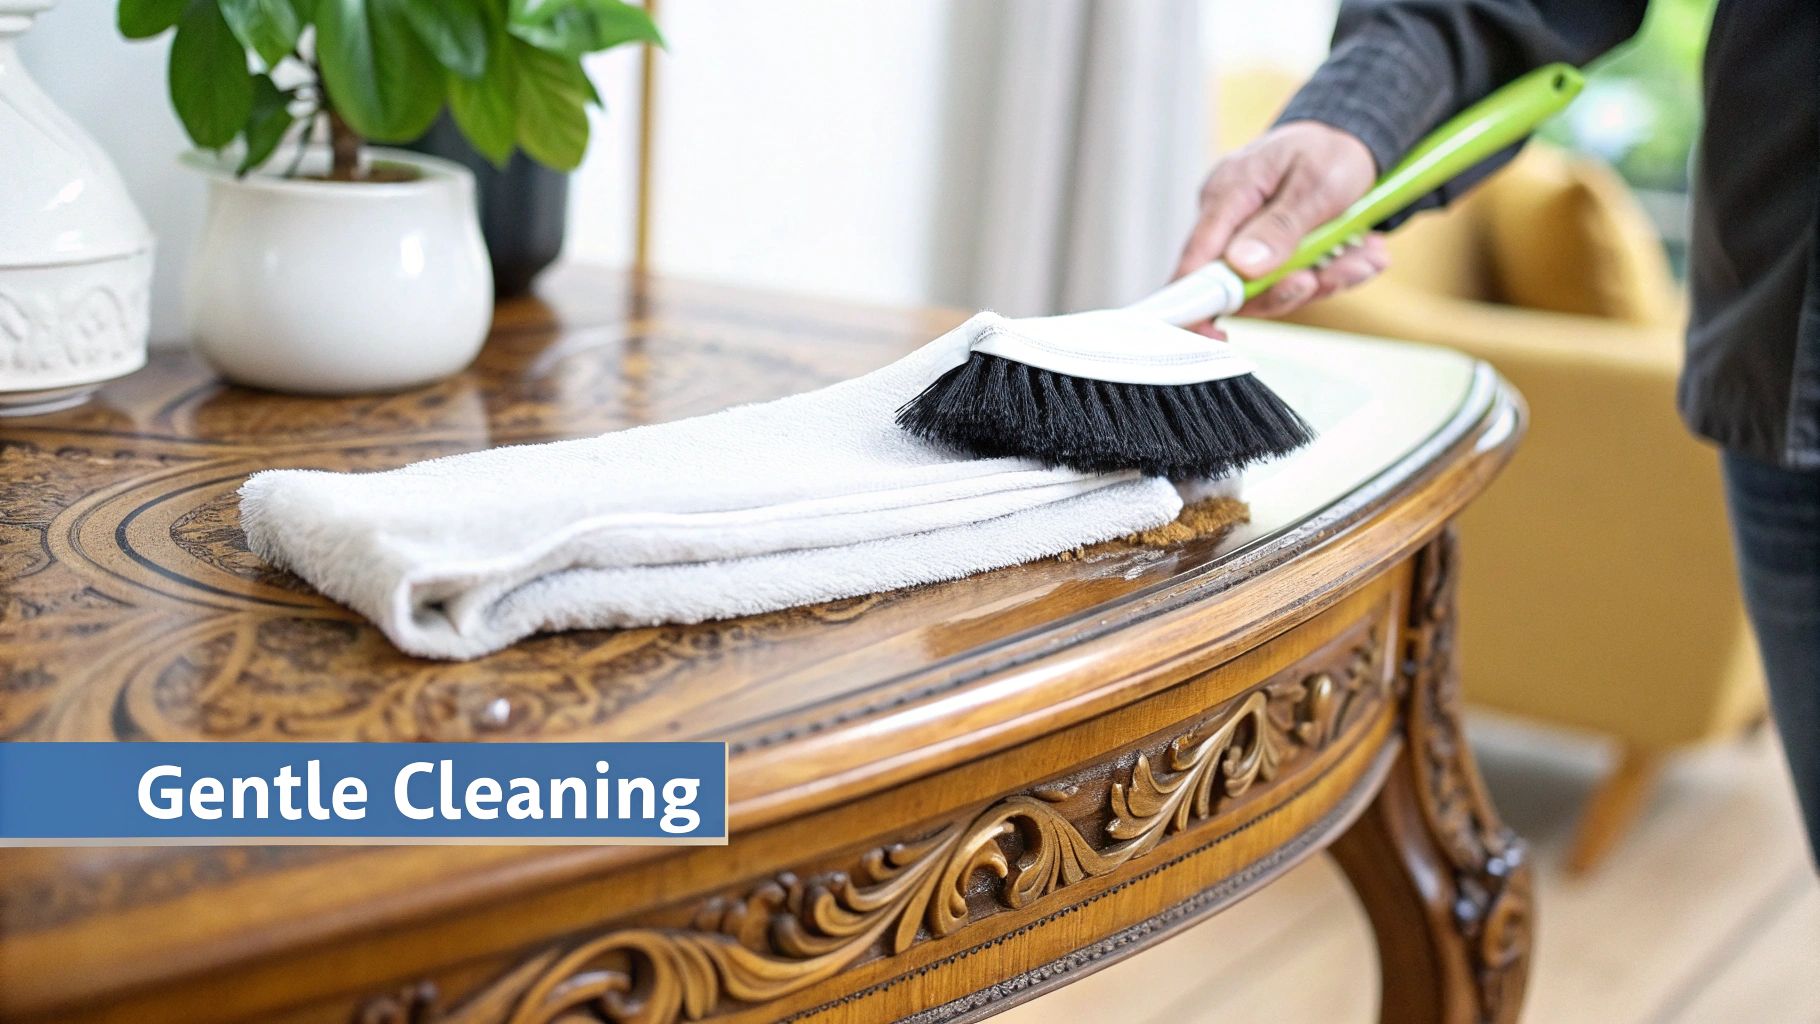
Start with a Thorough, Gentle Dusting
Always, and I mean always, start by getting rid of all the surface dust and grime. I like to use a soft-bristled brush—an artist's paintbrush works wonders—to gently coax dust out of all those ornate carvings and tight corners.
After that, go over the whole thing with a dry microfiber cloth to pick up what's left. Don't skip this. If you start scrubbing with a wet cloth while there's still grit on the surface, you're basically sanding fine scratches right into the finish.
A Quick Tip from Experience: Ditch the feather duster. It feels classic, but it mostly just rearranges the dust. Worse, the quills can have sharp points that might scratch a fragile finish. A good microfiber cloth is your best friend here.
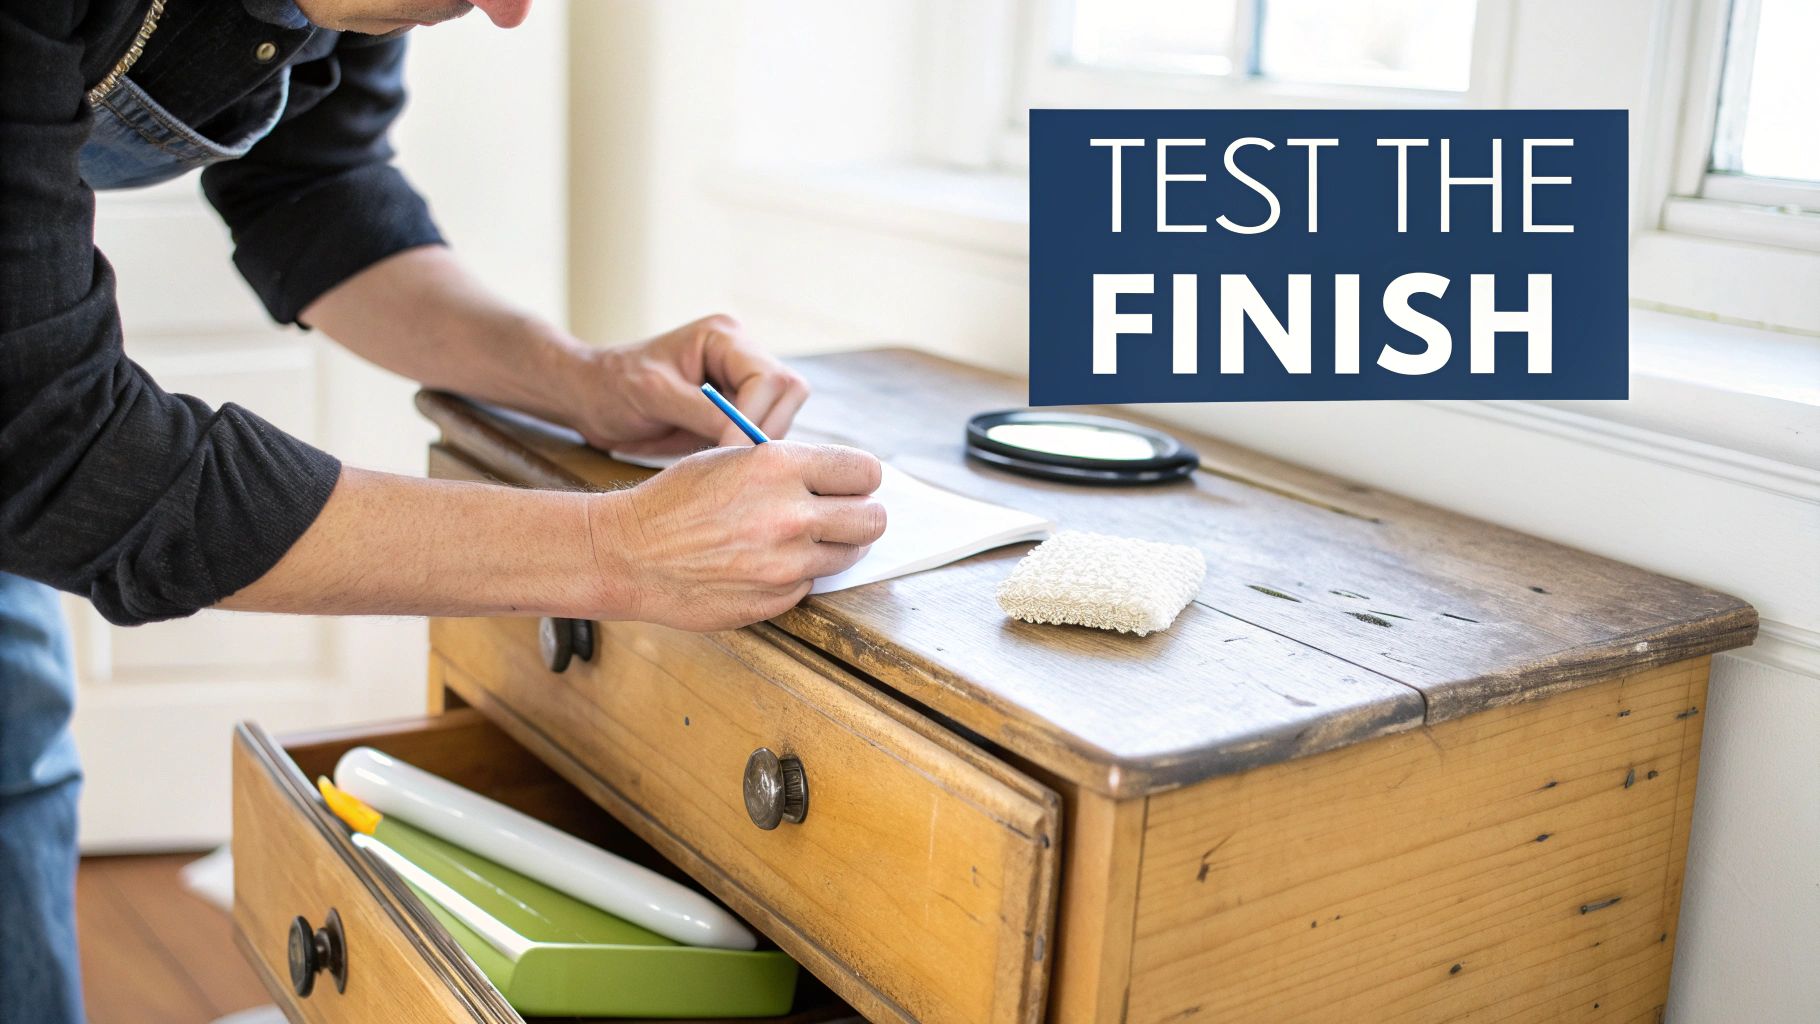
Figure Out the Finish with a Simple Spot Test
Now that it's dust-free, you need to play detective and identify the finish. The best way is to do a little spot test somewhere no one will ever see, like on the back of a leg or the underside of a shelf.
It’s easier than it sounds. Before you start dabbing things on your furniture, here’s a quick way to tell what you’re likely working with.
Quick Guide to Identifying Your Wood Finish
Use these simple spot tests in an inconspicuous area to figure out what kind of finish is on your antique wood.
| Finish Type | Simple Test Method | What to Look For |
|---|---|---|
| Shellac | Dab a cotton swab in denatured alcohol and gently touch the surface. | The finish will feel sticky or start to dissolve. |
| Lacquer | Use a cotton swab dipped in lacquer thinner. | Lacquer will dissolve very quickly on contact. |
| Oil, Wax, or Varnish | Place a few drops of water on the surface. | Water will bead up on a healthy finish. If it soaks in, the finish is worn or gone. |
Once you've done this test, you'll know exactly how to proceed with cleaning. If you're tackling larger surfaces like flooring, this detailed guide to cleaning old hardwood floors has some great tips that often apply to furniture, too.
Tackling Everyday Grime the Right Way
When it comes to the dust and dirt that builds up on antique furniture over time, you can—and should—skip the harsh chemicals. I've found that one of the most effective and safest cleaning solutions is one you can whip up right in your kitchen with just a couple of basic ingredients.
The real secret here is to use distilled water. It might seem like a small detail, but tap water is full of minerals that can leave a cloudy film on old, delicate finishes. Distilled water gives you a pure, residue-free clean that lets the wood's character truly come through.
Mixing Your Gentle Cleaning Solution
To get started, just add a few drops of a mild, pH-neutral dish soap to a small bowl of warm distilled water. You're not looking for a foamy bubble bath here—just a hint of suds is all you need to lift the grime without oversaturating the wood.
For the best results, stick to this simple process:
- Grab a soft cloth. A lint-free microfiber cloth or even a piece of an old cotton t-shirt works perfectly.
- Dampen, don't soak. Wring out the cloth until it’s barely damp to the touch. This is key.
- Always wipe with the grain. Following the direction of the wood grain helps avoid streaks and minimizes the risk of tiny scratches.
- Dry it right away. Come behind with a separate, clean, and dry cloth to wipe off any lingering moisture.
Being this careful isn't just for show. Too much water can make the wood swell, cause the finish to crack, or even lift fragile veneer right off the piece. It’s a principle that applies to many antique materials; for instance, our guide on how to clean antique brass fixtures also emphasizes a gentle, cautious approach.
Mastering a simple, safe cleaning method is about more than just upkeep. You're preserving the piece's integrity and enhancing its historical and aesthetic value for any future buyers or collectors.
Well-maintained pieces are the backbone of a strong market. In fact, the antique furniture market is projected to hit around USD 350 million by 2025, and a lot of that value is driven by skilled preservation. You can find more insights on the demand for well-kept antique pieces online. This simple cleaning method is really the first step in that preservation process.
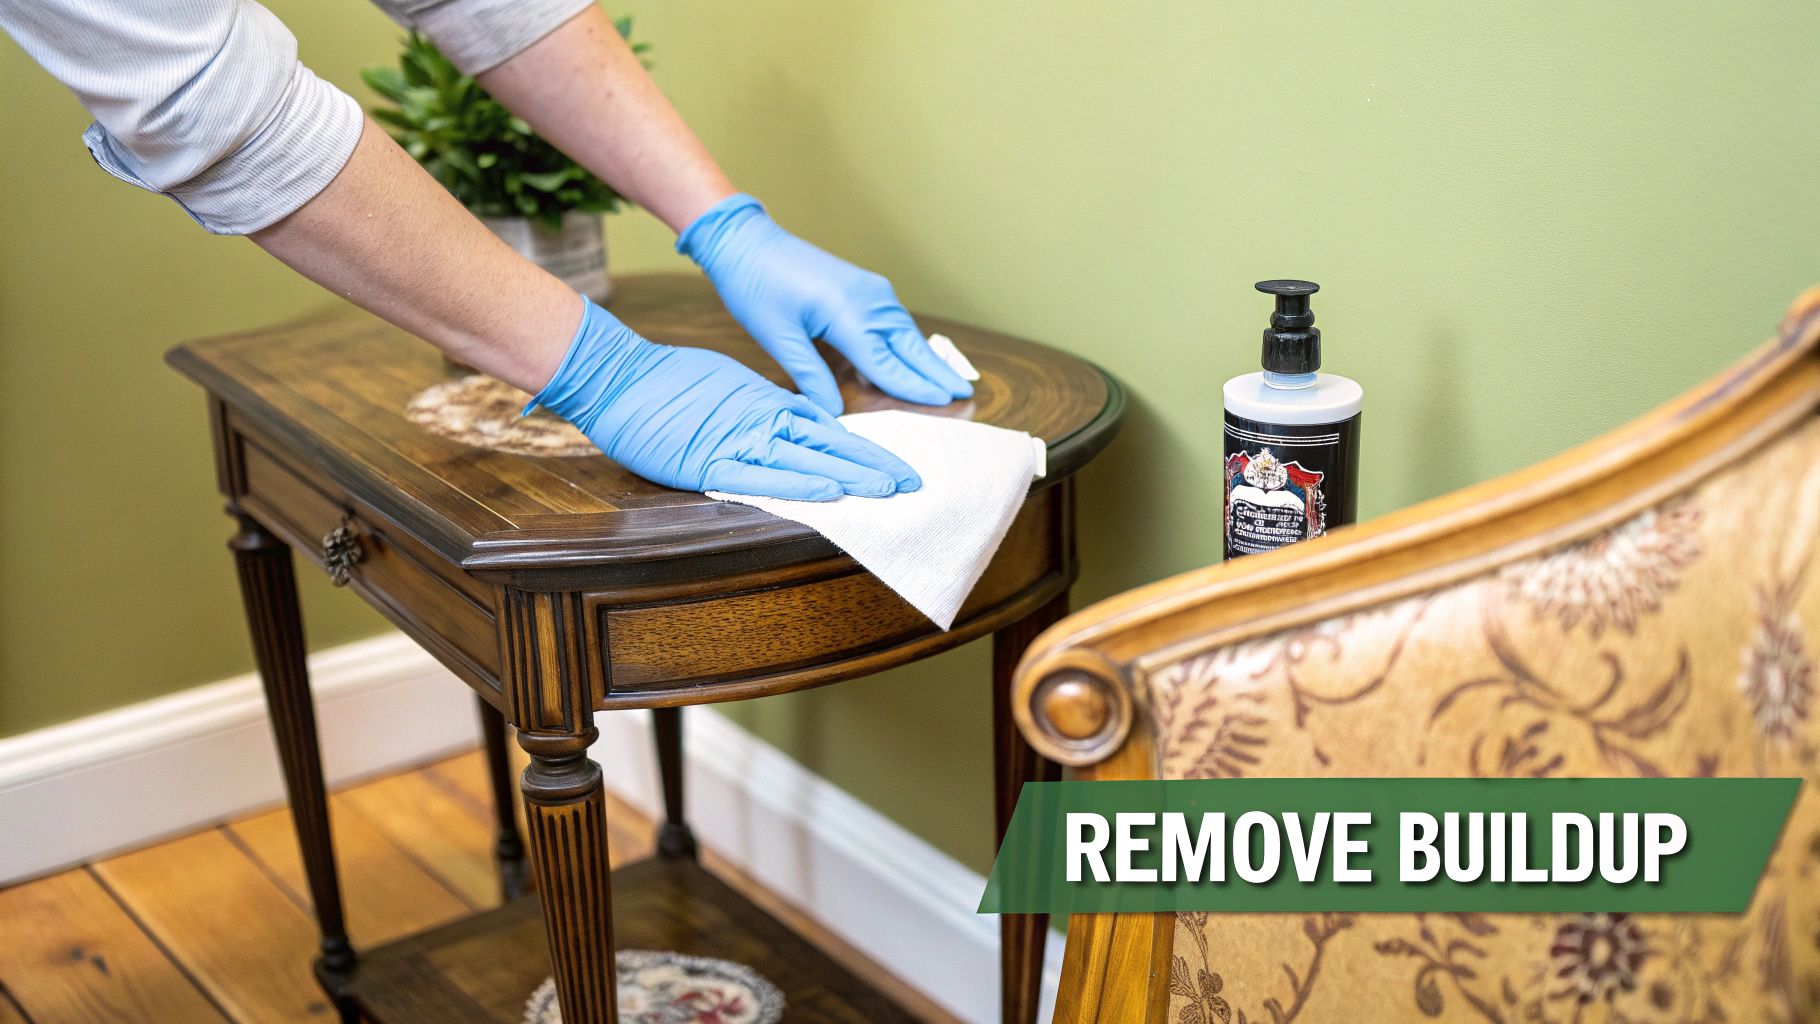
Tackling Stubborn Buildup and Grime
Every now and then, you'll encounter a piece that needs more than a simple dusting. We're talking about decades of caked-on furniture polish, sticky cooking grease from a kitchen, or even a layer of smoke residue that has turned the finish dull and grimy. A gentle wash just won't cut it.
For these tougher cleaning jobs, my go-to is odorless mineral spirits, which you might also see sold as white spirit. This is a mild, petroleum-based solvent that works wonders at dissolving old wax and oily buildup. The best part? When used correctly, it’s safe for most original antique finishes like shellac, lacquer, and old varnish.
How to Safely Use a Solvent
Let's say you've picked up a beautiful old side table from a flea market, but it's sticky to the touch and completely lacks any shine. This is the perfect time to bring out the mineral spirits. First things first: find a well-ventilated space to work and put on some protective gloves.
- Less is More: Lightly dampen a soft, clean cloth with the mineral spirits. You don't want it soaking wet, just damp enough to do its job.
- Work Methodically: Gently wipe a small section at a time, always following the direction of the wood grain. You should see the grime and old wax lifting right off onto your cloth.
- Wipe Away the Gunk: Immediately follow up with a separate, clean, dry cloth to wipe off the dissolved residue. Keep turning your cloths to a fresh side so you aren't just smearing the dirt around.
Quick Tip: You're cleaning the gunk off the finish, not removing the finish itself. If your cloth starts picking up the actual color of the wood stain (not just brown grime), stop what you're doing right away. That means you're going too deep.
As you work, you might notice the piece has metal hardware that could also use some love. The principles of gentle cleaning often carry over, and learning how to clean a bronze statue can give you some great parallel tips for handling aged materials carefully.
Curious about what mineral spirits actually are? Here’s a look at the chemical structure.
This mix of hydrocarbons is what makes it so good at breaking down waxy, oily substances without being too harsh on the delicate finish underneath. It’s exactly why professional restorers have relied on it for years to safely bring antique wood back to life.
How to Nourish and Protect Cleaned Wood
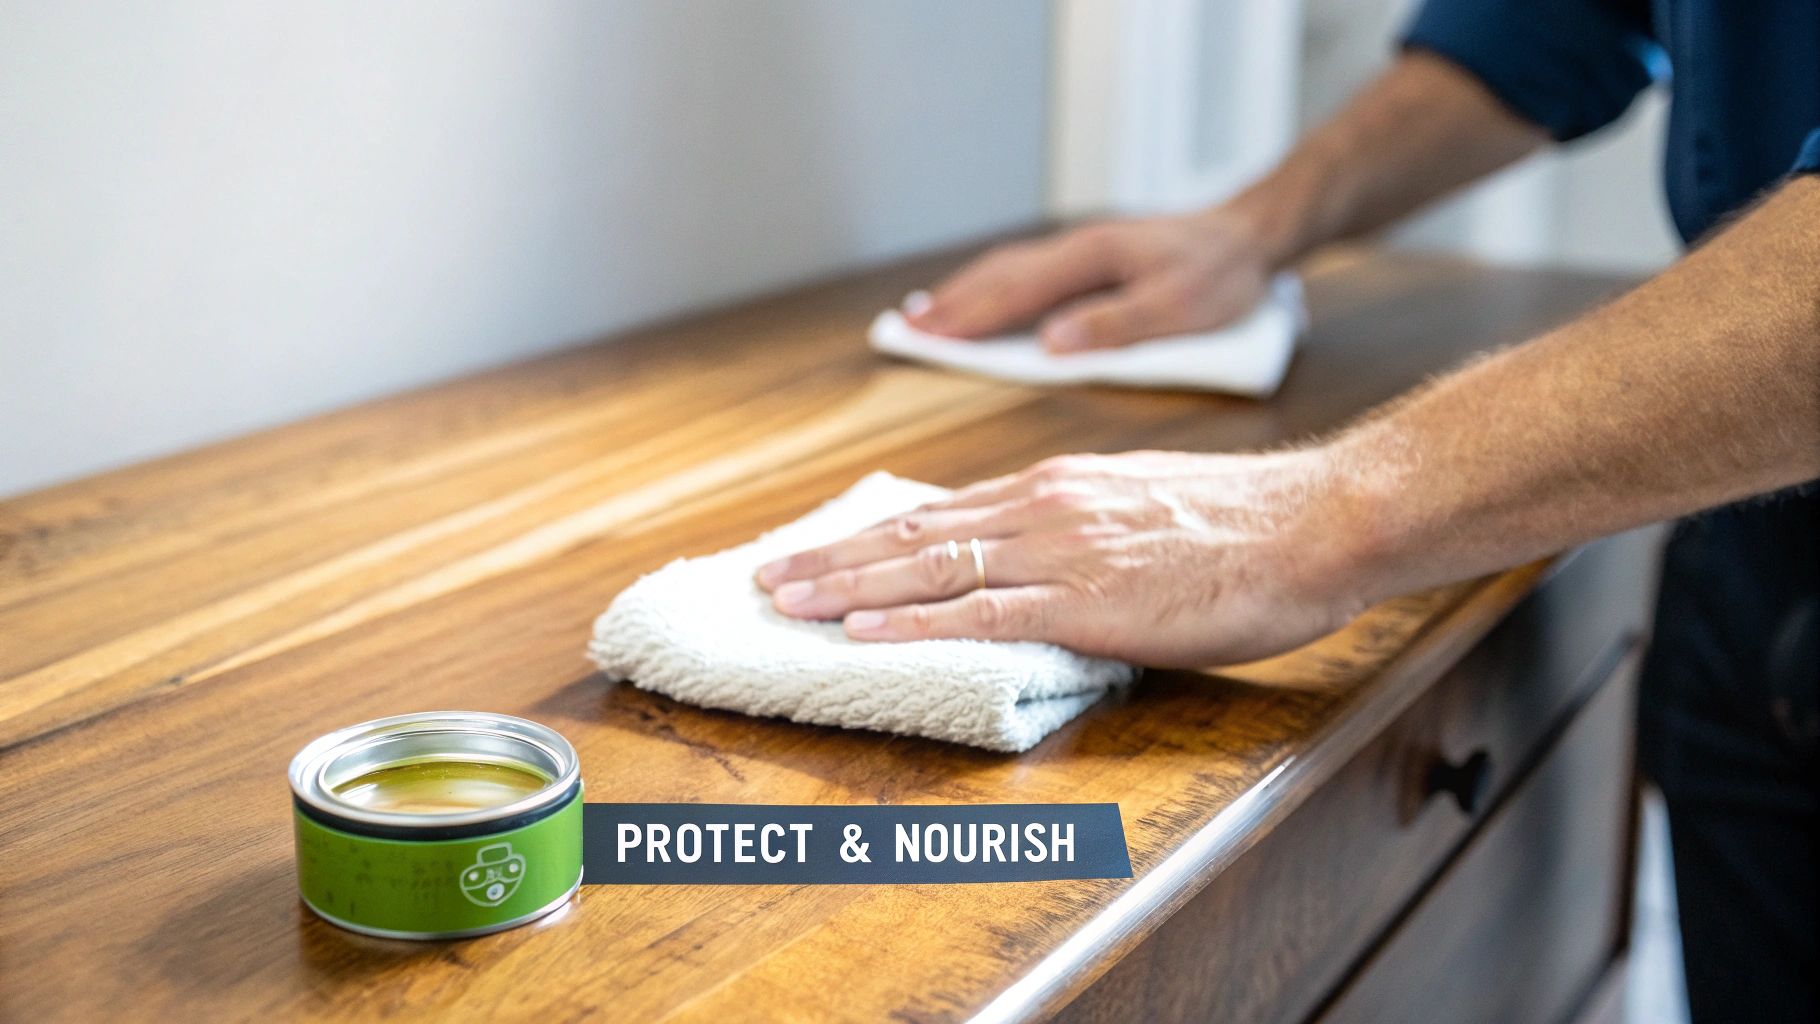
After you've gently lifted away years of grime, the wood's finish can look a little dull or "thirsty." Don't panic—this is totally normal. Now for the fun part: bringing back that soft, warm glow and adding a vital layer of protection.
Think of it like putting on moisturizer after washing your face. It's all about revitalization and creating a barrier against dust, moisture, and everyday life. Your two main go-to options here are a quality paste wax or a good conditioning oil. The right choice hinges on the type of finish you identified earlier.
Choosing Between Wax and Oil
For those hard, sealed finishes like varnish, shellac, or lacquer, a silicone-free paste wax is the gold standard. It buffs out to a beautiful, subtle sheen—not a high-gloss shine—and provides a tough shield against spills and dust. I always recommend a carnauba-based wax for this job.
But if you're working with an oil finish (like tung or linseed oil), it needs to be refreshed with more of the same. A light coat of a conditioning or furniture oil will sink right into the wood, restoring its rich color and depth. Trying to put wax on top of an oil finish is a bad idea; it can block future oil treatments from penetrating properly.
A Quick Tip from Experience: When in doubt, always go with wax. It sits on top of nearly any finish without causing problems, making it the safer bet by far. Smearing oil over a sealed varnish or shellac finish won't do anything but leave you with a sticky, greasy mess that's a magnet for dust.
Applying either one is straightforward but takes a little patience. Use a clean, soft cloth to apply a very thin, even layer. Let it sit for about 15-20 minutes until it looks hazy, then grab another clean cloth and buff it off until you get a lovely, deep glow.
With your antique piece now clean and nourished, it’s a good idea to think about the bigger picture, like maintaining hardwood floors and other wood surfaces in your home. This final protective step not only makes the piece look fantastic but also makes future cleanings a breeze.
Why Preserving Antique Wood Is a Big Deal
When you decide to clean antique wood instead of just letting it go, you’re doing so much more than tidying up an old piece of furniture. You're actually connecting a small, personal project to a much larger story of cultural and environmental care.
Each piece you bring back to life is a small victory for history, a nod to the artisans of a bygone era. Instead of adding to a landfill, you’re embracing a more sustainable path. This choice champions a circular economy where craftsmanship and history are valued far more than today's disposable goods.
The Bigger Economic Impact
That decision also sends ripples through an entire industry. Every time someone restores an old chest or table, they're supporting the reclaimed lumber and wood recycling markets. This directly reduces the need to harvest new timber, making it a surprisingly powerful act.
This isn’t just a small-time hobby, either. The global reclaimed lumber market was valued at an impressive USD 54.34 billion in 2022 and is projected to climb to USD 78.16 billion by 2030. What's driving this? A growing awareness of our environmental footprint and a renewed appreciation for materials with a past. You can see the full picture in this report on the growth of the reclaimed lumber market.
By choosing to clean and preserve, you become a steward of history. You are not just maintaining furniture; you are curating a piece of the past, ensuring its story and craftsmanship are passed down to the next generation.
Thinking about your furniture this way changes everything. Once you understand the history locked inside a piece—and its potential value—your appreciation for it deepens. If you're curious about what your item might be worth, our guide on how to value antique furniture is a great place to start.
Ultimately, every time you gently clean a piece of antique wood, you're making a conscious choice. It's a vote for sustainability, a salute to history, and a real commitment to preserving beauty for a more thoughtful future.
Your Top Questions About Cleaning Antique Wood, Answered
When you’re standing in front of a piece of history, whether it's a cherished family heirloom or a fantastic flea market find, it’s only natural to feel a little hesitant. A bit of caution is a good thing! Let’s walk through some of the most common questions I hear so you can confidently clean antique wood without causing any harm.
It's so easy to grab what's under the sink, but many everyday cleaners can do more harm than good to old, fragile finishes. Let's clear up some of the confusion right from the start.
What Cleaners Are a Definite "No"?
I get asked about things like Murphy Oil Soap and vinegar all the time. My advice? Keep them far away from your antiques.
Here’s why:
- Murphy Oil Soap has a reputation for being a wood-care classic, but it often leaves an oily film behind. Instead of cleaning, this residue becomes a magnet for dust and dirt, eventually creating a dull, sticky mess.
- Vinegar is acidic, plain and simple. For finishes like shellac or varnish, that acidity can be a disaster, causing the finish to become cloudy, dull, or even start to dissolve.
Your safest bet is always a very mild, pH-neutral soap mixed with water. It's gentle and gets the job done without the risk.
A Pro Tip From the Field: How do you know if you're cleaning off dirt or stripping the actual finish? Look at your rag. A brownish, grimy residue is good—that’s years of accumulated dirt. But if you start seeing the color of the wood stain on your cloth and the surface feels sticky, stop immediately. You're taking the finish off.
How Often Should I Be Cleaning and Waxing?
With antiques, less is almost always more. You can easily do too much of a good thing.
For routine care, a quick dusting with a dry microfiber cloth every week or so is plenty. This keeps surface dust from building up and grinding into the finish.
Save the deep cleaning (with that mild soap solution) for when it’s truly needed, maybe once a year or even less. As for waxing, think in terms of years, not months. A good quality paste wax provides a hard, protective layer that should only need to be applied every 2-3 years. Waxing too often creates a cloudy buildup that completely hides the beautiful grain you’re trying to show off.
Have a piece you're curious about? Let Curio be your guide. Snap a photo to instantly identify your antique, learn its history, and get an estimated value. Download the app today and uncover the stories hiding in your home. Find out more at https://www.curio.app.