Before you even pick up a cleaning cloth, the most important thing you can do for your antique furniture is to simply stop and look. I’ve seen it happen too many times—someone gets eager, grabs the wrong product, and causes damage that’s impossible to undo. The real secret to safe cleaning is knowing exactly what you're working with, from the wood's finish to any hidden structural problems.
First Steps in Antique Furniture Care
Think of yourself as part furniture detective, part conservator. Every antique has a story, and its surface is a big part of that history. Your first job, before you even think about cleaning, is to figure out what kind of finish you’re dealing with. Is it a fragile shellac that dissolves with alcohol? A more resilient varnish? Or a simple, hand-rubbed oil finish? Getting this wrong can strip a century-old finish in an instant, tanking the piece's value and charm.
This initial assessment isn't just a suggestion; it's the foundation of good restoration. And people are catching on. The market for professional furniture repair and care, which includes this kind of specialized cleaning, was worth about USD 2.1 billion in 2023 and is projected to nearly double by 2031. It just goes to show that taking the time to do things right is a smart investment.
Inspecting for Damage
First, get hands-on. Gently run your palms over every surface. Can you feel any veneer that’s starting to lift? Are any of the joints wobbly? Check the legs and corners, as that’s where you’ll usually find the most wear and tear. If you find a major issue like a deep crack or a loose leg, it's best to address that before you start cleaning. A cleaning cloth can easily snag on a loose piece of veneer and snap it right off.
Identifying the Finish
Here’s the most critical part of the entire process: figuring out the finish. Different finishes react very differently to cleaning agents. Your best friend here is a simple spot test performed on a hidden area, like the back of a leg or the inside of a drawer. If you want to dive deeper into construction styles and wood types, our comprehensive guide to identifying antique furniture is a great resource.
Pro Tip: Whatever you do, don't skip the spot test. I can't stress this enough. Taking just two minutes to test a small, hidden area can save you from a mistake that could take a professional restorer hundreds of dollars—and a lot of heartache—to fix.
To figure out what you're working with, you'll need to do a quick test. This simple process will tell you what the finish is made of, which in turn tells you exactly how to clean it safely.
Quick Finish Identification Test
Use this simple test in a hidden area to identify your antique's finish, which determines the appropriate cleaning method.
| Test Method (Using a Cotton Swab) | Result | Likely Finish |
|---|---|---|
| Dab with denatured alcohol | The finish gets sticky or starts to dissolve. | Shellac |
| Dab with lacquer thinner | The finish softens or dissolves. | Lacquer |
| Dab with mineral spirits | The finish doesn't react, but the swab picks up grime. | Oil Finish or Varnish |
| Dab with denatured alcohol and lacquer thinner | Neither solvent has any effect. | Modern Polyurethane |
Once you know the finish, you know your game plan. If a quick dab of denatured alcohol on a cotton swab makes the surface sticky, you've almost certainly got shellac—very common on furniture made before the 1930s. If alcohol does nothing, you might be looking at a tougher varnish or lacquer. And if the area just seems to get a little cleaner, it’s likely an oil finish. This one piece of information dictates everything you do next and ensures you protect the piece for years to come.
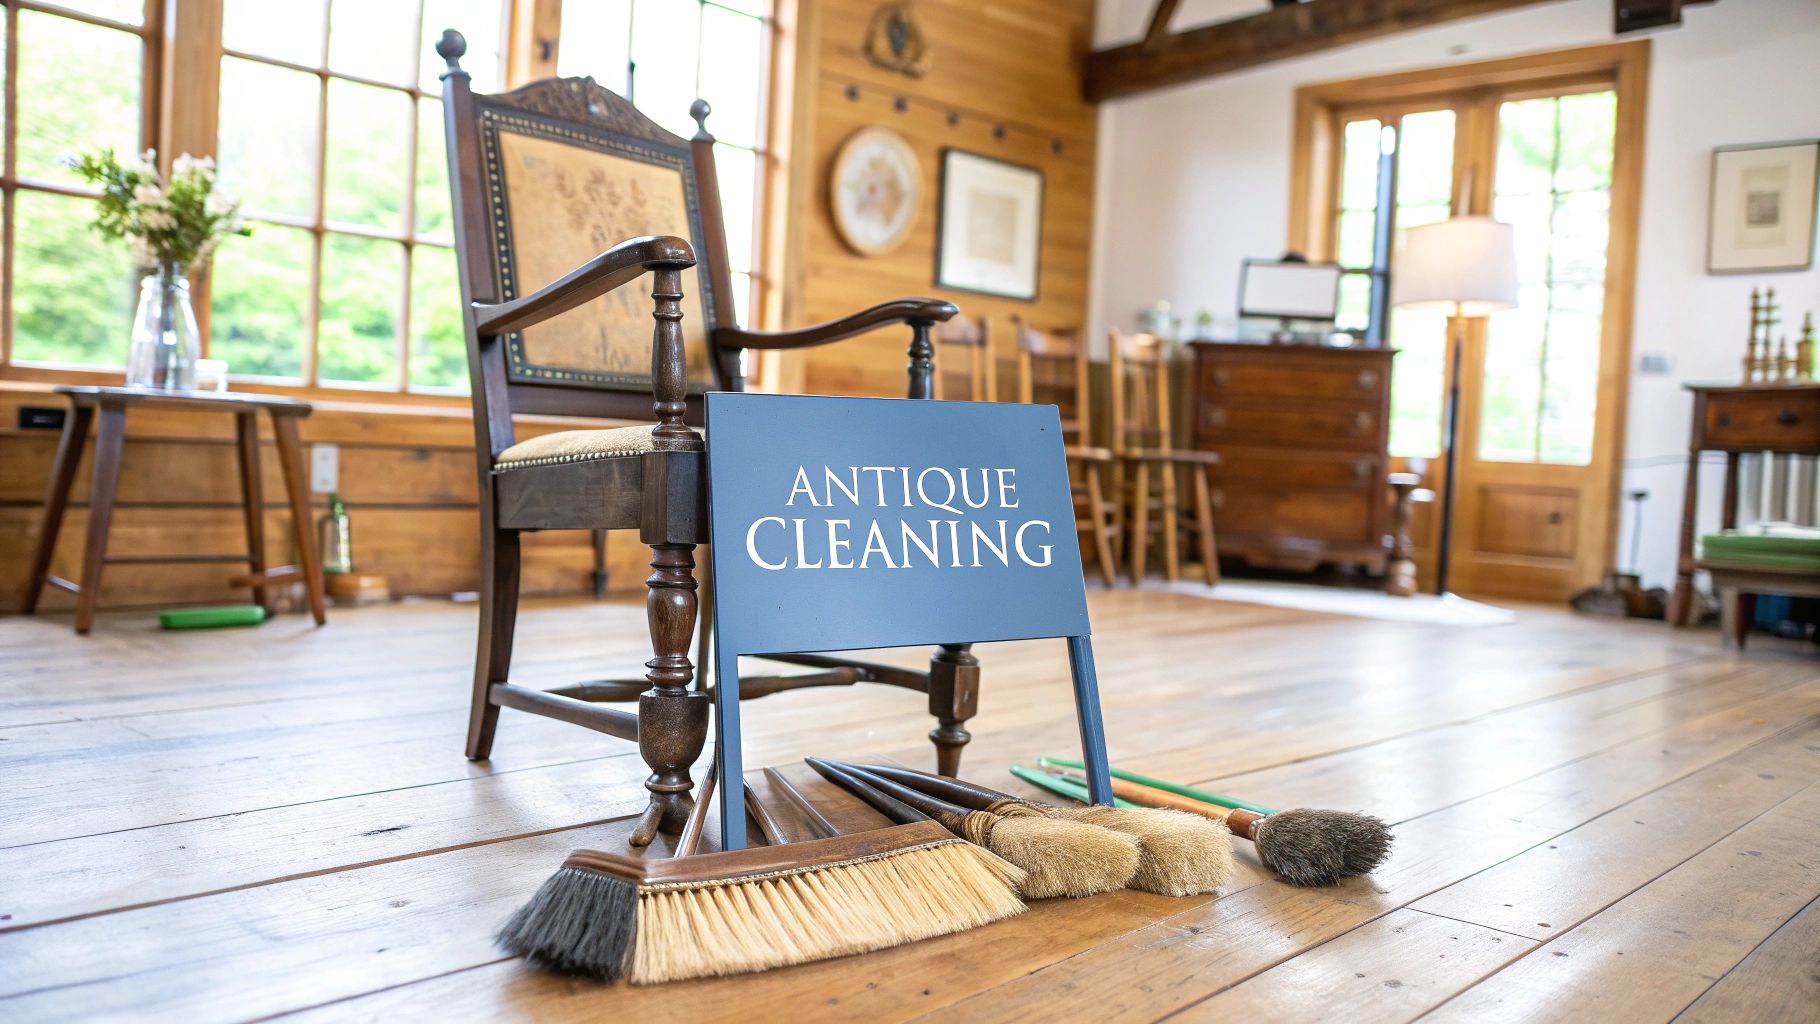
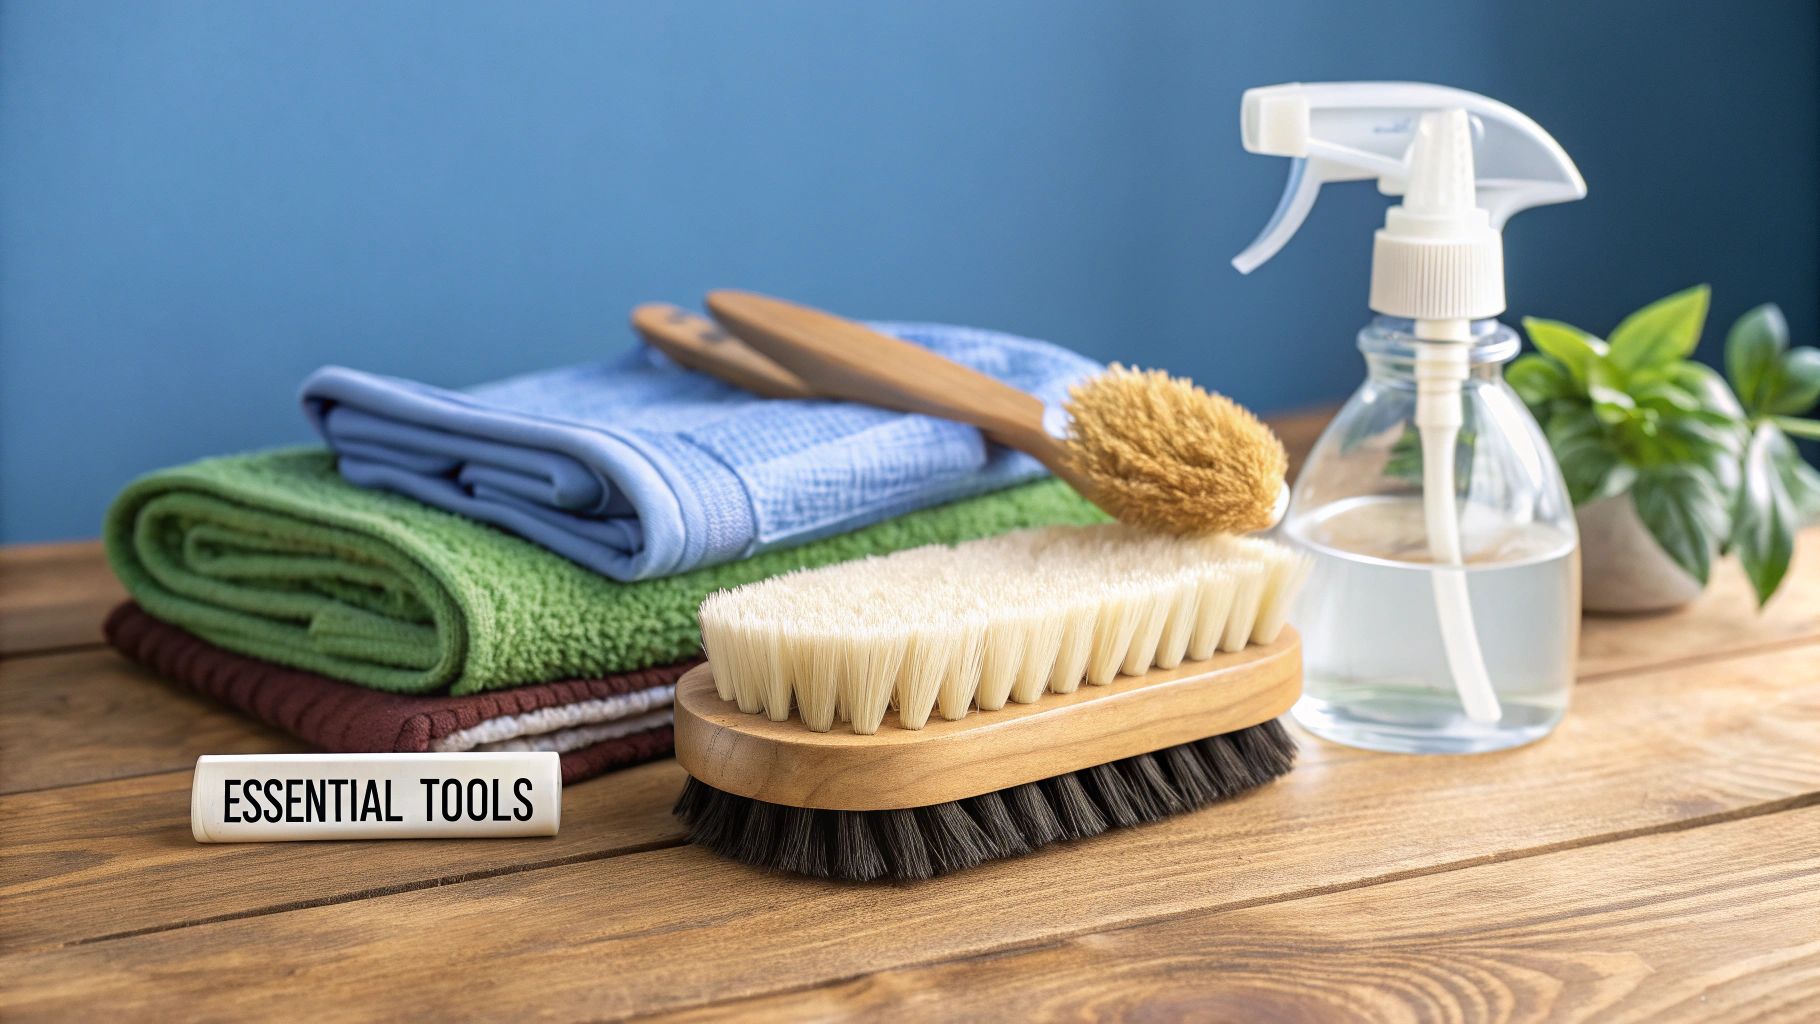
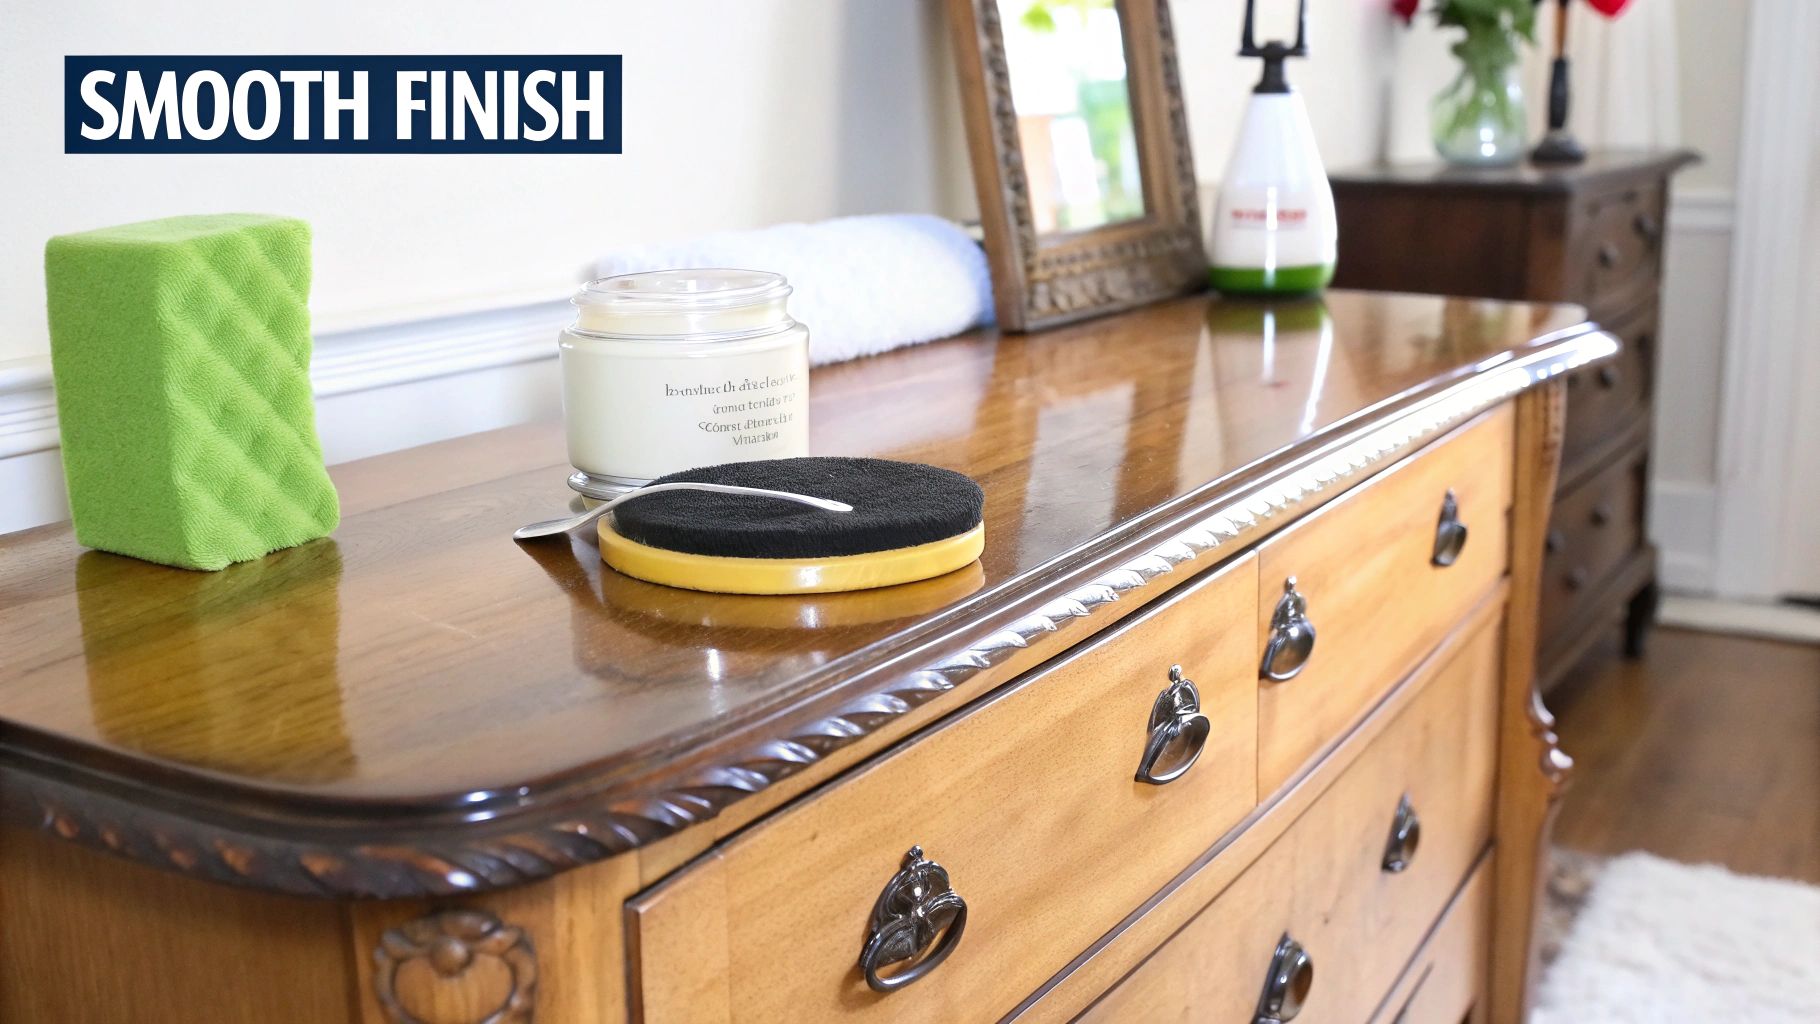
Gathering Your Gentle Cleaning Toolkit
When it comes to cleaning antique furniture, forget everything you know about modern cleaning supplies. Step away from the harsh, all-purpose sprays under your kitchen sink. After years of working with delicate pieces, I can tell you that the best tools for the job are almost always the simplest and gentlest ones.
Aggressive chemicals or those tempting silicone-based polishes can completely strip a fragile finish in the blink of an eye, causing damage that's impossible to reverse. Our goal is to put together a kit that cleans away the years of dust and grime without harming the wood or its beautiful, hard-earned patina.
It seems more and more people are catching on to this gentle approach. The market for specialized furniture care products, which includes cleaners for antiques, was valued at around $3.67 billion in 2024 and is only expected to climb. This tells me people are finally choosing thoughtful preservation over a quick, shiny fix. You can read more about these furniture care market trends at datahorizzonresearch.com.
The Essentials for Gentle Cleaning
Your toolkit doesn't need to be expensive or complicated. In fact, you probably have most of what you need already.
- Soft, Lint-Free Cloths: Old, clean cotton t-shirts or a stack of microfiber cloths are your best friends. They're soft enough to dust and wipe down a surface without leaving behind scratches or annoying bits of lint.
- Natural-Bristle Brushes: A soft paintbrush or a special detailing brush is a must-have. You'll use this to gently flick dust out of all those ornate carvings, joints, and tight corners where a cloth just can’t get.
- Cotton Swabs and Balls: These are my go-to for any kind of precision work. They’re perfect for testing a cleaning solution on a hidden spot or carefully cleaning around delicate hardware and inlays.
A mistake I see all the time is people reaching for paper towels. The wood fibers in paper towels can be surprisingly abrasive, creating microscopic scratches on delicate finishes like shellac or a French polish. Stick to soft cloth. It’s a non-negotiable.
Choosing Your Cleaning Solutions
Now for the liquids. Don't overthink this. For the vast majority of antique cleaning jobs I encounter, one of two simple, homemade solutions will do the trick.
- Mild Soap Solution: This is your starting point for tackling general dirt and grime. Just mix a few drops of a clear, pH-neutral dish soap into a bowl of distilled water. And yes, it has to be distilled water. The minerals in regular tap water can leave behind a cloudy film on the finish.
- Mineral Spirits: What if the soap and water don't cut it? For stubborn, greasy buildup or layers of old, sticky wax, odorless mineral spirits (also called white spirit) is the answer. It's a fantastic solvent that's safe for most clear finishes like varnish, shellac, and lacquer. Just be sure to test it on a small, hidden area first, and never use it on painted pieces.
That’s it. With just these few items, you're ready to safely and effectively tackle most cleaning projects, ensuring your antiques look their best for many more years.
A Practical Method for Cleaning Antique Wood
Alright, you've got your gentle cleaning kit assembled. Now for the satisfying part: putting it to use. I'm going to walk you through my go-to method for cleaning antique wood. It’s all about working methodically, starting with the driest, least invasive technique and only moving on if the piece truly needs it. This approach ensures we lift away the grime without harming the wood's delicate finish or its unique story.
The first step is always, always a thorough dry cleaning. Don’t even think about introducing moisture yet. Your goal is to get every speck of loose dust, dirt, and cobwebs off the surface first. If you don't, adding even a drop of water will just turn that grit into a muddy, abrasive slurry that can easily scratch the very finish you're trying to protect.
Grab a soft, dry microfiber cloth or a natural-bristle brush. As you wipe, follow the direction of the wood grain. It’s a small detail, but it makes a difference—it helps lift dust out of the wood’s tiny pores instead of grinding it further in.
Handling Intricate Details
Flat surfaces are easy, but antique furniture is known for its character—ornate carvings, tight joints, and other spots your cloth just can't reach. This is where you need to get a little more creative with your tools.
I once restored a Victorian walnut table with the most incredible, deep carvings. They were beautiful but packed with decades of dust. A cloth was completely useless. I spent the better part of an hour with a soft artist's brush, just patiently coaxing the grime out of every single nook and cranny. Only then could I even think about the next step. Patience is non-negotiable here.
- For Carvings: A soft, dry paintbrush is perfect for gently flicking dust out of tight crevices.
- For Corners: Use a vacuum with its soft brush attachment on the lowest suction setting. It carefully lifts debris without putting stress on the wood.
- For Hardware: A simple cotton swab is great for cleaning around pulls, knobs, and keyholes without snagging your cloth.
Remember, the goal of dry dusting is more than just cleaning; it's about preparing the surface. Sometimes, a piece looks fantastic after just a good dusting. If that's the case, stop there! You’ve avoided unnecessary wear on the finish.
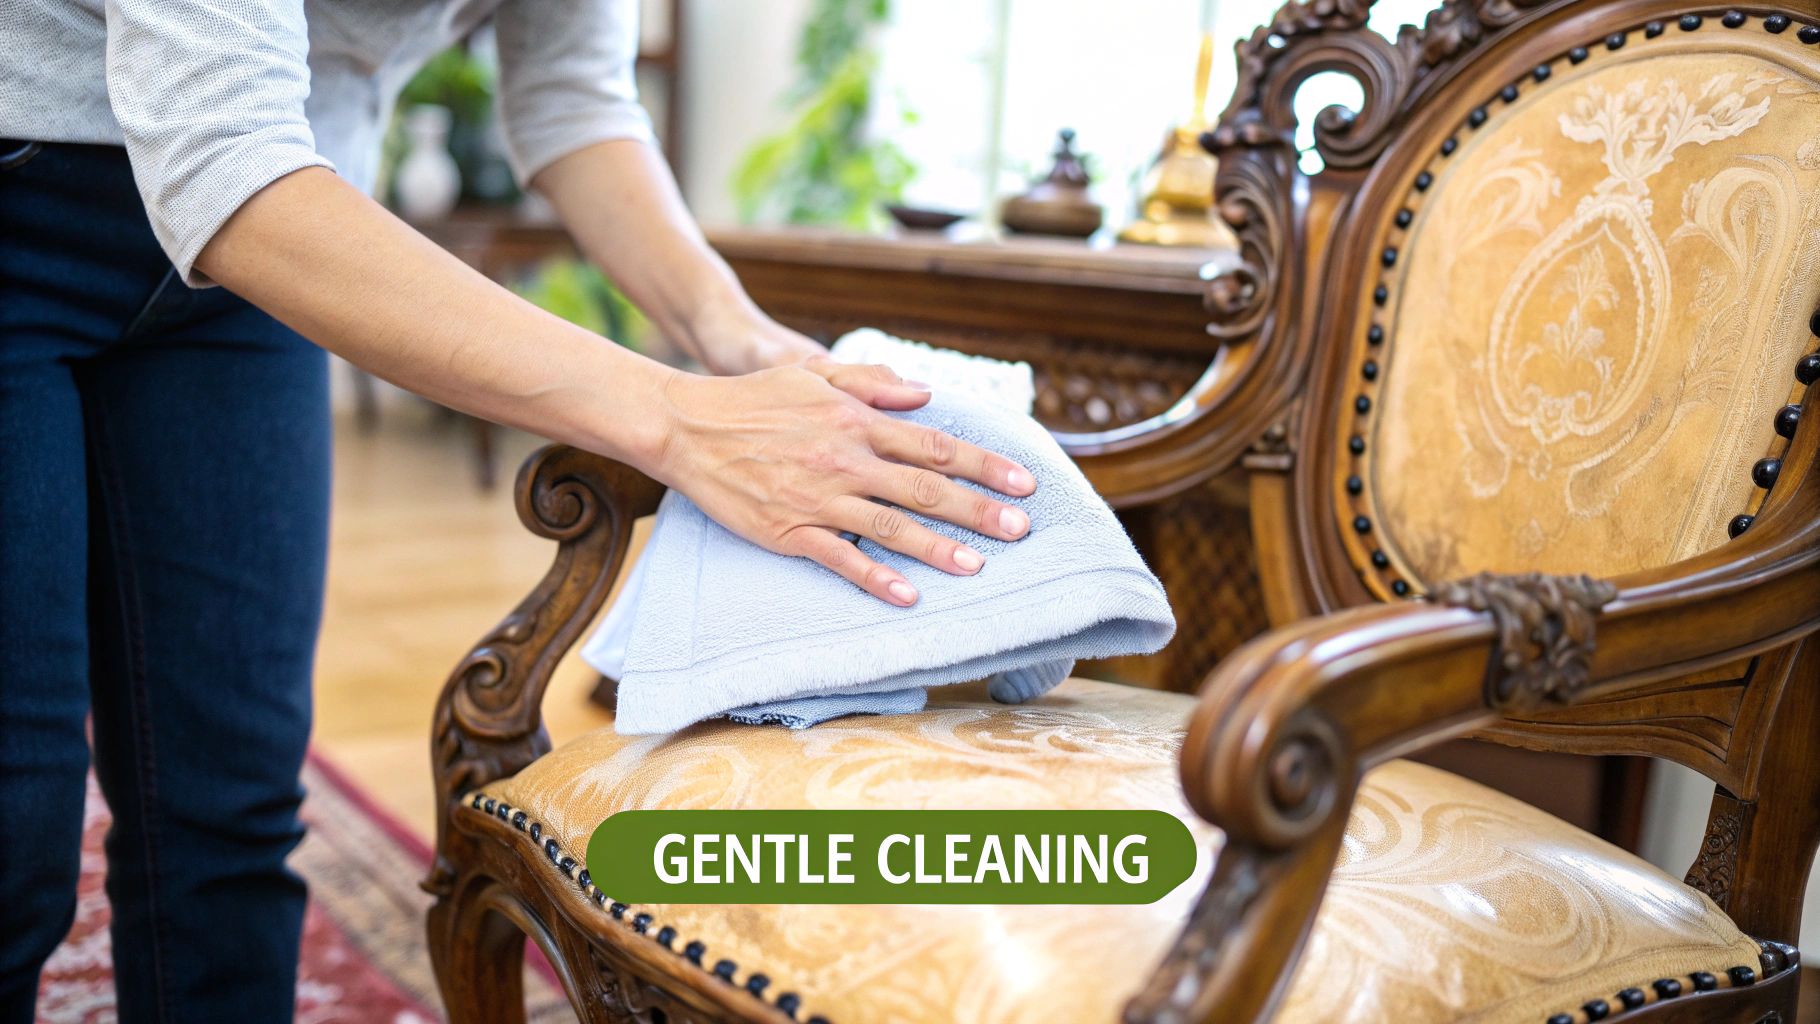
The Barely-Damp Wipe Technique
After you've removed all the loose dust, take a step back and assess the piece. If you still see built-up grime, fingerprints, or sticky spots, it's time for a very controlled damp wipe. I can't stress this enough: the key is using as little water as possible. Wood and water are not friends. Too much moisture will cause the wood to swell, warp, or even lift the finish right off.
Mix up your gentle cleaning solution: just distilled water and a single drop of pH-neutral soap. Now, take a clean, soft cloth, dip it in the solution, and wring it out completely. Then wring it out again. It should feel almost completely dry to the touch—not wet, not even damp.
Working in small, manageable sections, gently wipe the surface, always following the wood grain. Immediately after, take a separate clean, dry cloth and buff away any trace of moisture. Never let water sit on the wood, even for a few seconds. This two-step process lifts stubborn grime without letting the wood get oversaturated, keeping your antique safe and sound.
What About Upholstery and Metal Hardware?
So far, we've been talking all about wood. But let's be honest, many of the most stunning antiques have more going on than just their frames. Think about the worn velvet seat on a Victorian armchair or the beautiful brass handles on a Georgian chest of drawers. If you're going to clean your antique furniture properly, these details need just as much care.
I get it—tackling these other materials can feel a little scary. Fabric is delicate, and one wrong move with a metal cleaner could easily damage the wood surrounding it. But with the right approach, you can get every part of your piece looking its best.
Gently Reviving Antique Upholstery
Old fabrics, whether it's tough-as-nails horsehair or fragile silk, demand a soft touch. The biggest fears are making the colors bleed or causing the fibers to shrink or tear. That’s why your very first step should always be a good, gentle vacuuming.
Grab your vacuum’s soft brush attachment and turn it to the lowest suction setting. Go over the entire surface with care, paying extra attention to the seams and button tufts where years of dust have settled. You’ll be surprised how much of a difference this simple step can make.
If you’ve got a small spot or stain, you might be able to tackle it yourself, but first, you absolutely must do a colorfastness test. Don't skip this.
- Find a hidden spot: Pick an area that no one will ever see, like the fabric on the underside of a chair or a section tucked away behind a cushion.
- Dampen a white cloth: Get a clean, white cloth slightly damp with a bit of distilled water.
- Gently blot the area: Press the damp cloth onto that hidden spot and just hold it there for about 30 seconds.
- Check for color transfer: Lift the cloth. If any color has transferred onto it, stop right there. Water-based cleaning is off the table for this fabric.
If the fabric passes the test, you can try gently blotting the stain with a cloth dampened with a very mild upholstery shampoo. Follow that by blotting with a new cloth dampened with plain water, and then blot it dry. But for big, ugly stains or on very delicate materials like silk, your best and safest bet is always to call in a professional.
For projects where you're dealing with both delicate fabric and wood, looking at some advanced antique restoration tips can give you a better feel for how the pros navigate these challenges.
Polishing Metal Hardware Without Damaging Wood
Over time, metal hardware like brass pulls, knobs, and keyhole escutcheons will inevitably tarnish. A good cleaning can instantly brighten up the entire piece of furniture, but the number one rule is to protect the wood.
By far, the best method is to simply remove the hardware before you start polishing. If that’s not an option, get creative. Carefully slide a piece of cardboard or even a thin plastic spatula behind the hardware. This creates a simple but effective barrier, shielding the wood finish from your cleaner.
For a surprisingly effective and gentle cleaner for brass, you can whip one up in your kitchen. Mix equal parts salt and flour, then add just enough white vinegar to form a thick paste. Apply this paste to the hardware, let it sit for a few minutes, then give it a gentle scrub with a soft brush (an old toothbrush works great) before wiping it all clean. It's a classic trick that works wonders and is much safer for your antique than most harsh commercial polishes.
Long-Term Preservation And Maintenance
Once you’ve put in the work to clean a piece of antique furniture, the job isn’t quite finished. Real preservation is about what you do next. It’s about shifting from a one-time cleaning project to a long-term care strategy that will protect your piece for decades to come. This is how you turn a successful cleaning into a lasting legacy.
Think of it as safeguarding an investment. It's a growing field, too; the market for professional antique restoration services was valued at around $500 million in 2025 and continues to expand. This isn't just a trend—it's a clear sign that people are valuing heritage and sustainability more than ever. You can actually read more about the growth of the antique restoration market on marketreportanalytics.com.
The Protective Power of Waxing
After a thorough cleaning, one of the best things you can do for a piece is to apply a quality paste wax. The goal here isn’t to create a glassy, modern shine. Instead, a good wax feeds the wood and provides a breathable barrier that helps repel dust and minor spills.
I always recommend a silicone-free paste wax. Using a soft, clean cloth, apply a very thin layer, always working with the grain of the wood. Let it haze over according to the manufacturer's directions, then gently buff it off with another clean cloth. You'll be left with a soft, deep luster that looks authentic to the piece. Just remember, this is a once-a-year task at most. Over-waxing will just lead to a sticky, dull buildup.
I once worked on a beautiful mahogany sideboard that had become dull and lifeless. A good cleaning followed by a single, careful application of paste wax completely revived its deep, rich color. It didn’t look shiny or "restored"—it just looked healthy.
Controlling The Environment
The room your furniture lives in has a massive impact on its health. Wood is a natural material that breathes and reacts to its surroundings, so getting the environment right is crucial.
- Sunlight: Direct sunlight is the arch-nemesis of antique finishes. UV rays will bleach wood, fade colors, and can even cause the finish to crack and peel over time. If you can't avoid a sunny spot, look into UV-filtering films for your windows or make a point to rotate the furniture every so often.
- Humidity: Wild swings in humidity are terrible for old wood. Too dry, and the wood can shrink and crack. Too humid, and it can swell and warp, causing joints to fail. The sweet spot is a stable relative humidity between 45% and 55%. A simple humidifier or dehumidifier can be your best friend here.
- Temperature: Try to keep your antiques away from direct heat sources like radiators, vents, and fireplaces. The constant cycle of hot and cold can put immense stress on wood joints, eventually leading to structural damage.
To help you remember these key points, here’s a quick reference table.
Do's and Don'ts of Long-Term Antique Care
| Do | Don't |
|---|---|
| Do apply a thin coat of paste wax annually. | Don't use spray polishes or waxes containing silicone. |
| Do keep furniture out of direct sunlight. | Don't place items directly next to heat vents or radiators. |
| Do aim for a stable humidity level (45%-55%). | Don't let humidity levels fluctuate dramatically. |
| Do perform regular checks for wobbly legs or pests. | Don't ignore small issues until they become major repairs. |
| Do use coasters and felt pads to prevent damage. | Don't place wet or hot items directly on the surface. |
Following these simple rules will make all the difference in keeping your pieces in great shape for the long haul.
Routine Health Checks
Finally, get into the habit of giving your furniture a quick check-up every few months. Gently test for any wobbly legs or loose joints. It’s also a good idea to peek inside drawers and underneath the piece, looking for tell-tale signs of woodworm, like tiny exit holes or fine, sawdust-like powder called "frass."
Catching these problems early makes them infinitely easier (and cheaper) to fix. This proactive approach is the real secret to effective long-term care. And if you ever need to move your treasures, proper preparation is key; our guide on how to safely ship antique furniture offers some invaluable advice.
Answering Your Top Questions About Cleaning Antique Furniture
Even with a solid plan, cleaning an old piece of furniture for the first time can feel a little nerve-wracking. You're bound to run into situations that make you pause and wonder, "What do I do now?" That's perfectly normal.
Let's walk through some of the most common questions I hear from fellow collectors and enthusiasts. Think of this as having an expert on call to help you navigate those tricky spots and make the right call for your treasured pieces.
How Often Should I Actually Be Cleaning My Antiques?
This is probably the most frequent question I get, and the answer is refreshingly simple: only when it's genuinely needed. For day-to-day upkeep, a light dusting every week or two with a soft, dry microfiber cloth is all you need. This quick pass prevents abrasive dust from settling and dulling the finish over time.
A deeper clean, the kind that involves any liquid, should be a very rare event. You should only consider it when a piece is visibly dirty with sticky spots or built-up grime that dusting alone won't touch. For most furniture in a normal home environment, this might mean a proper clean once a year, or even less.
Key Takeaway: It's far easier to damage an antique by over-cleaning than by under-cleaning. Every time you introduce moisture, you risk putting a small amount of stress on a finish that could be over a century old. Always start with a simple dry dusting and only escalate from there.
Can I Use Kitchen Products Like Olive Oil or Vinegar?
I see this suggestion pop up online all the time, and it makes me cringe. Please, step away from the kitchen pantry! Using products like olive oil or vinegar is one of the quickest ways to cause problems for your antique furniture.
Here’s the real-world breakdown of why this is such a bad idea:
- Olive Oil: Unlike a proper furniture polish, olive oil doesn't cure or harden. It stays greasy, eventually turning rancid and creating a sticky magnet for every particle of dust and dirt in the room. You'll end up with a gummy mess that’s much harder to clean later.
- Vinegar: Vinegar is an acid. Its acidic nature can be incredibly harsh on old finishes, especially delicate ones like shellac or French polish. It can easily dull, etch, or even start to strip the finish right off, causing permanent damage.
When you need to damp-wipe a piece, stick with the gentlest option: a few drops of a pH-neutral soap in a small bowl of distilled water. It's safe, effective, and won't harm the patina.
What’s the Best Way to Handle Mold on an Antique?
Finding mold or mildew on a beloved piece is definitely alarming, but if you catch it early, it's usually manageable. The first priority is to prevent it from spreading. If you can, carefully move the furniture outside or to a garage on a dry, sunny day.
Start by gently vacuuming the moldy spots with a soft brush attachment on your vacuum. This will lift away the surface spores. Next, you can treat the area by lightly dampening a cloth with a 50/50 mix of denatured alcohol and distilled water. Critically, test this on a hidden spot first—like the back of a leg—as alcohol can react poorly with certain finishes. After wiping, let the area dry completely before bringing it back inside.
When Is It Time to Call in a Professional Restorer?
Knowing your own limits is the hallmark of a responsible antique owner. You should always call a professional for any problem that goes beyond simple surface cleaning. Don't be a hero; it's just not worth the risk.
Here are definite signs you need an expert:
- Structural Problems: Things like wobbly legs, loose joints, or broken carvings.
- Major Finish Damage: Deep gouges, extensive water stains, or a finish that is actively cracking and flaking off.
- Veneer Issues: Any lifting, bubbling, or missing chunks of veneer.
- Pest Infestations: If you see the tell-tale holes of active woodworms or other pests.
- Serious Mold: When the mold is widespread, deep in the wood, or keeps coming back after you've cleaned it.
Trying to DIY these kinds of repairs can easily lead to irreversible damage and tank the value of your piece. A good restorer has the right tools, materials, and experience to do the job correctly.
Feeling overwhelmed by a family heirloom or a recent thrift store find? Let Curio be your expert in your pocket. Snap a photo to instantly identify your antique, learn its history, and get an estimated value. Download Curio today at https://www.curio.app and let your antiques tell their story.