
Before you even think about polishing, the first step is always a gentle wash. Just use some warm water, a soft cloth, and a bit of mild, non-lemon-scented dish soap to get rid of any leftover food or grime. This simple pre-wash is crucial—it prevents tiny, abrasive particles from scratching the delicate surface when you start tackling the tarnish. If you've got some stubborn spots, a brief soak is okay, but never leave silver submerged for long periods.
The Careful Art of Cleaning Antique Silverware
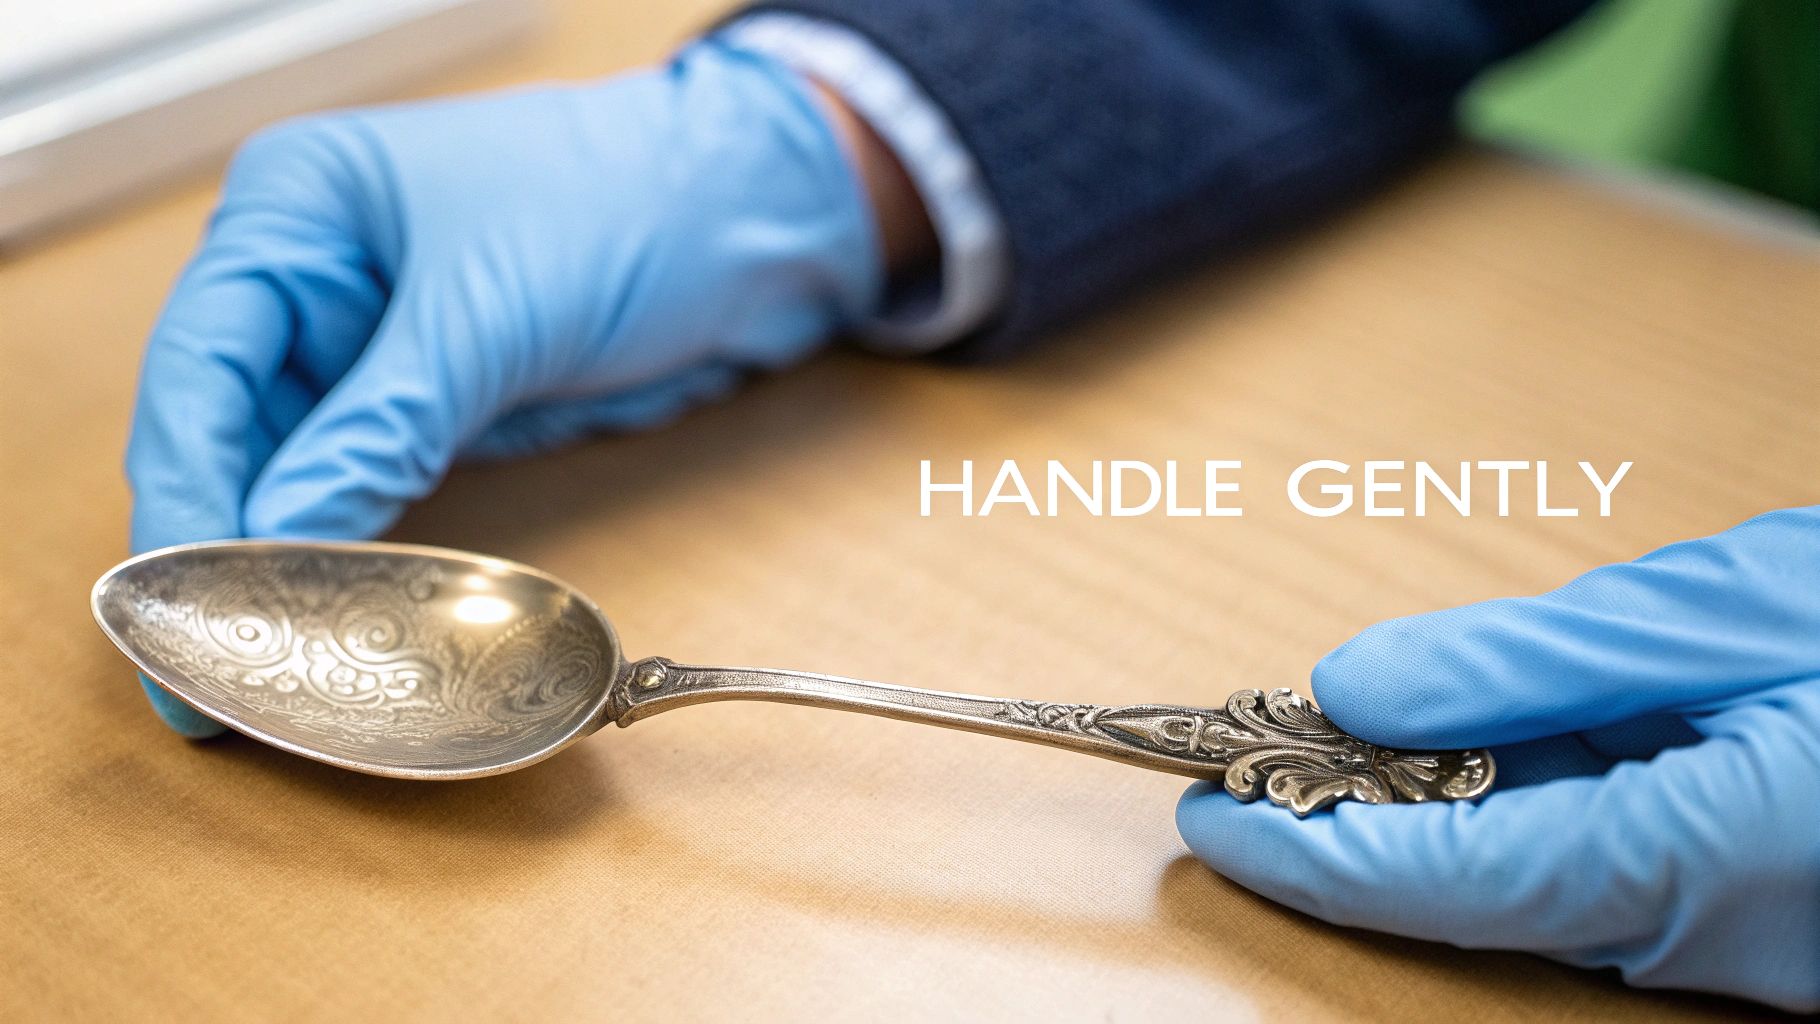
Holding a piece of antique silver feels like connecting with the past, doesn't it? But that feeling often comes with a healthy dose of fear—what if I damage it? Whether you've inherited a cherished family set or found a beautiful piece at a flea market, this guide is for you. We're moving past generic advice to focus on the specific, conservation-minded methods that will protect the integrity of your treasures.
Understanding the Goal of Antique Silver Care
With antique silver, the goal is preservation, not perfection. Many collectors actually value the soft, warm glow that develops in the crevices of older silver over time. This is called patina, and it adds character and history to a piece. Aggressive, heavy-handed cleaning can strip this away, potentially diminishing the item's value.
This guide will show you how to distinguish between a gentle, necessary cleaning and a harsh tarnish removal that does more harm than good. We’ll cover how to figure out what kind of silver you have and, most importantly, which tools and techniques to use—and which ones to avoid like the plague.
What You Will Learn
My aim here is to give you the confidence to care for your heirlooms properly. Here’s a quick look at what we'll cover:
- Identification is Key: First, we'll learn how to spot the differences between solid sterling silver and the more fragile silverplate. Using the wrong cleaning method can easily ruin a plated item.
- Safe DIY Methods: I'll walk you through gentle, non-abrasive techniques that lift tarnish without removing precious layers of silver.
- The Right Tools for the Job: We’ll talk about why soft cloths and specific applicators are your best friends, and why you should never, ever reach for a toothbrush or an abrasive sponge.
- Long-Term Preservation: Once the cleaning is done, the work isn’t over. I’ll share my best tips for storing your silver to keep tarnish away and your collection looking brilliant for years.
Think of yourself as a custodian, not just a cleaner. Every single time you polish a piece, a microscopic layer of silver is removed. The real goal is to minimize this loss, restoring the item's natural beauty while protecting its unique story for the next generation to enjoy.
Identifying Your Silver Before You Start Cleaning
Before you reach for a single polishing cloth, the most crucial thing you can do is figure out exactly what you're working with. Is it solid sterling silver or the more delicate silverplate? Getting this wrong can be a disaster.
Using a heavy-duty cleaning method on silverplate is like taking sandpaper to a thin wood veneer—you’ll strip the silver coating right off, destroying the piece and its value. A few minutes of investigation now will save you from a costly and irreversible mistake later.
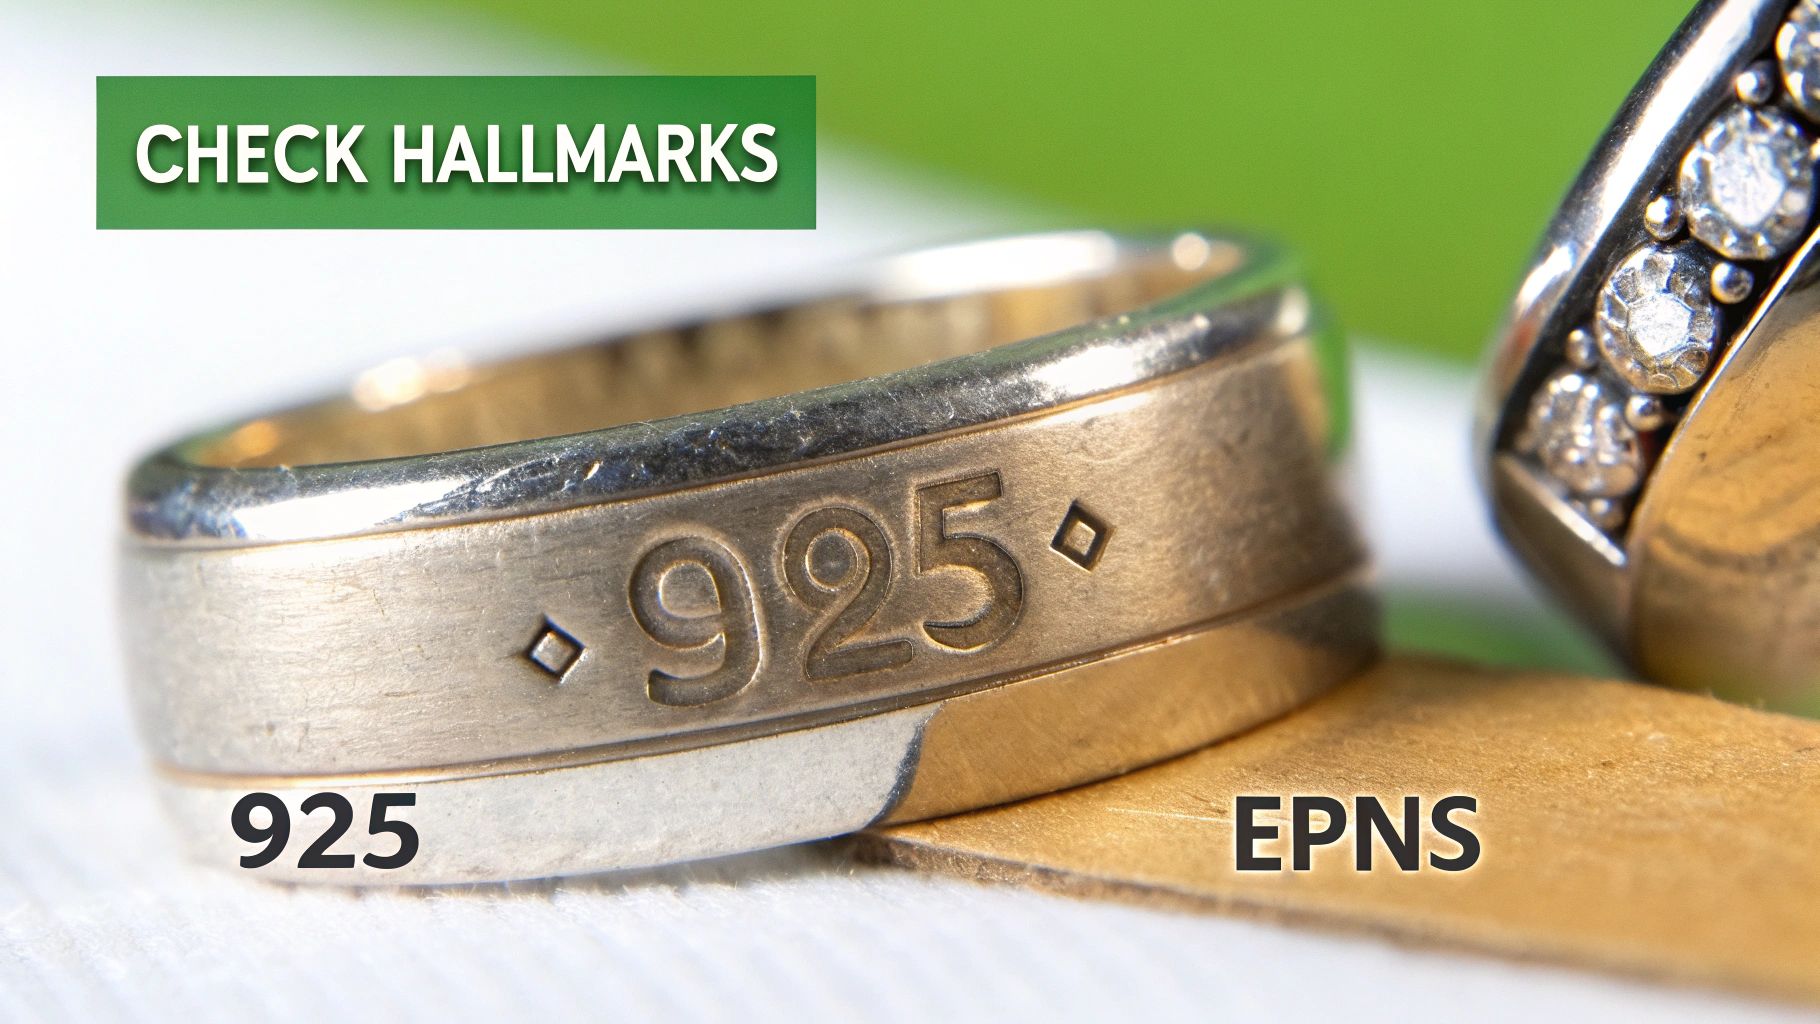
Decoding the Hallmarks: What Your Silver Is Telling You
Your first clue is almost always a tiny stamp, known as a hallmark, typically found on the back of a handle or the underside of the piece. These little marks are the manufacturer's code, telling you everything you need to know about its quality and what it's made of.
For sterling silver, which is 92.5% pure silver, the marks are pretty straightforward.
Look for these tell-tale signs of sterling:
- 925: This is the universal standard, meaning the item is 92.5% pure silver.
- STERLING or STER: A clear stamp used most often on American silver.
- Lion Passant: A walking lion symbol, the historic English hallmark for sterling.
Silverplate is a different story. It’s a base metal (like copper or nickel) coated with a very thin layer of actual silver. The hallmarks are meant to sound impressive but are designed to tell you it's not solid.
Common silverplate marks include:
- EPNS: This stands for Electro-Plated Nickel Silver.
- EPBM: Means Electro-Plated Britannia Metal.
- A1 or Quadruple Plate: These refer to the thickness of the silver plating, not solid silver content.
If you want to go down the rabbit hole, you can learn more about what hallmarks on silver mean and uncover the history behind these fascinating symbols.
For those who want a quick reference, this table breaks down the most common identifiers at a glance.
Sterling Silver vs Silverplate Quick Identification Guide
| Characteristic | Sterling Silver (e.g., 925) | Silverplate (e.g., EPNS, A1) |
|---|---|---|
| Common Markings | "925", "STERLING", "STER", Lion Passant | "EPNS", "EPBM", "A1", "Quadruple Plate" |
| Weight & Feel | Dense, heavy, and substantial for its size. | Feels lighter and less solid in the hand. |
| Wear Patterns | Scratches and dents will show more silver. | Worn spots reveal a different colored metal underneath (yellowish or grey). |
| Tarnish Color | Tends to develop a softer, greyish-blue patina. | Can tarnish a very dark, almost black color, especially on a nickel base. |
This simple chart is a great starting point, but sometimes the marks are just too worn to read.
When There Are No Marks: Use Your Senses
What happens if a piece is old, heavily worn, or simply has no hallmarks? It’s time to play detective. The differences between sterling and silverplate are subtle, but they're there if you know what to look for.
First, trust your hands. Sterling silver is a dense metal and feels noticeably heavier than a silverplate piece of the same size. If you have a known sterling fork, compare its weight to the mystery piece. The difference in heft is often immediate and obvious.
Next, look for signs of wear. Check the high points of the design—the tines of a fork, the bowl of a spoon, or the edges of a handle. On silverplate, years of use and polishing can wear through the thin silver layer, revealing the yellowish brass or greyish nickel base metal underneath.
If you see a different color peeking through, you've got your answer: it's silverplate. Solid sterling silver is silver all the way through. It can tarnish or get scratched, but you will never, ever see another color of metal showing from underneath.
Finally, look closely at the tarnish. While both will tarnish, sterling often develops a softer, slightly grey patina. Silverplate, on the other hand, can sometimes take on a much darker, almost blackish hue, which looks quite different from classic sterling tarnish.
Taking these few moments to properly identify your silver is the best thing you can do to ensure it stays beautiful for generations to come.
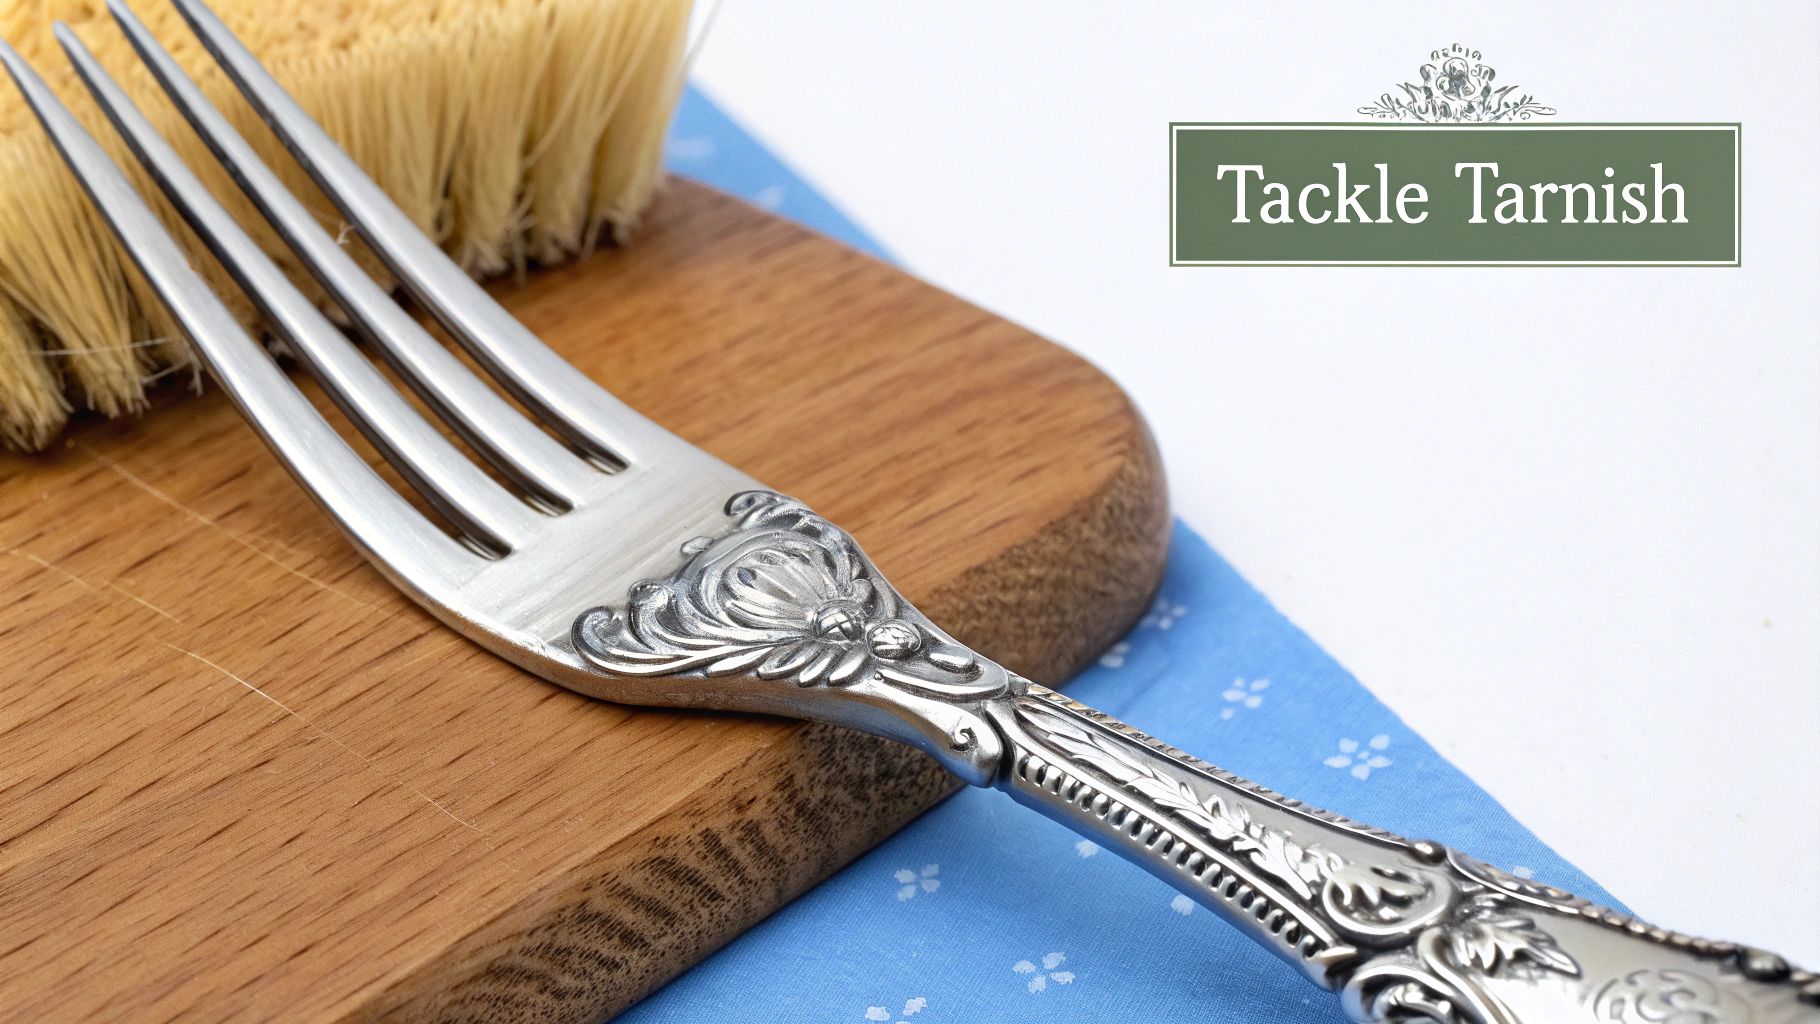
Safe and Effective DIY Silver Cleaning Methods
Alright, you’ve figured out what kind of silver you have and given it a gentle pre-wash. Now for the fun part: tackling that tarnish. It's tempting to grab a commercial silver dip for a quick fix, but I’ve seen those harsh chemicals do more harm than good. They can be incredibly aggressive, stripping away not just the tarnish but also the lovely, subtle patina that gives antique pieces their soul.
Luckily, you don't need them. There are much safer, more effective methods that even museum conservators rely on. Let's walk through two of my favorite techniques you can do right in your kitchen.
The Gentle Polishing Paste for Routine Care
For light tarnish or just regular upkeep, nothing beats a simple homemade polishing paste. It’s wonderfully gentle, completely non-abrasive, and puts you in total control. Please, step away from the toothpaste—it contains silica and other abrasives that will leave permanent scratches on your silver.
The magic ingredient here is precipitated chalk, which is just a very fine, soft form of calcium carbonate. It cleans beautifully without scratching.
Here’s what you’ll need:
- Precipitated chalk (you can find it online or at conservation supply stores)
- Distilled water (tap water has minerals that leave spots)
- A small bowl for mixing
- A soft, clean cloth (I like cotton flannel or microfiber)
Start by making a thin paste. Mix a small amount of the precipitated chalk with just a few drops of distilled water. You're aiming for a consistency like thin yogurt—not too clumpy, not too watery.
Dab a little paste onto your cloth and gently rub the silver. Always use a straight, back-and-forth motion, not a circular one, which can create noticeable swirl marks. For intricate patterns or crevices, a cotton swab dipped in the paste is perfect for getting into those tight spots without applying too much pressure.
Once the tarnish lifts, rinse the piece thoroughly with clean, warm distilled water and dry it immediately with another soft, clean cloth.
Protecting Non-Silver Elements
Many gorgeous antique pieces aren’t 100% silver. You'll often find handles made of ivory, bone, wood, or even early plastics like Bakelite. These materials are usually far more delicate than the silver and can be easily damaged by water and cleaning agents.
If your piece has these components, you have to protect them. Before you start the cleaning of silverware, carefully wrap the non-silver parts with a bit of plastic wrap and secure it with painter's tape. This creates a simple waterproof shield, making sure only the silver gets cleaned while the delicate handles stay perfectly safe and dry. It's an easy step that prevents a world of hurt.
Expert Tip: Never soak pieces with non-silver components. The old adhesives used to attach handles can weaken or dissolve, and materials like wood or ivory can swell, crack, or stain if they get waterlogged. For these mixed-material items, careful, targeted application is always the way to go.
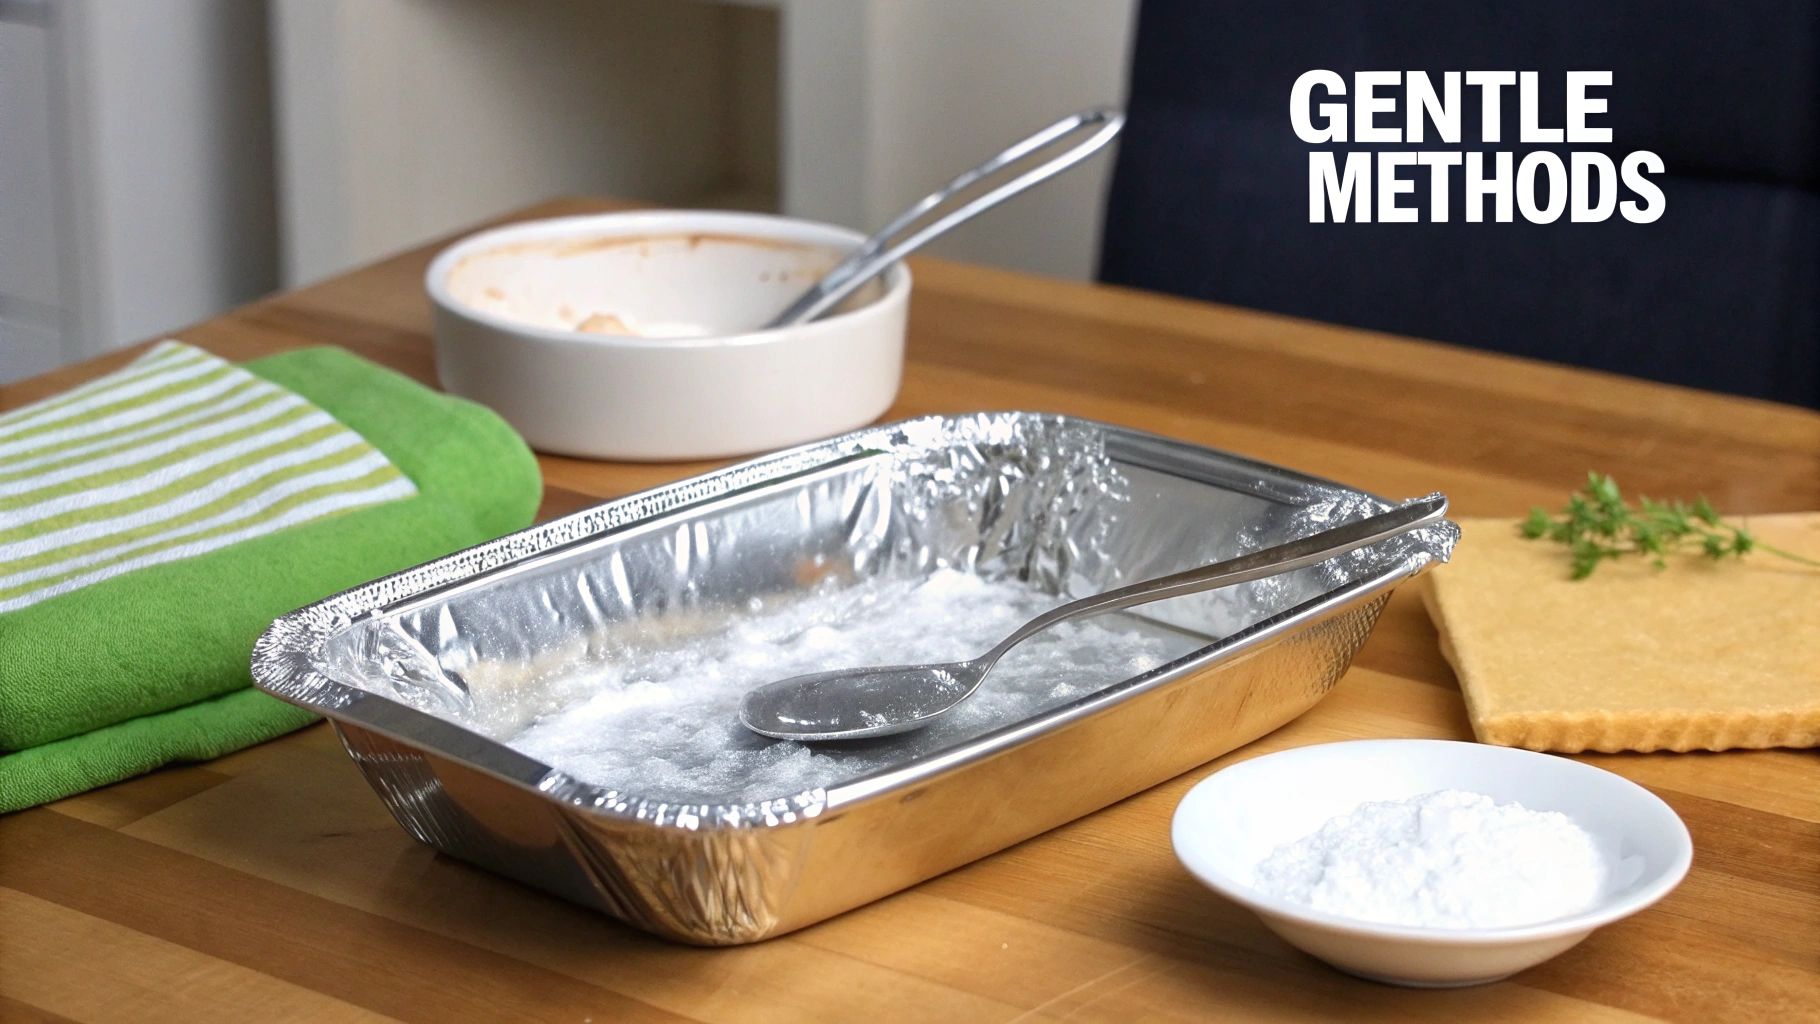
The Electrochemical Method for Heavier Tarnish
When you’re faced with really stubborn, widespread tarnish, the electrochemical method is a brilliant, non-abrasive solution. Instead of scrubbing, this technique uses a simple chemical reaction to convert the silver sulfide (tarnish) back into silver. It basically reverses the tarnishing process right before your eyes.
This science-backed trick works wonders. Electrochemical tarnish removal became popular in the 20th century and is a non-abrasive approach supported by guidelines from the Canadian Conservation Institute. When you place silverware in contact with aluminum in a warm baking soda solution, a reaction occurs that reduces the tarnish. This can reverse tarnish layers up to 2-3μm thick in just 5-10 minutes without any physical wear. You can learn more about this conservation technique and why it's better than commercial dips that actually dissolve silver.
Here's what you need to set it up:
- A non-metallic container: A glass baking dish or a plastic tub is perfect.
- Aluminum foil: Enough to line the bottom of your dish.
- Baking soda (sodium bicarbonate): This is the catalyst for the reaction.
- Hot water: Not boiling, but hot enough to easily dissolve the baking soda.
First, line your container with aluminum foil, making sure the shiny side is up. Lay your silverware directly on the foil so that each piece is touching it. This physical contact between the silver and aluminum is crucial for the reaction to work.
Next, sprinkle a good amount of baking soda over the silverware—about a quarter cup for a small dish should do it. Carefully pour hot water into the dish until the pieces are completely submerged. You might notice a faint smell of sulfur (like rotten eggs), which is a great sign! It means the tarnish is lifting off the silver.
Let the pieces soak for about 5-15 minutes, depending on how heavy the tarnish is. You can explore many other natural and simple ways to clean silver in our detailed guide at https://www.curio.app/blog/clean-silver-natural.
After the soak, use tongs to carefully remove the silverware. Give each piece a good rinse under clean, warm water and dry it thoroughly with a soft cloth. You'll be amazed at how the tarnish has just vanished, leaving a brilliant shine behind.
A word of caution: this method removes all tarnish, including any desirable patina that adds depth to engravings and patterns. Because of this, I recommend reserving it for heavily tarnished items that don't rely on that patina for their character. And if your cutlery is actually stainless steel, the process is different; understanding the specifics of cleaning stainless steel will help keep it looking its best.
How Polishing Choices Preserve Your Silver's Value
Every time you polish a piece of silver, you’re making a choice that directly impacts its beauty, integrity, and ultimately, its financial worth. It’s a concept museum conservators live by: polishing physically removes a microscopic layer of metal. While that’s necessary to get rid of tarnish, your method and materials determine whether you're preserving the piece or slowly erasing its history.
Aggressive, abrasive polishes are like liquid sandpaper. Over years of repeated use, they wear down the crisp edges of a pattern, soften intricate engravings, and thin the overall structure of a piece. This slow degradation is especially devastating for silverplate, where the silver layer is already incredibly thin. A few harsh cleanings can be all it takes to wear right through to the base metal, causing permanent damage.
The Science of Gentle Abrasion
The secret to proper cleaning of silverware isn't to avoid abrasion entirely—that's impossible. The real goal is to use the mildest abrasive that will get the job done. This is why professionals so often reach for materials like precipitated chalk (calcium carbonate). Its particles are fine and soft enough to lift away silver sulfide (the chemical name for tarnish) without scratching the actual silver underneath.
On the other hand, common household stand-ins like baking soda or toothpaste contain much harder, sharper crystals. Sure, they might remove tarnish quickly, but they also leave behind a network of fine scratches that dull the silver's shine over time. As these scratches accumulate, they not only obscure delicate details but also create more surface area for tarnish to form in the future.
Think of it like caring for the paint on a classic car. You wouldn't use a scouring pad on it. You’d use a soft microfiber cloth and a pH-neutral soap to protect the finish. Your antique silver deserves that same level of care.
"The difference between a custodian and a cleaner lies in understanding that value is found in the details. A gentle polish preserves the artist's original engraving, while a harsh one slowly erases their signature."
This philosophy is anything but new. The importance of careful, directional polishing was documented as far back as 1679. A directive for cleaning church silver specified that flagons and chalices should be rubbed from top to bottom—not crosswise—while basins were to be polished in a circular motion. It also explicitly forbade the use of chalk, sand, or salt, which were already known to cause irreversible scratches. This 340-year-old technique is built on the same principles modern conservators follow today. You can read more about these fascinating historical methods in the Journal of the American Institute for Conservation.
Comparing Polishing Abrasives
To really see the difference, let’s imagine two identical sterling silver spoons, both with moderate tarnish.
Spoon A is polished with a simple paste of precipitated chalk and distilled water. The process is gentle and requires patient, light rubbing. The result? A clean, bright surface with all its original details perfectly intact. Under a microscope, the surface is still smooth.
Spoon B is polished with a paste made from a common abrasive kitchen cleanser. The tarnish disappears fast, but a closer look reveals a problem. Under magnification, the surface is now covered in tiny, swirling scratches that scatter light, giving it a duller finish.
Fast forward twenty years. Spoon A will look virtually the same, having lost a negligible amount of silver. Spoon B, however, will show obvious wear. The edges of its handle will feel softer, and the details of a monogram or pattern will look blurred. For a collector, Spoon A has kept its value, while Spoon B has been significantly devalued by improper care.
This is why a thoughtful, gentle approach to cleaning of silverware is about more than just making things shiny. It's about the active preservation of a valuable asset. Your role isn't just to clean, but to be a true steward of your collection.
Managing Heavy Tarnish and Intricate Details
Sometimes, a simple DIY paste just won't cut it. We’ve all been there: you find a gorgeous piece at a flea market, but it’s almost completely black from decades of neglect. This is when you need a more strategic approach.
That doesn't mean reaching for the most aggressive, abrasive product you can find. It’s about choosing the right tools for a tough job and knowing what to avoid. A carefully selected commercial polish can be your best friend here, but not all are created equal.
Many store-bought polishes, especially the "dips," are far too harsh for antique silver. The biggest red flag on an ingredient list is thiourea. While it seems to work magic by removing tarnish almost instantly, it's actually dissolving a tiny layer of the silver itself. This chemical shortcut can leave a dull, etched finish that's impossible to reverse.
Choosing the Right Tools for the Job
The applicator you use is just as important as the polish. The right tool makes the cleaning of silverware safer and more effective, especially when you’re dealing with complex designs.
A fascinating 2016 UCL study on cleaning Islamic metalwork really drove this point home. Researchers found that when cleaning lightly tarnished 14th-century silver, foam pads achieved 90-95% tarnish removal in just 10-20 strokes. A standard polishing cloth, by contrast, needed 50 strokes to get the same result. You can dive deeper into these material performance findings on UCL Discovery.
This tells us that your choice of tool really matters.
- For light to medium tarnish: A soft foam pad or a tightly woven cotton cloth provides a gentle touch that lifts tarnish without scratching.
- For heavy tarnish: A specialized polishing foam block gives you a bit more leverage without being too harsh. Just promise me you’ll never use paper towels or stiff-bristled brushes—they will leave permanent scratches.
Think of it this way: you are physically removing a layer of silver sulfide. Your tool is the vehicle. A soft cloth is like a gentle buffer, while a foam pad can act like a focused polisher, concentrating your effort exactly where it’s needed most.
Safely Cleaning Around Intricate Patterns
One of the biggest headaches with antique silver is cleaning all those beautiful, intricate details. Ornate patterns, deep engravings, and delicate filigree work are magnets for dark tarnish that’s hard to reach. Getting into those spots requires patience and a delicate touch.
The secret is to work methodically with smaller tools. I always keep cotton swabs and a soft-bristled artist's brush (never a toothbrush!) on hand for this. Dip the tip in a mild polish and gently work it into the crevices. Let the polish do the work, not your elbow grease.
Removing the polish residue afterward is just as critical. A clean, dry artist's brush is perfect for sweeping away any dried polish from the detailed areas. For stubborn bits in deep grooves, you can carefully use a wooden toothpick—just be gentle to avoid scratching the metal.
Finish with a thorough rinse under distilled water and a careful drying with a soft cloth. This ensures no polish is left behind to attract new grime. If you're tackling some particularly stubborn dark spots, our guide on how you can remove tarnish from silver has more targeted techniques. This careful approach is how you restore a piece’s brilliant shine while preserving its history.
Proper Storage to Keep Your Silverware Bright
You’ve put in the work, and your silver is gleaming. Don't stop now. Honestly, what you do next is just as crucial as the polishing itself. The right storage is your secret weapon against tarnish making a quick and frustrating comeback.
Tarnish is just a chemical reaction—silver meeting sulfur in the air. The goal is to slow that process way, way down. That means cutting off air exposure and keeping humidity out of the picture.
Once you're positive every fork, spoon, and knife is completely dry (and I mean bone dry, because a single drop of moisture is tarnish’s best friend), it's time to tuck it away safely.
Choosing the Right Protective Materials
Not all storage solutions are created equal. Wrapping your heirlooms in the wrong material can actually do more harm than good, so it pays to be picky.
Here are the best bets I've relied on for years:
- Pacific Silvercloth: This is the undisputed champion for a reason. It's a special flannel embedded with tiny silver particles. These particles act like a magnet for airborne sulfur, trapping it before it can ever reach your silverware.
- Acid-Free Tissue Paper: A great, accessible alternative. If you don't have special cloth, carefully wrapping each piece individually in acid-free tissue provides a solid barrier against air and moisture.
- Felt-Lined Storage Boxes: A classic silverware chest lined with tarnish-resistant felt is a fantastic option. Just make sure the lid closes snugly to keep the air out.
This extra step of wrapping not only slows down tarnish but also prevents the nicks and scratches that happen when pieces jostle against each other in a drawer.
The golden rule of silver storage is isolation. You want to isolate each piece from airborne chemicals, from moisture, and from every other piece of silver. Master this, and you'll spend a lot less time with a polishing cloth in hand.
Household Items to Avoid at All Costs
Knowing what not to use is just as critical as knowing what works. Some common household items are loaded with chemicals that are an absolute nightmare for silver. One wrong move here can leave you with permanent damage.
Whatever you do, keep these far away from your silver:
- Rubber Bands: They're full of sulfur and will leave behind nasty, black lines that are nearly impossible to get off.
- Newspaper: The acids and inks in newsprint can easily transfer onto your silver, creating stubborn stains.
- Plastic Wrap: Many types of plastic release chemicals over time that can speed up tarnishing or even etch the surface of the silver.
- Cardboard or Wood Boxes: Unless they've been specially sealed, raw wood and cardboard can off-gas fumes and hold moisture—the perfect recipe for tarnish.
Tips for Safe Silver Display and Long-Term Care
But what if you love seeing your silver every day? You don't have to hide it away. If you want to display your pieces, the key is to do it strategically.
An enclosed glass cabinet is your best option, as it dramatically limits air circulation. For an extra layer of protection, you can tuck a few anti-tarnish strips or a small bowl of activated charcoal in the back of the cabinet to absorb any harmful gases.
For the pieces you do keep stored, throwing a few silica gel packets into the chest or drawer is a brilliant little trick to soak up any lingering humidity. By making these smart storage choices, all the effort you put into the cleaning of silverware will last, keeping your collection beautiful and ready for its next moment to shine.
Ready to uncover the stories behind your own heirlooms? The Curio app makes it easy. Just snap a photo to get instant identification, historical context, and an estimated value for your antiques. Download Curio today and let your treasures tell their story.