
When you need to clean an old bottle, the gentlest approach is often the best. A simple soak in warm, soapy water and a light scrub with a bottle brush usually does the trick. But for that stubborn gunk caked on the inside, a little trick I’ve picked up over the years is to use a swirl of uncooked rice or small aquarium gravel. Add a bit of soap and water, and you have a safe, effective abrasive that dislodges buildup without scratching the glass. It's a simple method that respects the bottle's integrity and leaves you with a beautiful, clear finish.
Your Roadmap to Cleaning Old Bottles
So, you've found a real treasure—maybe you dug it up in the garden or scored it at a flea market. Now comes the important part: cleaning it properly. The goal here isn't just to make it sparkle, but to do it without causing any harm. I've seen too many beautiful old bottles ruined by hasty cleaning. Aggressive methods can easily cause cracks, etch the glass, or strip away a priceless label, erasing the very history you’re trying to preserve.
This guide gives you a quick rundown of the safest and most effective ways to clean your finds. Before we get into the nitty-gritty steps, it helps to see the bigger picture. Every bottle is different, and the gunk inside tells its own story, so a one-size-fits-all approach just won't cut it.
Overview Of Cleaning Methods
Think of this as your cleaning game plan. You wouldn't use a power washer on a dusty bookshelf, right? The same logic applies here. Your first decision is figuring out what kind of grime you're dealing with.
This quick comparison table should help you choose the best place to start.
| Method | Best For | Time | Ease |
|---|---|---|---|
| Warm Soapy Water Soak | Light dust, surface dirt, greasy film | 1-24 hours | Very Easy |
| Vinegar Solution | Mineral deposits, hard water stains, general cloudiness | 12-48 hours | Easy |
| Denture Tablet Fizz | Tough interior grime, organic stains (like old medicine residue) | 8-12 hours | Very Easy |
| Gentle Abrasive Swirl | Caked-on mud or stubborn residue on the inside | 5-10 minutes (active) | Moderate |
Choosing the right method from the get-go saves you a lot of time and potential heartache.
Key Considerations Before You Start
Before you even turn on the tap, keep a couple of things in mind. First, always, always use lukewarm water. Drastic temperature changes can cause thermal shock, which will crack old, fragile glass in a heartbeat. It’s a rookie mistake, but a costly one.
Second, if your bottle has a paper label or any painted details you want to save, you absolutely must protect them from getting wet.
Expert Tip: Never, ever put an antique bottle in the dishwasher. The combination of intense heat, harsh detergents, and powerful water jets is a recipe for disaster. You’re asking for irreversible etching, chipping, or a shattered piece of history.
Ultimately, patience is your best friend in this process. Many of the best techniques are about long, gentle soaks, not aggressive scrubbing. By taking a moment to assess the bottle and choose the right path, you’re setting yourself up for a beautiful restoration that honors its past. This overview should give you the confidence to make that first, crucial decision.
Check Out Your Bottle and Get Set Up
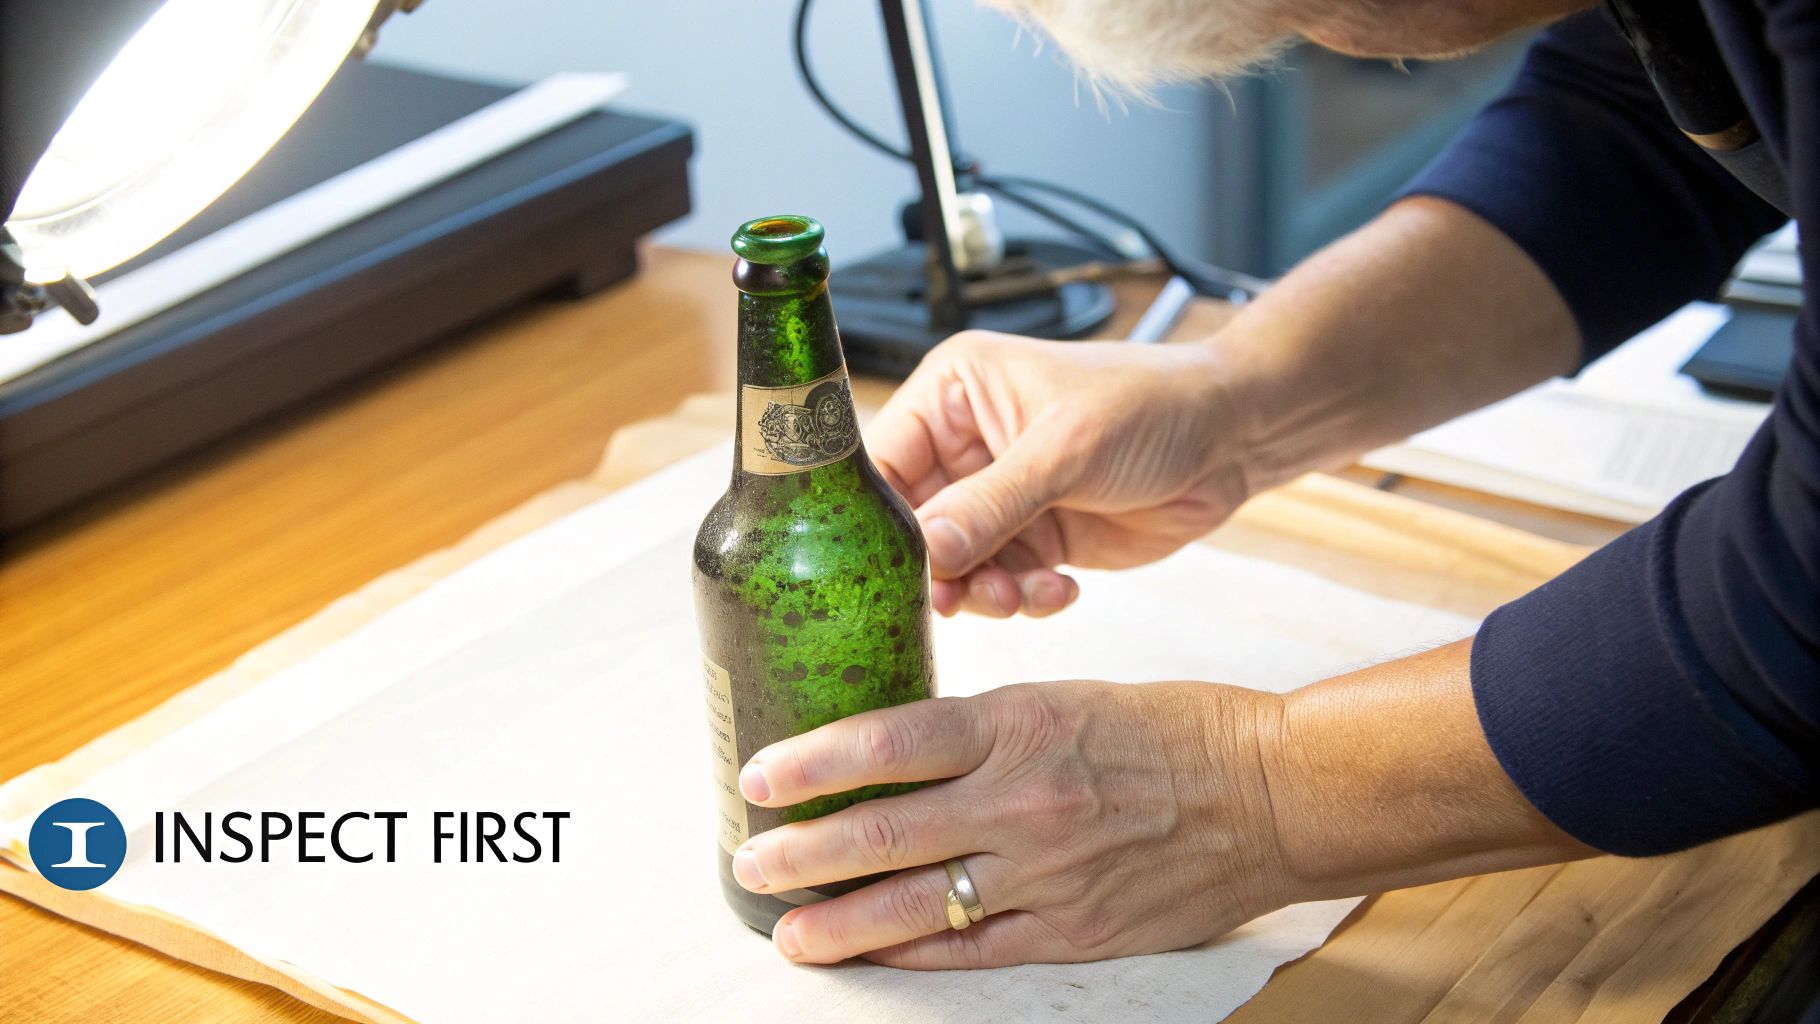
Before you even think about turning on the tap, stop and give your bottle a good, honest look-over. I can't tell you how many times I've seen people rush this part and end up with a broken treasure. This is where you play detective.
Take the bottle over to a sunny window or under a bright lamp. Turn it slowly, letting the light catch it from every angle. You’re hunting for the subtle stuff—hairline cracks, small chips on the rim or base, and any spots where the glass looks weak or thin.
Sometimes your fingers can find what your eyes miss. Gently run your fingertips over the entire surface, especially around the neck and the bottom edge. These are weak points where damage loves to hide. What you find here will determine how you handle the entire cleaning process. A pristine, thick bottle can handle more than one with a faint crack.
Spotting Fragile Details and Sizing Up the Grime
Now, look at the features that give the bottle its character. Is there an embossed logo? A painted-on design? Maybe the fragile remains of an old paper label? These historical details are incredibly delicate and the first things to get destroyed by aggressive cleaning. If you've got a paper label you want to save, you'll have to work around it carefully to keep it dry.
This is also a good time to figure out what kind of gunk you're up against. Are you dealing with simple loose dirt, a hazy film on the inside, or some really stubborn, caked-on residue? Knowing your enemy helps you choose your weapon later. For a deeper dive into what your bottle might be, our guide to antique glass bottle identification is a great resource.
Taking just five minutes to properly inspect your bottle is the difference between a successful restoration and a pile of broken glass. You're not just cleaning; you're preserving a piece of the past.
Setting Up a Safe Cleaning Station
Okay, now that you know your bottle’s condition, it’s time to prep your workspace. Your main goal here is to create a soft, safe environment. The hard surface of a porcelain or stainless steel sink is the number one enemy of old glass. One little slip and it’s all over.
A much better approach is to lay down something soft. A folded towel, a rubber dish mat, or a silicone baking sheet in the bottom of your sink works great. This cushioned surface will absorb any accidental bumps and protect your bottle.
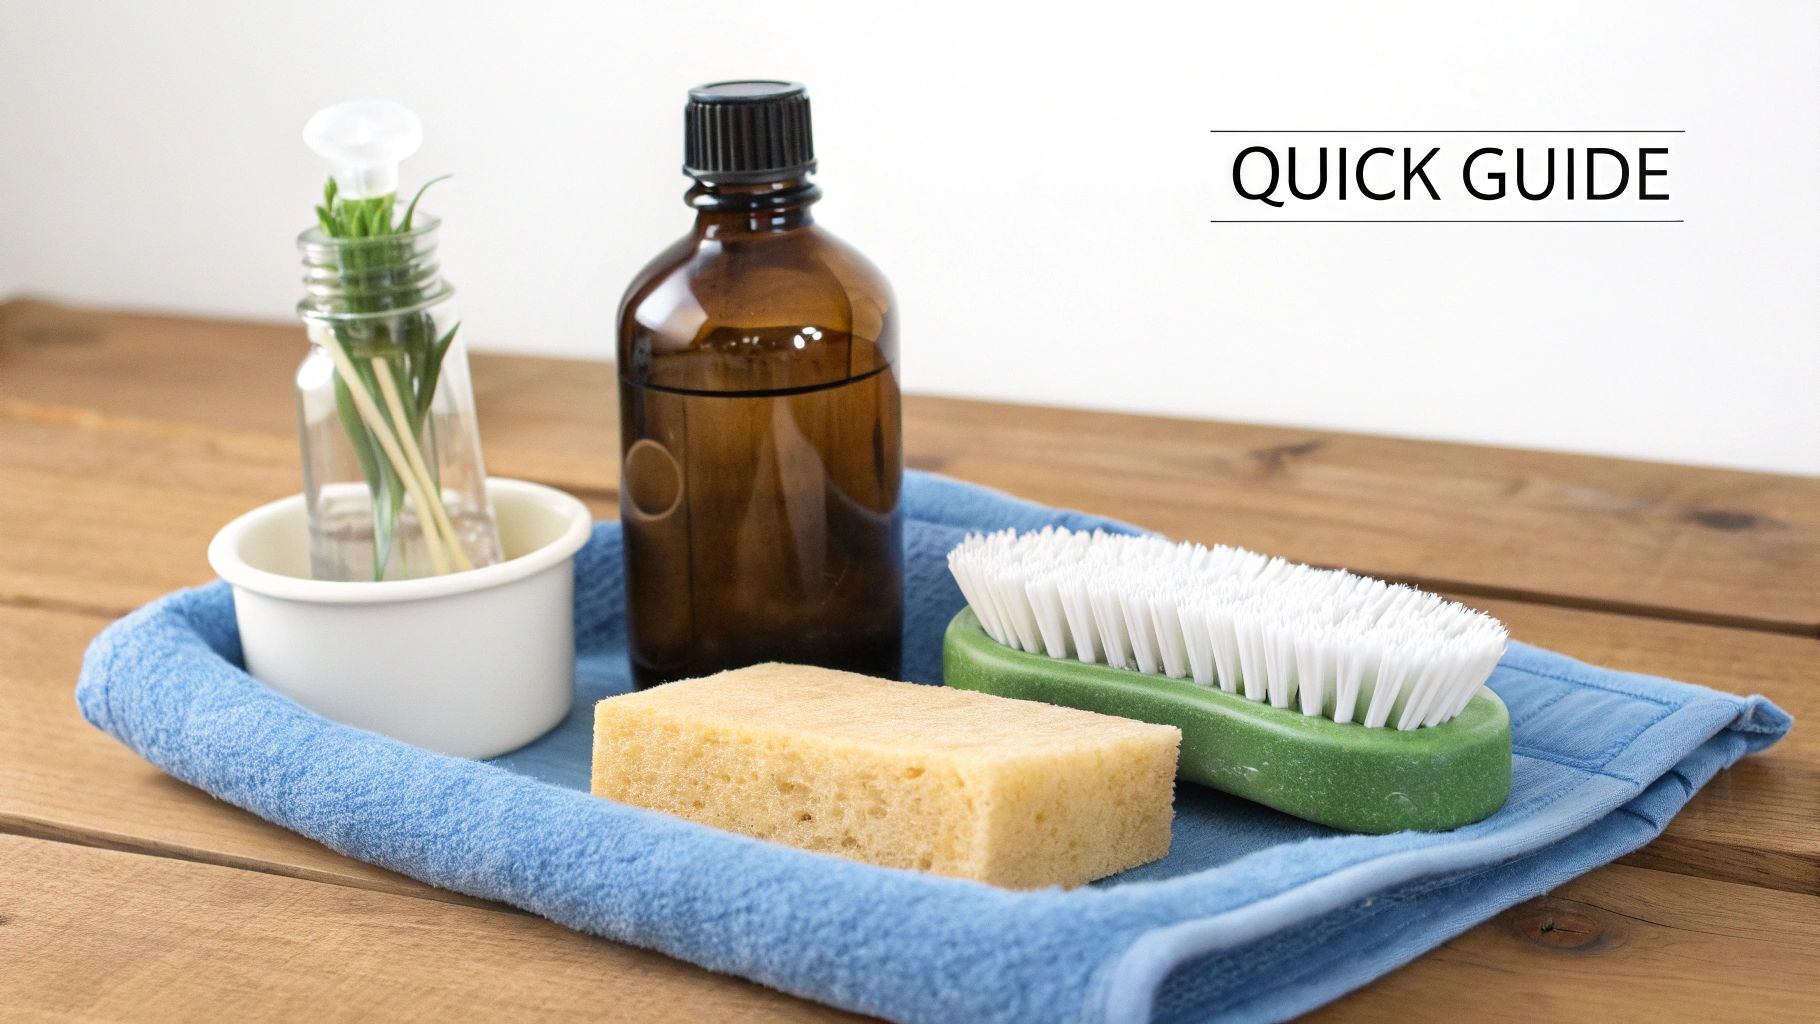
Next, gather your supplies. You don't need a bunch of harsh chemicals or fancy gadgets. A simple, gentle toolkit is all it takes.
- Soft cloths: You can't beat microfiber for wiping down the outside without scratching.
- Gentle brushes: A set of bottle brushes, especially the flexible silicone kind, will let you get inside without damaging the glass.
- Small tools: Cotton swabs and a soft, old toothbrush are perfect for getting into screw threads and around detailed embossing.
- A plastic tub: Soaking your bottle in a plastic basin is so much safer than filling up a hard sink.
With your station all set, you can do a quick pre-rinse. Use only lukewarm water—extreme hot or cold temperatures can shock the glass and cause it to crack. Just swirl a little water inside, pour it out, and gently rinse the exterior. This gets rid of all the loose dust and grit, setting you up for a safer, more effective deep clean.
Choosing Gentle Cleaning Solutions
Once your bottle is prepped and your workspace is ready, it's time to pick your cleaner. I know it’s tempting to grab whatever powerful spray you have under the sink, but when you're cleaning an old bottle, gentleness is everything. Harsh chemicals can permanently etch or cloud the glass, and in some cases, even weaken its structure. Trust me, you don't want to turn a fun restoration project into a heartbreaking mistake.
The trick is to match your cleaning solution to the specific kind of grime you're facing. A greasy film needs a different approach than stubborn mineral deposits or that weird, caked-on gunk at the bottom. The golden rule is to always start with the mildest option first to protect the bottle's integrity.
The Mild Dish Soap Soak
This is always, always my first move. It's the perfect starting point for bottles coated in general dust, surface dirt, or that slightly greasy film you often find on pieces from old barns or kitchens. It's incredibly safe and works wonders more often than not. Think of it as a gentle spa day for your glass.
Here’s what I do:
- Grab a plastic tub or basin and fill it with lukewarm water. Never use hot or cold water, as the sudden temperature change can cause thermal shock and crack the glass.
- Squeeze in a few drops of a simple, non-abrasive dish soap. Classic Dawn works great.
- Gently submerge the bottle and just let it sit. For light dust, an hour might be enough, but for more stubborn layers, I'll often leave it for a full 24 hours.
This extended soak does most of the heavy lifting for you, softening and loosening years of dirt without any need for risky scrubbing. If you're into DIY cleaners, there are some great effective natural cleaning products that are also safe alternatives.
Using White Vinegar for Mineral Buildup
Ever found a bottle with a hazy, whitish film that just won't wash off? That's almost always a sign of mineral deposits like calcium and lime from hard water. A soap soak won't touch it, but this is where distilled white vinegar really shines.
Vinegar’s acetic acid is just strong enough to dissolve those mineral bonds without being aggressive enough to harm the glass. My go-to recipe is a 50/50 solution of lukewarm water and white vinegar. Let the bottle soak in this mix for at least 12 to 24 hours. You’ll be amazed as you watch the cloudiness start to disappear.
A Quick Tip: After a vinegar soak, always rinse the bottle thoroughly with clean, lukewarm water to neutralize the acid and get rid of the smell. I like to do a final rinse with distilled water—it prevents new water spots from forming while the bottle air dries.
The Power of Effervescence with Denture Tablets
Sometimes, the worst gunk is trapped deep inside a bottle with a narrow neck, where no brush can possibly reach. This is when I pull out my secret weapon: denture cleaning tablets. The magic is in their fizzing, or effervescent, action.
It couldn't be simpler:
- Fill the bottle with warm water.
- Drop in one or two denture tablets.
- Sit back and let the bubbles do the work.
The fizzing actively scours the inside surfaces, dislodging everything from old medicine stains to mysterious organic bits. For the best results, let it work its magic for at least 8 hours, or even overnight. Afterward, just pour it all out and give it a good rinse.
It's interesting to think about how people handled this historically. They were incredibly resourceful, often soaking bottles in simple soap or vinegar solutions, just like we do. Then, they’d add an abrasive like salt or uncooked rice with some water and shake vigorously to scrub the inside clean—a technique that, frankly, still works great today.
Understanding how different types of glass react is also part of the process. If you're working with more delicate pieces, our guide on cleaning antique glassware and crystal has some more specific advice. By choosing your cleaner thoughtfully, you're not just cleaning a bottle; you're preserving its history and revealing its true beauty.
Getting the Inside of Your Old Bottles Clean
After that first good soak, you'll probably see the outside of your bottle looking pretty fantastic. The inside, however, is often a completely different beast. Those narrow necks and curvy shoulders are the perfect traps for years of stubborn grime, making the interior the real test of your cleaning skills. This is where you have to roll up your sleeves and get a bit more hands-on.
Luckily, there are several tried-and-true methods to tackle those hard-to-reach spots. These techniques range from simple tricks using stuff you already have in your kitchen to specialized tools designed for this exact challenge. Which one you choose really comes down to the bottle's shape, the size of its opening, and what kind of gunk you're trying to remove.
The Abrasive Swirl Trick
One of the oldest and most reliable tricks in the book is the good old abrasive swirl. It’s a fantastic way to dislodge that caked-on dirt or that hazy film that a simple soak just can't touch. The idea is brilliantly simple: you put a gentle abrasive material inside the bottle to act like thousands of tiny scrubbers.
I’ve had amazing results with this method on bottles I almost gave up on. The secret is picking the right abrasive—you need something hard enough to scrub away the grime but not so hard that it will scratch the glass.
Here are a few of my favorites:
- Uncooked Rice: This is my go-to. The grains are usually small enough to fit through most bottle openings and have just the right amount of scrubbing power.
- Coarse Salt: Salt works like a charm and has the added benefit of dissolving afterward, which makes rinsing it out a breeze.
- Small Aquarium Gravel: For the really tough jobs, the slightly larger and heavier gravel can give you more oomph. Just remember to use a strainer when you pour it out so it doesn't go down the drain!
To get started, just pour a small handful of your chosen abrasive into the bottle. Add a few drops of dish soap and a splash of warm water. Then, cover the opening securely with your thumb and give it a vigorous swirl. The abrasive bits will scour the inner walls, knocking loose any stubborn residue. After a minute or two of shaking, pour everything out and rinse the bottle thoroughly.
Using the Right Bottle Brushes
While the swirl method is a great first step, sometimes you need to apply direct pressure to a specific problem area. This is where a good set of bottle brushes becomes absolutely essential. And forget those stiff, flimsy brushes you might be picturing; the ones available today are far more effective.
Look for brushes built on a flexible wire stem that you can bend to match the unique curves of your bottle. Silicone bristles are an excellent choice because they're gentle on the glass but still tough on grime. For those really narrow-necked bottles, like old inkwells or tiny perfume vials, a super-thin, flexible brush is often the only tool that can get the job done.
I always keep a variety of brush sizes on hand. A long, slender brush can reach the bottom of a tall wine bottle, while a shorter, wider one is perfect for cleaning the shoulders of a glass jar. It's about having the right tool for the specific geography of your bottle.
When you're using a brush, work it gently in a circular motion, focusing on any visible spots or mineral buildup. You can get fantastic results by combining a brush with your soapy water or vinegar solution—you get the chemical cleaning power of the liquid and the mechanical scrubbing of the bristles all at once.
A Little History and Modern Tools
The challenge of cleaning the inside of a bottle is nothing new. It’s a problem people have been trying to solve for centuries, especially back when reusing bottles was standard practice. This need for efficient cleaning led to some pretty interesting innovations, particularly in the European wine and beer industries of the late 19th century.
Early manual devices used metal wires attached to a hand crank to physically scrub bottle interiors. Some cleaners even used lead shot as an abrasive, a method we now know is incredibly hazardous. After cleaning, the bottles were placed on drying racks called Égouttoir to air dry hygienically. This history shows a clear progression from those manual, labor-intensive methods to the sophisticated, automated systems used today that can clean thousands of bottles an hour. You can discover more insights about the evolution of bottle cleaning in the wine industry.
This long history of trial and error has led to the amazing tools we have today. We’ve moved from risky lead shot to safe options like uncooked rice and from simple wire scrapers to flexible silicone brushes. Understanding this evolution helps us appreciate the simple, safe, and effective methods we have at our fingertips to clean an old bottle without causing any harm.
Removing Tough Stains and Cloudiness
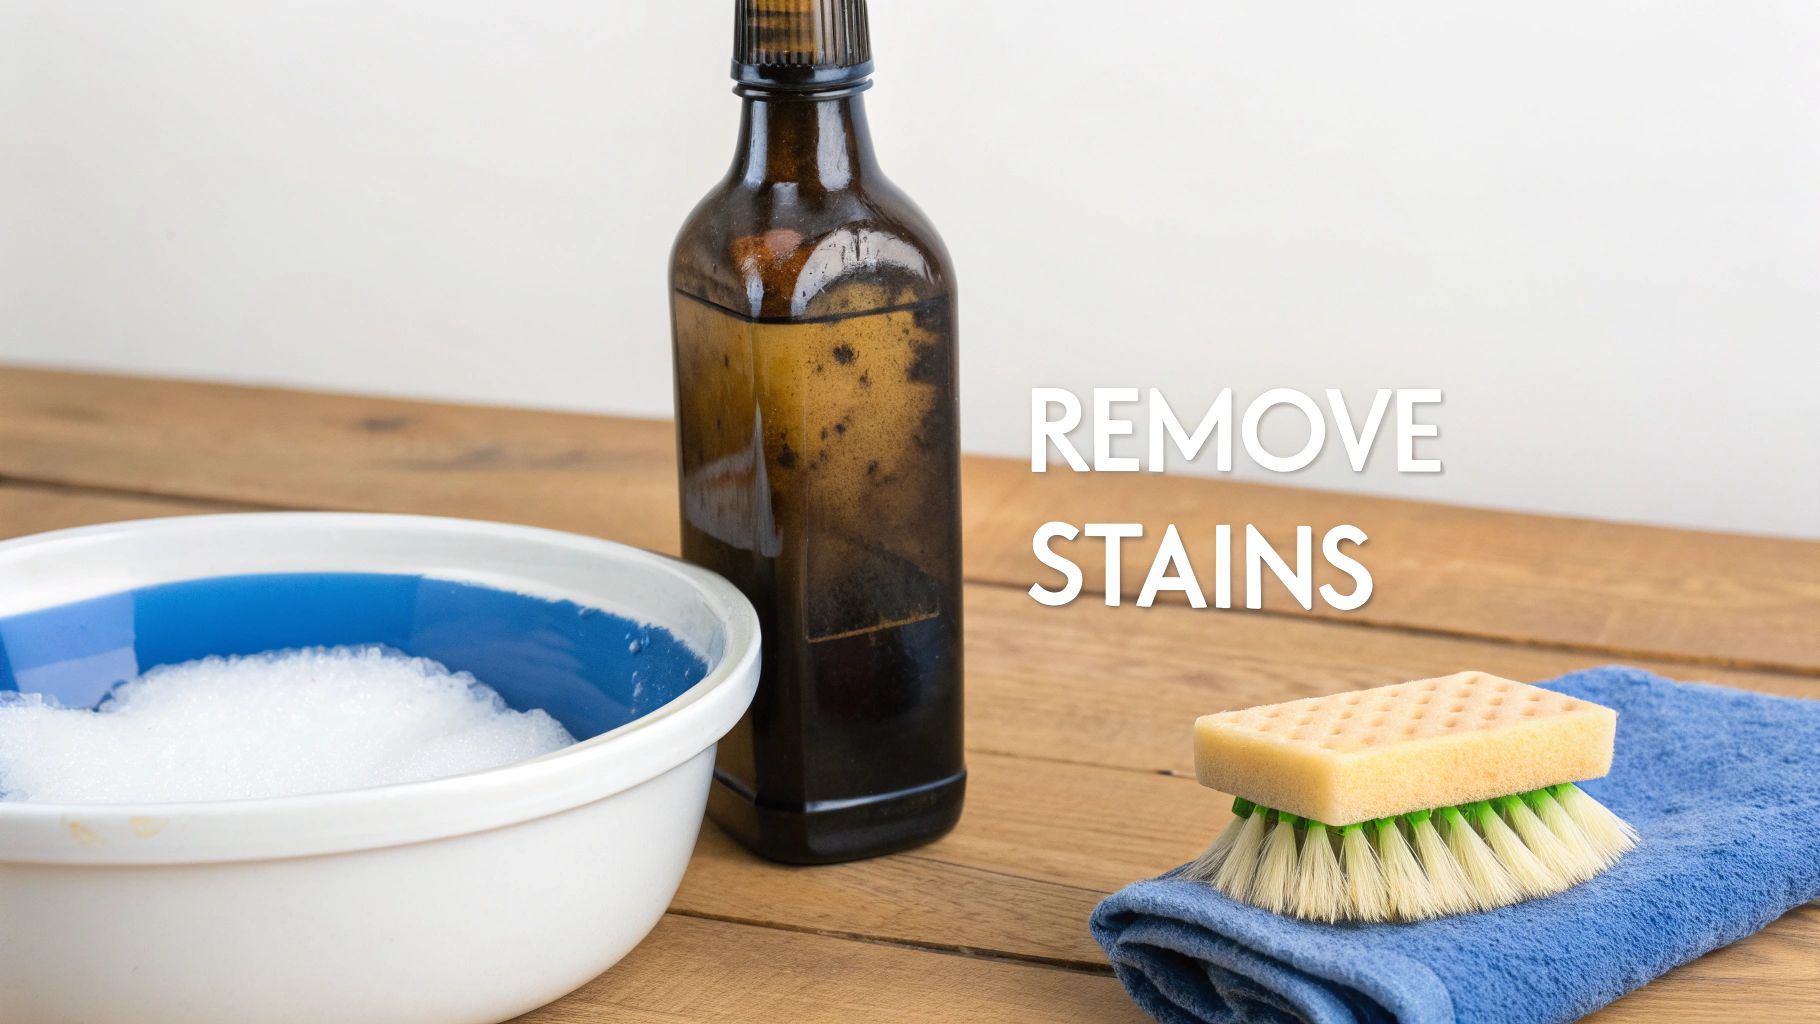
Sometimes, a good soak and scrub just don't cut it. You’ve done everything right, but the bottle is still plagued by a stubborn, milky haze, rust-colored rings, or other unsightly stains. This is classic mineral buildup, a result of years of sitting with water inside or a chemical reaction from the original contents.
Don't give up on it. This doesn't mean your bottle is a lost cause—it just means it's time to bring in a few stronger, but still safe, techniques. The goal here is to dissolve these deposits chemically without resorting to harsh acids that can permanently etch and ruin the glass.
Harnessing Mild Acids for Mineral Deposits
That frustrating cloudiness is almost always caused by mineral scale, typically calcium and lime. A simple soap-and-water bath won’t break that down, but a mild acid can work wonders. The best part? You probably have everything you need right in your kitchen.
Distilled white vinegar is my go-to for this job. Its gentle acetic acid is perfect for dissolving mineral buildup without being too aggressive. I usually start with a 50/50 mix of vinegar and lukewarm water. For really stubborn cases, don’t be afraid to use straight vinegar. Let the bottle soak for at least 24-48 hours; you need to give the acid time to work its magic.
Fresh lemon juice is another great option. The citric acid works just like vinegar but leaves a much more pleasant smell behind. You can use it the same way—either diluted or full strength—for a long soak.
A Quick Safety Note: Never, ever mix acidic cleaners like vinegar with other chemicals, especially bleach. The combination can create toxic chlorine gas. For safety and effectiveness, just stick to one method at a time.
Creating a Gentle Polishing Paste
For stains that need a little more persuasion, a baking soda paste is a fantastic gentle abrasive. It can help polish away light surface haze and tackle specific spots without scratching the glass.
Just mix a bit of baking soda with a few drops of water until you get a thick paste, about the consistency of toothpaste. Apply it to the stained area with a soft cloth, an old toothbrush, or a cotton swab, and rub gently in a circular motion.
This trick is especially handy for the outside of a bottle or for wide-mouthed jars where you can actually get your hand inside. Once you’re done polishing, rinse the bottle thoroughly to get all that baking soda residue out.
Finishing Touches for a Spotless Result
After you've finally beaten the stains and cloudiness, these last steps are what separate a clean bottle from a sparkling one. Rushing the rinsing and drying can leave you right back where you started, but with a fresh set of water spots.
The single best thing you can do is a final rinse with distilled water. Why? Your tap water is full of minerals, and as it evaporates, it leaves those little white spots behind. A quick swish with pure, demineralized water prevents this completely.
For more unusual and stubborn residues, like old paint that sometimes ends up on bottles, looking into effective methods for stripping model paint can provide some specialized solutions.
Proper drying is the last piece of the puzzle. The idea is to let air circulate freely without introducing new dust or lint.
- Position is everything. Place the bottle upside down on a drying rack or prop it up on a couple of wooden skewers. This lets water drain out and air flow in.
- Location matters. Find a clean, dust-free spot, away from the main traffic areas of your home. A sunny windowsill is great because the sun can help speed things up.
- Be patient. Whatever you do, resist the urge to dry the inside with a paper towel. It will always leave lint behind. Air drying might take a day or two, but the crystal-clear result is absolutely worth the wait.
Preserving Labels And Patina
For many of us who love old bottles, the real magic isn't just in the glass itself. It’s in the surviving details—a fragile paper label, a faded painted logo, or that unique patina that tells a story of where it's been. The biggest mistake a newcomer can make is scrubbing away all that history just to get the bottle "clean."
The trick is to think more like a museum curator and less like a dishwasher. We’re aiming for conservation, not restoration. That means we stabilize the bottle, clean only what we absolutely have to, and protect the features that give it character. It's a bit of a balancing act, but it’s what keeps the bottle’s story—and often its value—intact.
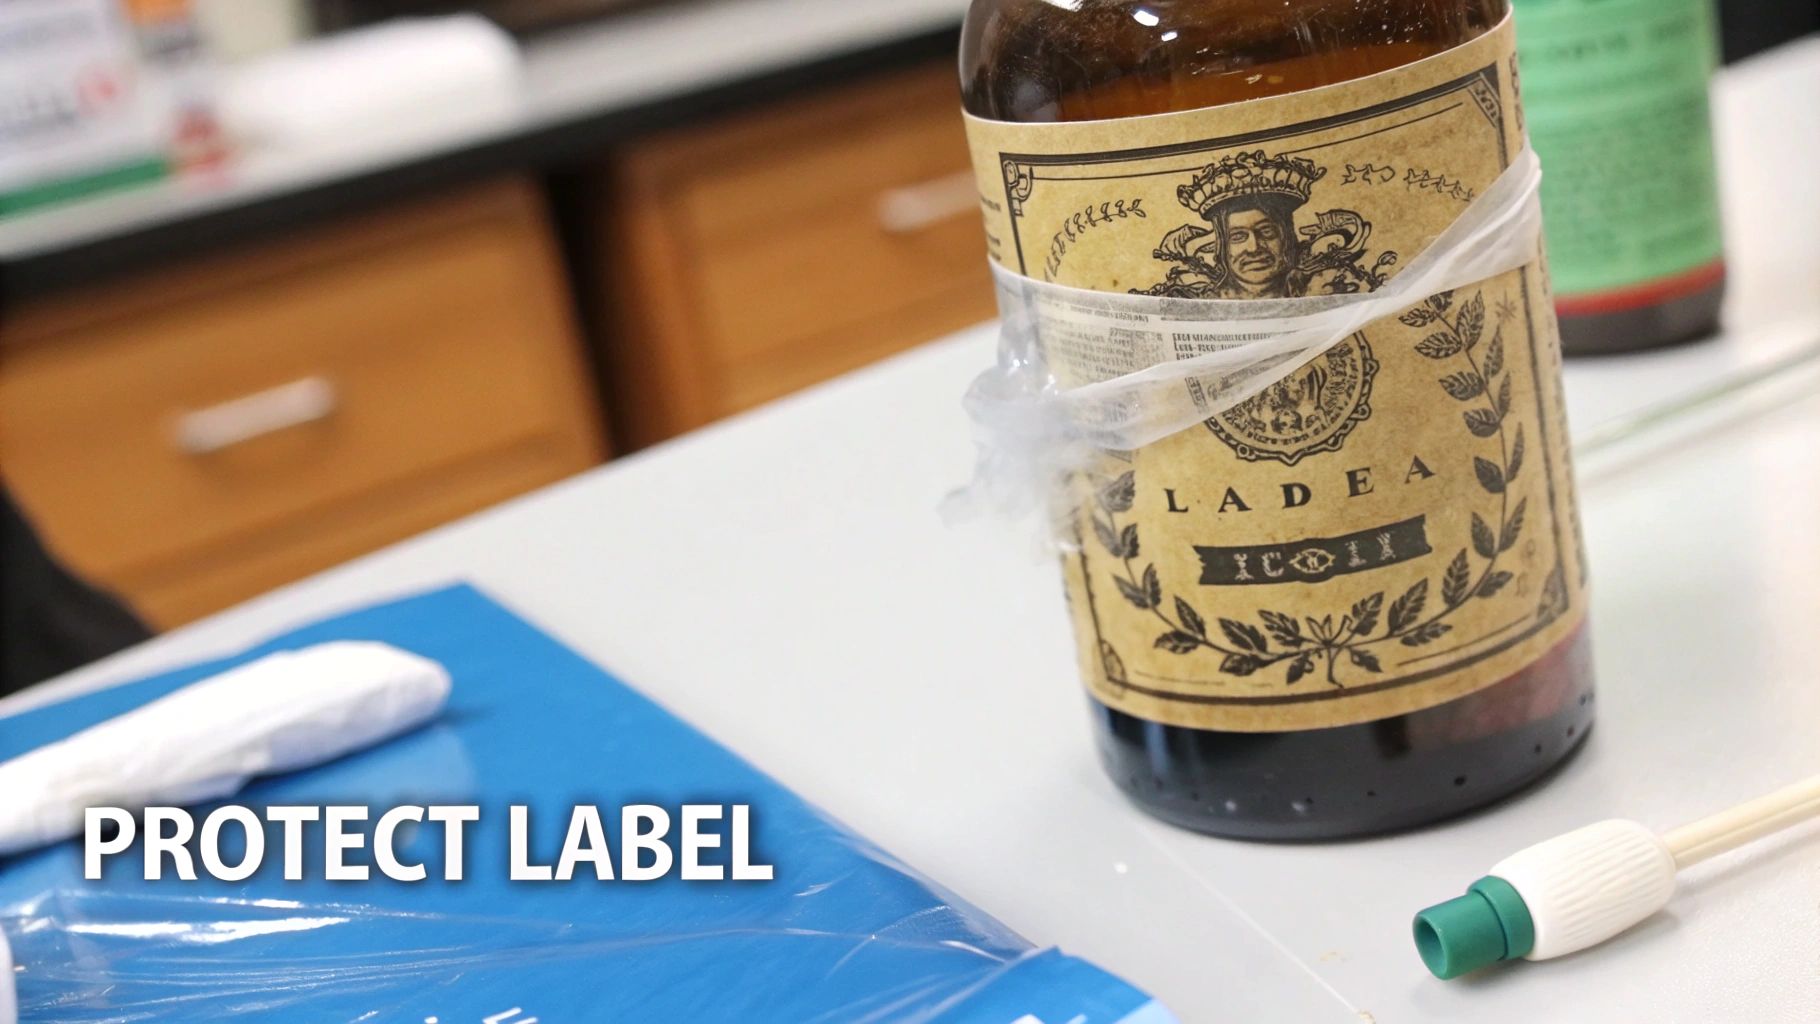
Shielding Fragile Paper Labels
Old paper and water are mortal enemies. Before a bottle with a label even gets near water, you have to create a waterproof barrier. A few minutes of careful prep work here will save you from a world of regret.
Here's the method I've relied on for years:
- Start by carefully wrapping the label with plastic cling wrap. Get it smooth and tight against the glass, making sure to press out any air bubbles.
- Don't be stingy with the wrap. You want a generous buffer zone extending well past the label's edges on all sides.
- Finally, secure the plastic with two rubber bands, one above the label and one below. They need to be snug enough to form a good seal, but not so tight that they damage any underlying paint or embossing.
Once your shield is in place, you can move on to cleaning the bottle’s interior or any unlabeled glass. Just remember to always keep the protected area out of the water as much as possible, even with the wrap on.
The Art of Selective Spot Cleaning
Sometimes, a bottle is just too fragile or the patina too perfect to risk even a gentle soak. This is where spot cleaning becomes your best friend. It lets you tackle specific specks of grime without disturbing the delicate history all around them.
A damp cotton swab is the perfect tool for this kind of surgical cleaning. Just dip the tip in a little lukewarm water (or a very weak, mild soap solution) and gently dab or roll it over the dirt. The key is to never, ever scrub. This gives you pinpoint control, allowing you to clean right up to the edge of a label or graphic without making the ink bleed or tearing the paper. This same delicate approach is a great principle for other antiques, too; our guide on cleaning antique brass covers similar methods for preserving patina.
Knowing What Grime to Leave Behind
Learning to appreciate a bottle’s natural aging is perhaps the hardest skill to master. Not all "dirt" is bad. That subtle rainbow iridescence from mineral deposits or the soft haze developed over a century isn't just grime—it's patina.
Scouring this history away can absolutely tank a bottle’s value and appeal to serious collectors. Before you attack a blemish, ask yourself: is this an ugly stain, or is it a part of the bottle's journey? If it adds to the story, consider leaving it be. For instance, while a good soak can remove over 85% of internal residue, the harsh acids once used for external cleaning are now frowned upon because they can strip valuable patina and even etch the glass. You can discover more about chemical safety when cleaning glass.
Got Questions About Cleaning Old Bottles? We've Got Answers
Even when you follow all the right steps, old bottles can throw you a curveball. From a haze that just won't scrub off to a smell that lingers, some challenges pop up again and again. I've been there. Let's walk through some of the most common questions I hear from fellow collectors and bottle hunters.
Getting these details right can be the difference between a beautifully restored piece and a damaged one. So, let's get into it.
Can I Just Toss an Old Bottle in the Dishwasher?
I get this question all the time, and the answer is always a hard no. I know it's tempting to let a machine do the heavy lifting, but putting an antique bottle in a dishwasher is one of the worst things you can do. It's a perfect storm of heat, harsh chemicals, and brute force.
The extreme heat can cause thermal shock, making the glass crack or even shatter right before your eyes. On top of that, modern dishwasher detergents are incredibly abrasive. They're designed to scour, and on old glass, they can leave behind permanent etching—that dreaded cloudy film that you can't ever remove.
And let's not forget the powerful water jets. They can easily chip a fragile lip, blast off a paper label, or wear down delicate embossing.
Stick to cleaning by hand. It’s the only way to have complete control over the temperature, pressure, and cleaners you use. It’s all about preserving the bottle’s history and integrity.
What Is "Sick Glass" and Can It Be Cured?
If you've ever found a bottle with a cloudy, almost iridescent sheen that soap and water won't touch, you've met "sick glass." This isn't just a stubborn stain; it's a chemical change deep within the glass itself. Over many years, minerals from whatever was inside the bottle (or the water it was sitting in) have leached out, permanently altering the glass structure.
The bad news is that severe cases are irreversible. The good news? You can often dramatically improve mild haziness. My go-to method is a long soak in a 50/50 mix of white vinegar and water. Give it at least 48 hours—you need to give the gentle acid time to work its magic on any surface mineral deposits that are making the cloudiness look worse.
If some haze remains, you can try making a thin paste of baking soda and water and gently polishing the inside. Always test it on a small, hidden spot first, though. The key is to have realistic expectations; you might not get it perfectly clear, but you can often bring back a lot of its original beauty.
How Can I Get That Musty Smell Out of a Bottle?
That old, musty smell is a dead giveaway that moisture and mold have been trapped inside for a very, very long time. To get rid of it for good, you need to knock out the source of the odor and then make sure the bottle is bone dry.
Here’s a trick that has never failed me:
- First, after the initial soap and water wash, give it another soak in a vinegar-water solution. Vinegar is fantastic for neutralizing the mold and bacteria causing that smell.
- For really stubborn odors, pour out the vinegar and add a tablespoon of baking soda and about a quarter-cup of uncooked rice. Add just a tiny splash of water, cover the top, and shake it like crazy. The rice acts like a tiny, gentle scrub brush, while the baking soda soaks up the odor.
- Finally, rinse it all out with clean water. The most important part comes next: drying. Place the bottle upside down on a rack in a sunny, airy spot. The combination of sunlight and good airflow is your best defense against that musty smell ever coming back.
Patience and the right approach will get you through just about any cleaning headache an old bottle can throw at you.
Found a bottle and want to know its story? The Curio app makes it easy. Just snap a photo to instantly identify your find, learn its history, and get an estimated value. Download Curio today and turn your mysterious treasures into known treasures. Find out more at https://www.curio.app.