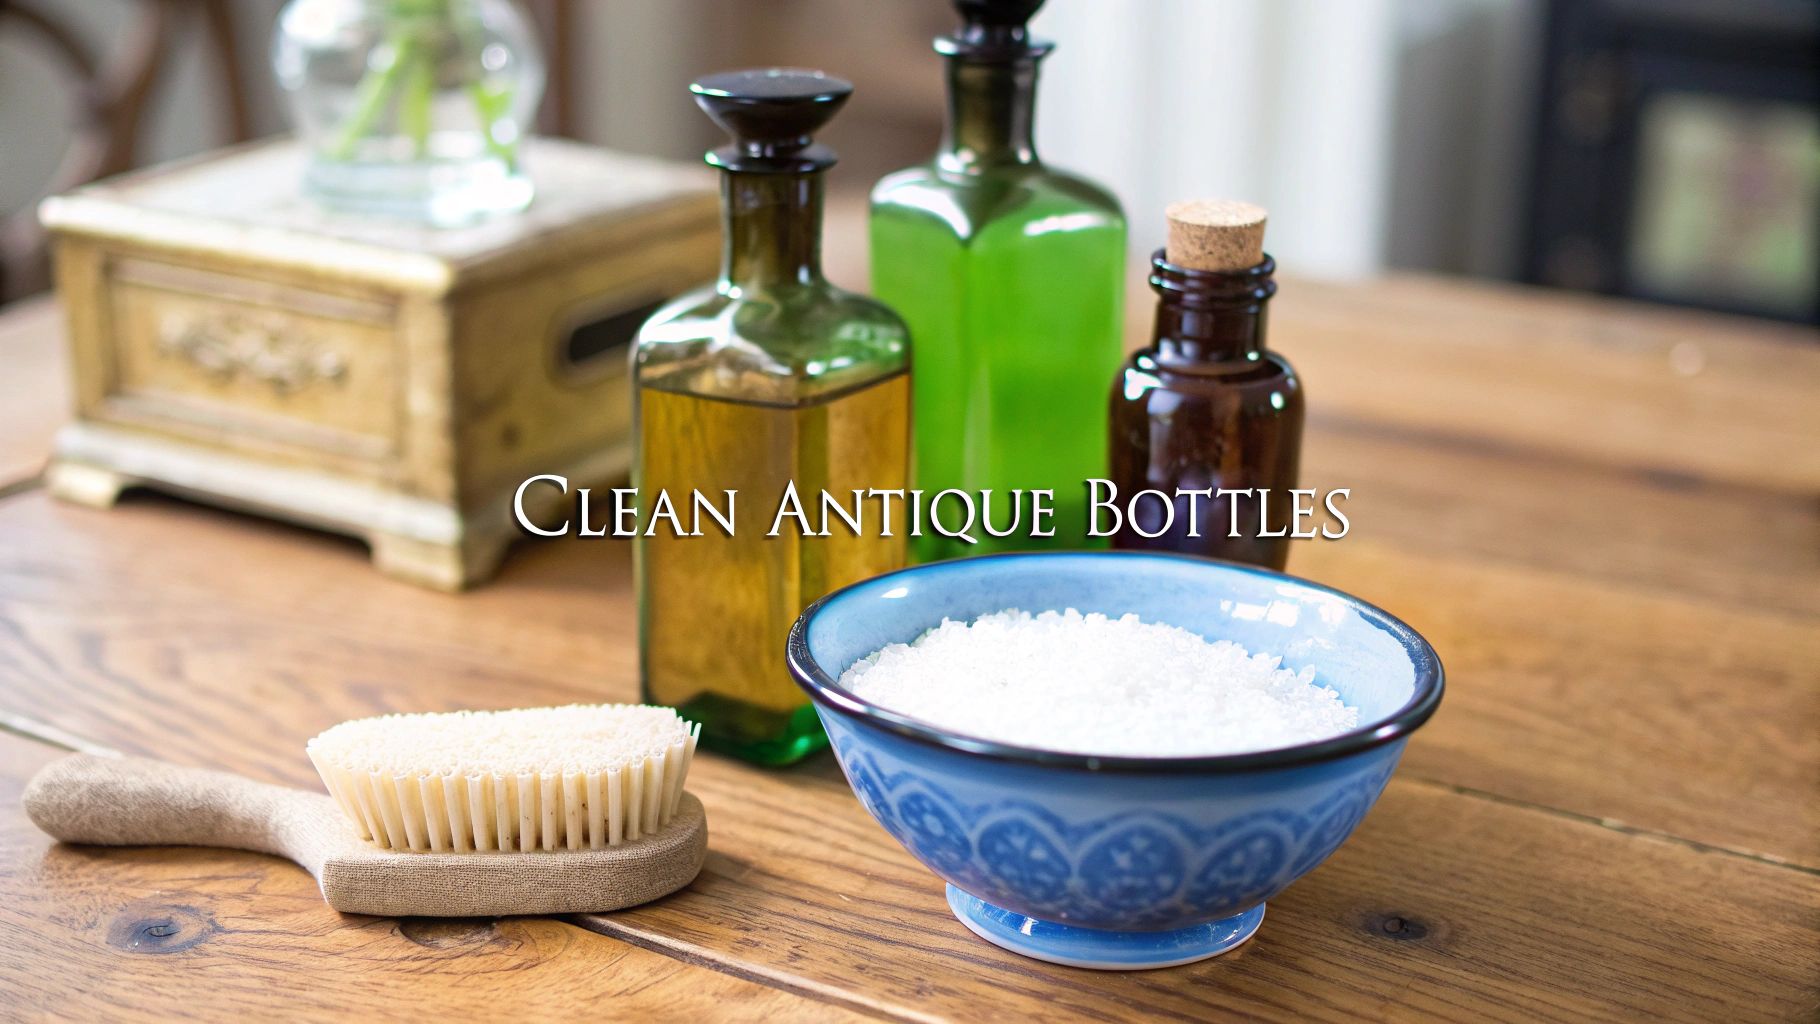
There's a certain magic in pulling an old bottle from the earth or finding one tucked away in an attic. But before you can appreciate its history, you've got to deal with years—sometimes decades—of grime. The trick to learning how to clean antique bottles is to start slow and safe. Rushing in can easily damage a piece you’ve waited so long to find.
Starting Clean: Your First Steps with Antique Glass
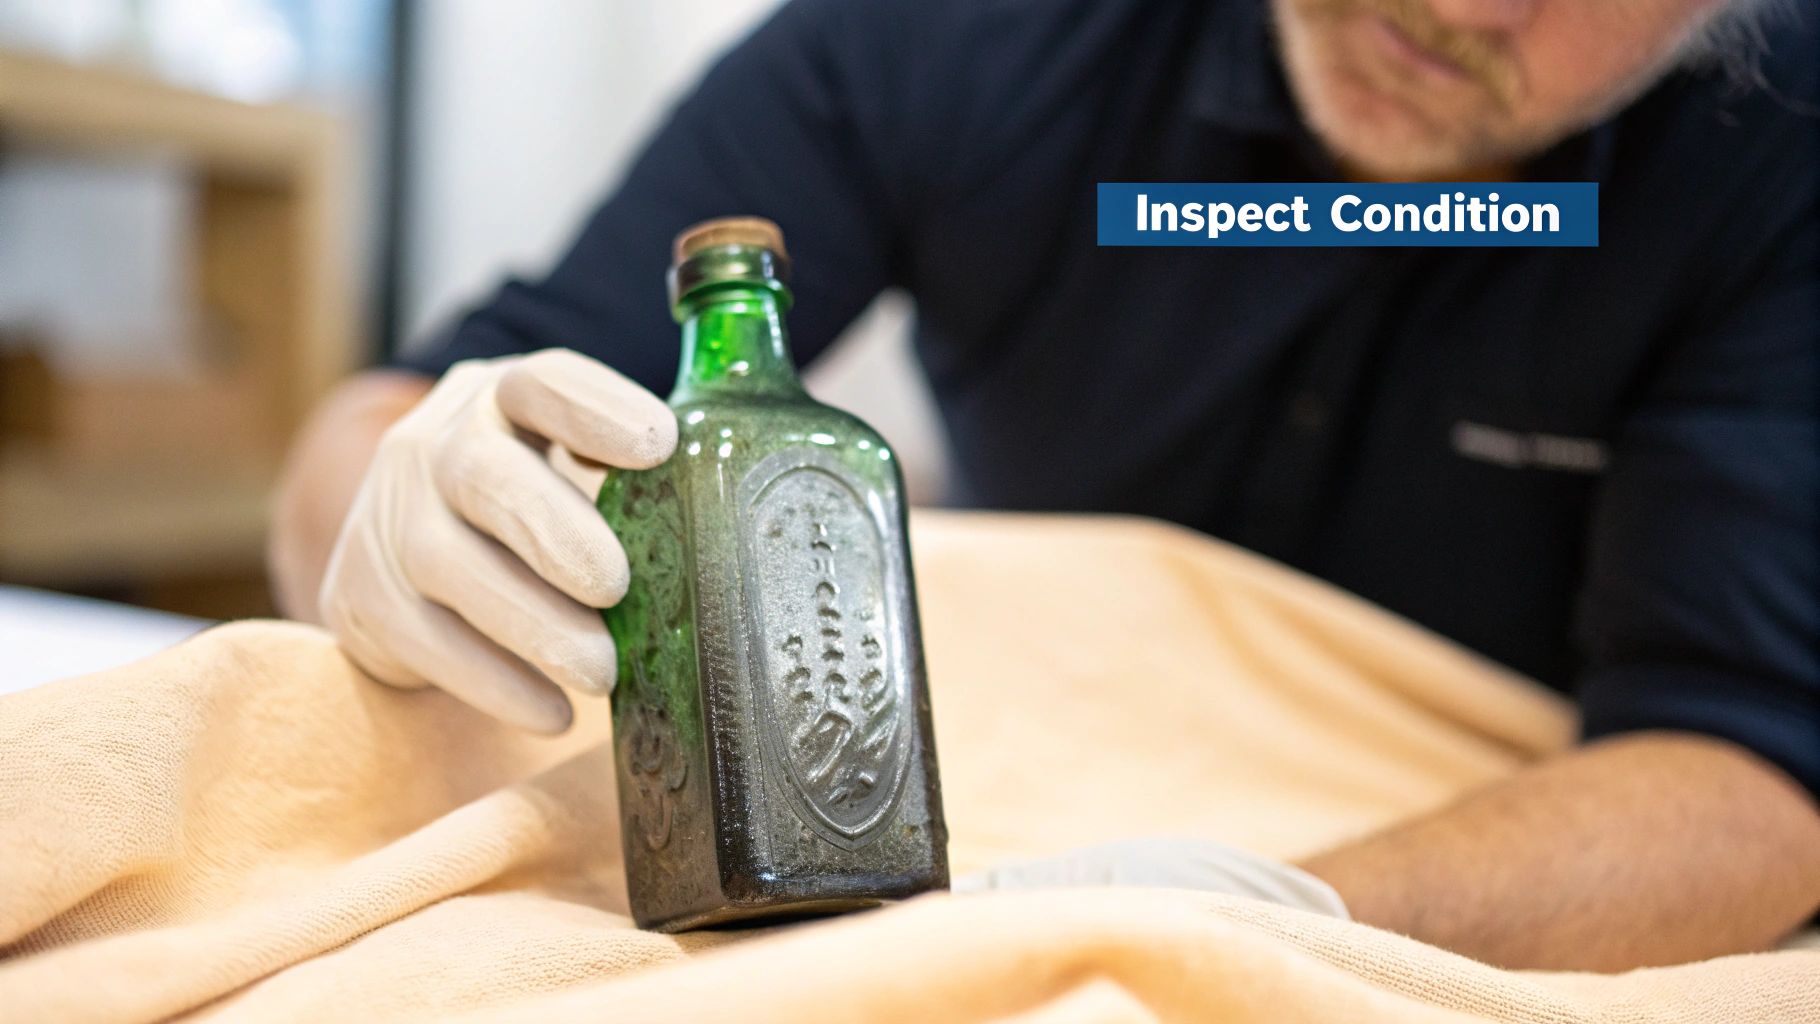
Hold on before you reach for a brush. The very first thing I do with any new find is just look at it. Carefully. I check for tiny hairline cracks, chips around the lip, or any other weak spots. This is where a lot of people go wrong—they get excited and skip this crucial inspection, which can turn a small flaw into a big problem.
Once you’ve given it a good look-over, it's time for a gentle rinse. Use lukewarm water only. Extreme temperatures, whether hot or cold, can shock the old glass and cause it to crack. Let the water run over the outside and slowly fill the inside to wash away all that loose dirt. This simple step preps the bottle for a deeper, safer clean. It's a fundamental principle that applies to cleaning almost anything delicate; you can even see similar methodical approaches in comprehensive cleaning guides for other tough jobs.
The Gentle Pre-Soak: Your Most Important Tool
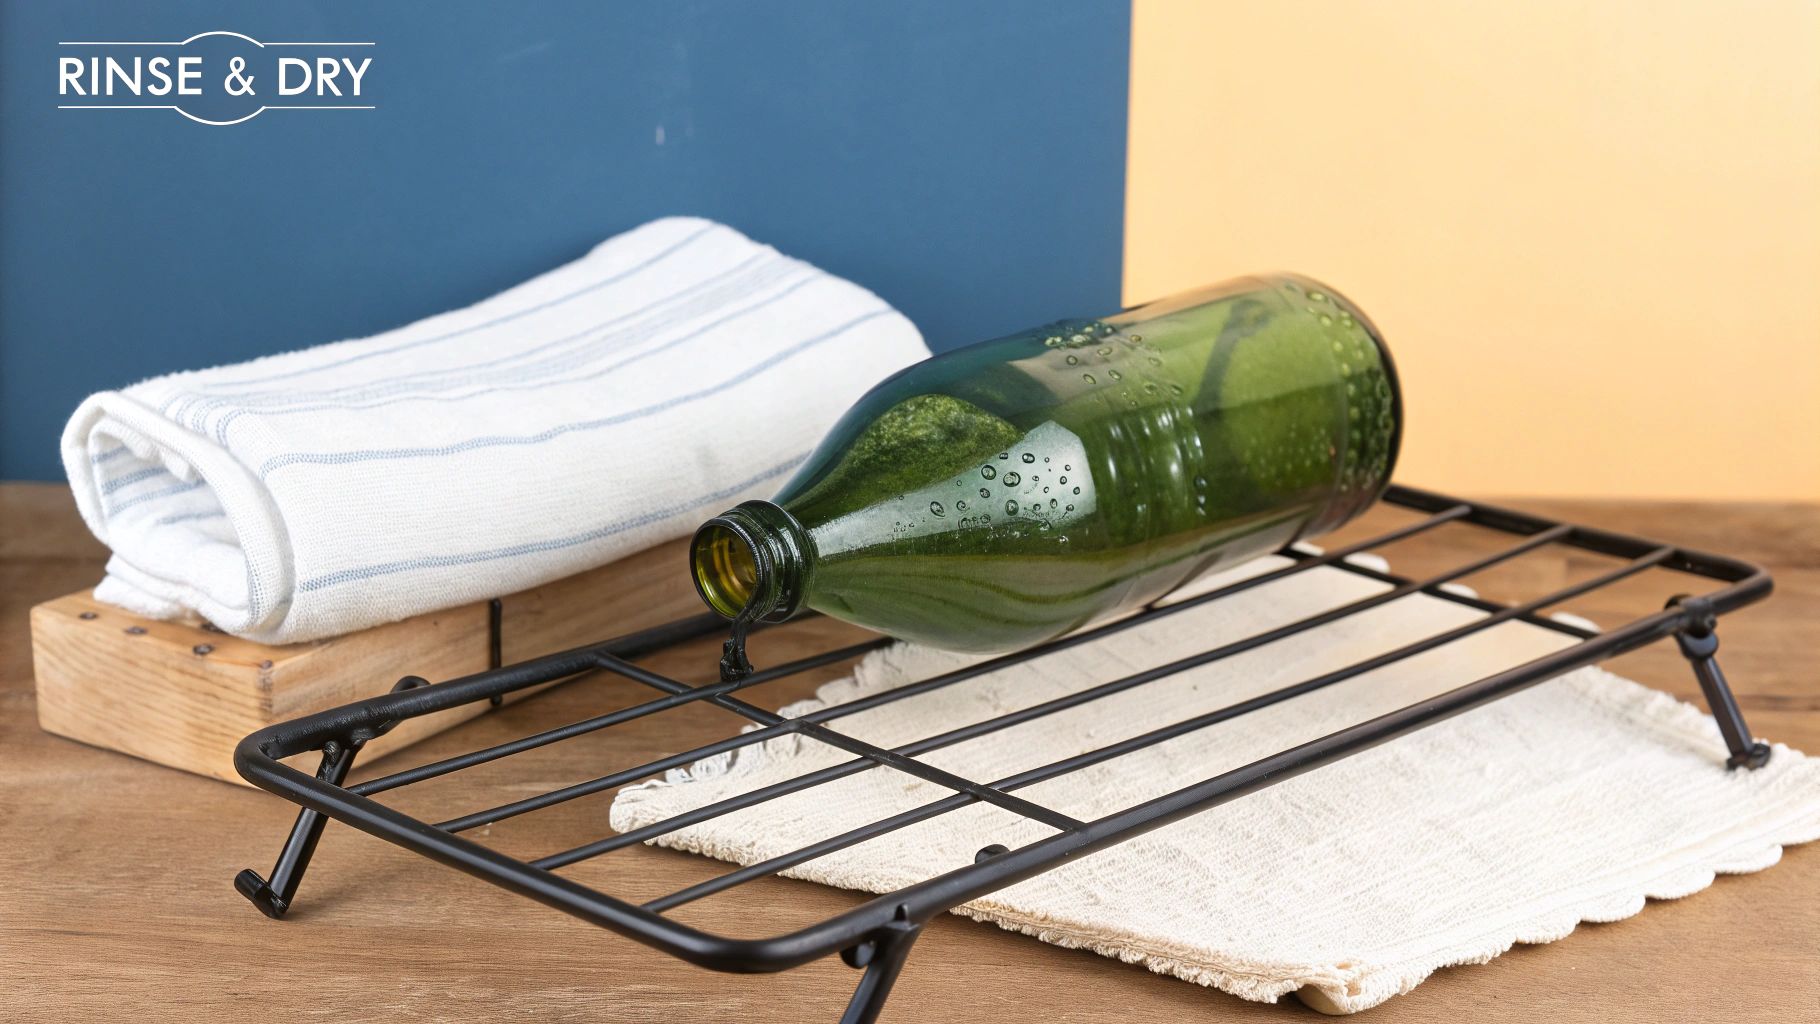
Honestly, the most valuable tool you have right now is patience. A long, gentle soak has been the go-to method for collectors forever, and for good reason. It just works.
Get a plastic tub or bucket (something that won't chip the glass) and fill it with warm water and a bit of mild dish soap. Submerge your bottle completely, letting it fill with the soapy water so it doesn't try to float to the top. Then, just let it sit. I'm talking hours, or even overnight. You can find more details on this time-tested technique in our guide to cleaning old bottles.
Pro-Tip: After a good, long soak, I’ll often put my thumb over the opening and give the bottle a gentle shake. You'd be amazed at how much caked-on gunk this simple motion can dislodge from the inside without putting any stress on the glass.
This slow, methodical approach is what separates careful collectors from a pile of broken glass. It’s all about working with the bottle to remove the dirt while keeping its history—and its value—intact.
Mastering the Gentle Soaking Method
When it comes to cleaning antique bottles, patience is truly your best friend. Before you even think about scrubbing, a good long soak is the safest way to start. This first step does most of the heavy lifting, loosening years of grime so you don’t have to resort to aggressive methods that could scratch the glass.
You don’t need a complicated chemical bath. In my experience, a simple solution works best for most finds.
- For General Dirt: A plastic tub filled with lukewarm water and a few squirts of a mild dish soap (I prefer Dawn) is perfect. Never use hot water, as the sudden temperature change can cause thermal shock and crack the glass.
- For Light Mineral Buildup: Seeing a bit of a white, hazy film? A gentle acid solution is your ticket. Just mix about one part regular white vinegar into four parts warm water.
Make sure to submerge the bottle completely. Let it fill with water so it sinks to the bottom and doesn't float around. Now for the easy part: walk away. Let it sit for at least a few hours, though for really grimy bottles, I'll often leave them overnight. You'll be amazed at how much dirt just melts away on its own.
Choosing the Right Soaking Time
How long you soak a bottle really just depends on how dirty it is. A piece that was just sitting on a dusty shelf might only need an hour. But for a bottle dug up from the mud, you might need a full 24 hours, or even longer.
I like to check on my bottles periodically. If the water gets really murky, that’s a good sign! It means the process is working. Carefully drain the dirty water, give the bottle a quick, gentle rinse, and start a fresh soak. This keeps all that loosened gunk from settling back onto the glass.
A classic rookie mistake is rushing the rinse. After a warm soak, always rinse your bottle with water that’s the same temperature as the bath. A sudden blast of cold water is one of the fastest ways to put a hairline crack in old, fragile glass.
One last tip: wet glass is slippery glass. I always work over a folded towel or inside a plastic basin to provide a soft landing spot in case of a slip. Taking your time with this gentle approach is the key to cleaning your bottle safely and preserving a piece of history.
Using Household Items for a Deeper Clean
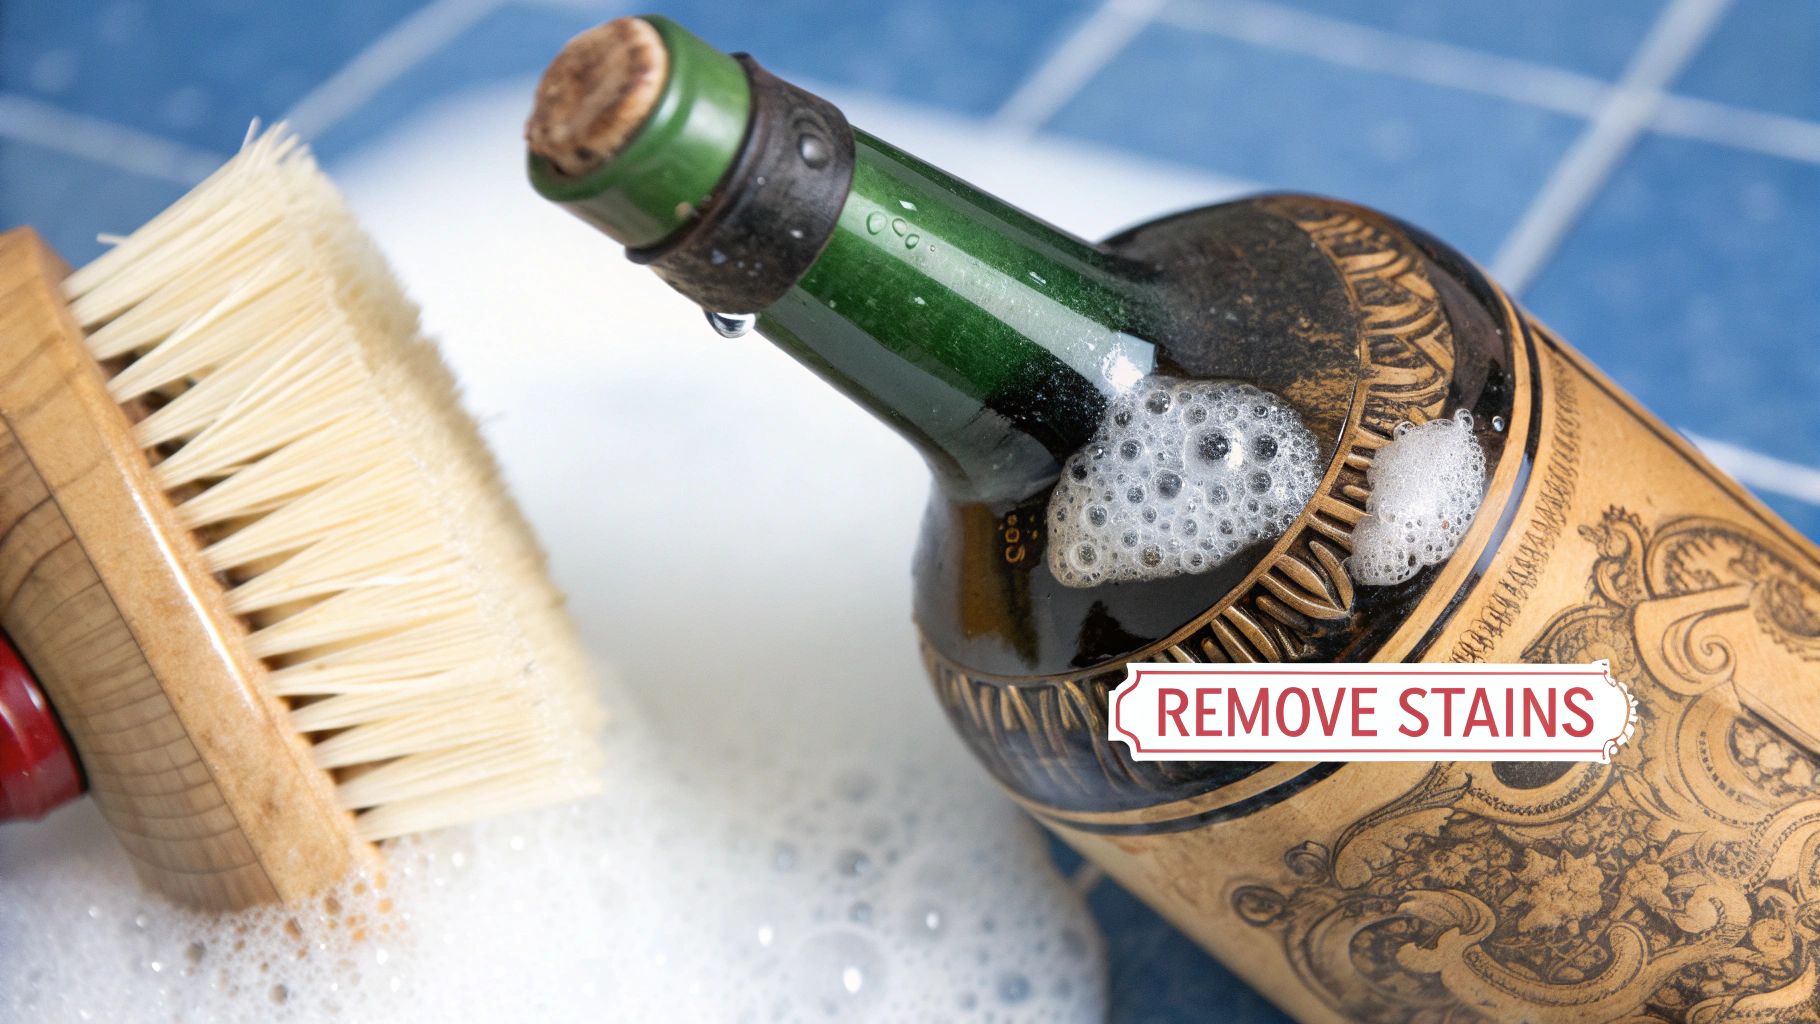
So, you've given your bottle a good soak, but there's still a stubborn haze or some caked-on gunk inside. Don't worry, that’s completely normal, especially for bottles that have been buried for decades. When a simple bath doesn't cut it, you don't need to reach for harsh chemicals—the best tools for the job are probably already in your kitchen.
The trick I've relied on for years is a gentle, abrasive slurry made from common household items. Think of it as a tiny, flexible scrub brush that can get into every nook and cranny that a real brush can't reach. The idea is to create just enough friction to lift the grime without scratching the old, delicate glass.
Creating Your Gentle Scouring Slurry
To get started, you only need a few simple things. It's the combination of a mild abrasive with a bit of lubricant that makes this work so well.
- Uncooked Rice: Grab about a tablespoon of uncooked rice. It provides the perfect amount of gentle scrubbing action.
- Coarse Salt: Add a teaspoon of coarse salt, like sea salt or kosher salt. This really helps break down stubborn mineral deposits.
- Dish Soap: Just a few drops of a mild dish soap will help lubricate everything, letting the rice and salt move around freely and preventing scratches.
- Warm Water: You'll need just enough to make a soupy mix, usually about a quarter cup.
Once you have everything in the bottle, seal the opening tightly with your thumb or a stopper. Now for the fun part: start shaking. I find a combination of swirling and short, back-and-forth shakes for a minute or two works best. You’ll actually hear the mixture scrubbing away at the inside of the glass.
This gentle abrasion is surprisingly effective. It's one of the most widely recommended methods out there, combining a good soak with the cleaning power of basic pantry items. Many collectors will start with a vinegar soak to loosen things up, then add salt and a bit of dish soap before giving it a vigorous shake to scrub the interior clean.
This technique is incredibly safe for most types of antique glass. When you're done shaking, just pour the mixture out and give the bottle a really good rinse with lukewarm water to get rid of any leftover soap and debris.
If you're up against a particularly tough case, our guide on how to clean old glass bottles has a few more tricks up its sleeve. You can always repeat the process, but you'll often be surprised at how much sparkle you can restore in just one go.
How to Tackle Stubborn Stains and Hazy Glass
Sometimes, a simple soak and scrub just won't cut it. You might be staring at a cloudy film or a stubborn stain that seems permanently fused to the glass. This is pretty common, especially with bottles that have spent decades underground.
Collectors have a term for this: "sick glass." It's that hazy, often iridescent layer caused by a slow chemical reaction between the glass and the minerals in the soil. But don't give up on that bottle just yet. There are a few tricks we can try for these really tough cases.
If you're dealing with old organic gunk—think dried medicine residue or other caked-on grime—a denture cleaning tablet can be your secret weapon. Seriously. The fizzy, effervescent action is brilliant at lifting away stubborn bits from those impossible-to-reach corners. Just fill the bottle with warm water, pop in a tablet, and let it do its thing for a few hours.
Dealing with Mineral Stains and Haziness
When the cloudiness is from mineral deposits, you need a different approach. A mild acid is the key to dissolving that stubborn film. This is where a targeted soak can save the day.
A simple solution of white vinegar and water is incredibly effective. I usually start with a mix of about one part vinegar to three parts warm water. Let the bottle soak in the solution for a few hours, or even overnight for really tough jobs. The gentle acid works to break down the lime and calcium deposits without being harsh on the glass. If the haze is particularly bad, you can even try using straight white vinegar.
The challenge of removing "sick glass" is so significant that it has led to specialized restoration techniques. Professional services have developed aesthetic and technical processes that focus on preserving the original characteristics of the glass. You can discover more insights about this advanced restoration from experts at MrBottles.com.
No matter which method you use, always finish with a thorough rinse. Use lukewarm water first, then follow up with a final rinse using distilled water. This is a great little pro-tip that prevents new mineral spots from appearing as it dries. These techniques can often bring back the original sparkle to even the most forgotten bottles, letting their history shine through again.
Common Cleaning Mistakes That Can Ruin Your Bottles
Knowing the right way to clean an antique bottle is only half the battle. Honestly, knowing what not to do is probably even more important. One wrong move, and a beautiful piece of history can end up cracked, etched, or worse—in pieces. Let's walk through the most common pitfalls I've seen over the years so you can clean your collection with confidence.
The number one mistake, without a doubt, is using water that's too hot. Pouring boiling or even just very hot water into a cool, old bottle creates thermal shock. This sudden temperature change will almost certainly cause it to crack or shatter instantly. Always, always stick to lukewarm water for soaking and rinsing.
Harmful Tools and Chemicals
This brings us to the next big no-no: getting too aggressive with your cleaning. Harsh chemicals and abrasive tools are the fastest way to ruin an old bottle's surface, destroying its character and gutting its value.
Here's what you should never let near your antique glass:
- Abrasive Scouring Powders: Think Comet or Ajax. These will cover the glass in thousands of tiny scratches, leaving it with a dull, hazy finish that you can't undo.
- Bleach and Harsh Cleaners: Potent chemicals can actually etch the glass itself. They're especially destructive to bottles with applied color labeling (ACL), as they can cause the paint to flake right off.
- Wire Bottle Brushes: Those metal bristles are a disaster waiting to happen. They will scratch the interior of the bottle, and once that damage is done, it's impossible to fix.
- Automatic Dishwashers: Just don't. The combination of intense heat, powerful detergents, and high-pressure water jets is a guaranteed recipe for disaster for fragile, old glass.
The golden rule in any restoration project is to start with the gentlest method first and only escalate if you have to. It’s the same logic you'd use for other delicate antiques—much like how you’d learn https://www.curio.app/blog/how-to-clean-silver-plate-silverware without damaging the thin plating, your goal is to remove the grime without harming the bottle itself.
Being aware of these common cleaning mistakes to avoid is crucial when you're dealing with delicate items of any kind. By simply steering clear of these destructive habits, you're making sure your treasured bottles will stay safe and beautiful for many more years.
Answering Your Bottle Cleaning Questions
Even when you follow the steps perfectly, you're bound to run into a few tricky situations when cleaning old bottles. I get asked about these all the time, so let's tackle some of the most common challenges you might face.
Can I Use a Bottle Brush on the Inside?
I'd strongly recommend against it, especially if it’s one of those standard brushes with a twisted metal wire core. That metal is notorious for scratching the inside of delicate old glass, and those marks are permanent.
If you absolutely must use a brush, make sure it’s one with soft nylon bristles or, even better, a foam-tipped wand made for cleaning delicate items. Honestly, though, you’re much safer sticking with the rice or coarse salt method. It works wonders as a gentle abrasive and gets into all the nooks and crannies without any risk.
How Do I Dry the Inside of a Narrow Bottle?
Ah, the classic problem. Getting the inside of a skinny bottle completely dry can feel impossible. The best way is to simply let gravity do the work. After you've given it a final rinse, just flip it upside down on a thick, folded towel and leave it for a few hours.
For any stubborn leftover moisture, you can try twisting a small piece of paper towel and carefully feeding it inside with a pair of tweezers. Just be very gentle so it doesn't tear off and get stuck.
Pro-Tip: To get that perfectly clear, spot-free look, always do your final rinse with distilled water. Tap water is full of minerals that leave those annoying white spots behind when the last few drops evaporate.
What if My Bottle Has a Paper Label I Need to Preserve?
This is where you need to be extra careful. If there's a fragile paper label you want to save, do not submerge the bottle. Period.
You'll have to clean the inside by carefully pouring your cleaning solution in through the opening, making sure not to splash or spill anything on the outside. For the exterior glass, gently work around the label with a slightly damp cotton swab. In many cases, it’s best to just leave the exterior glass as-is to avoid damaging a valuable piece of history.
Found a bottle you can't identify? Curio is like having an antique expert in your pocket. Snap a photo to uncover its history, origin, and value in seconds. Download the app today and let your antiques tell their story. Learn more at https://www.curio.app.