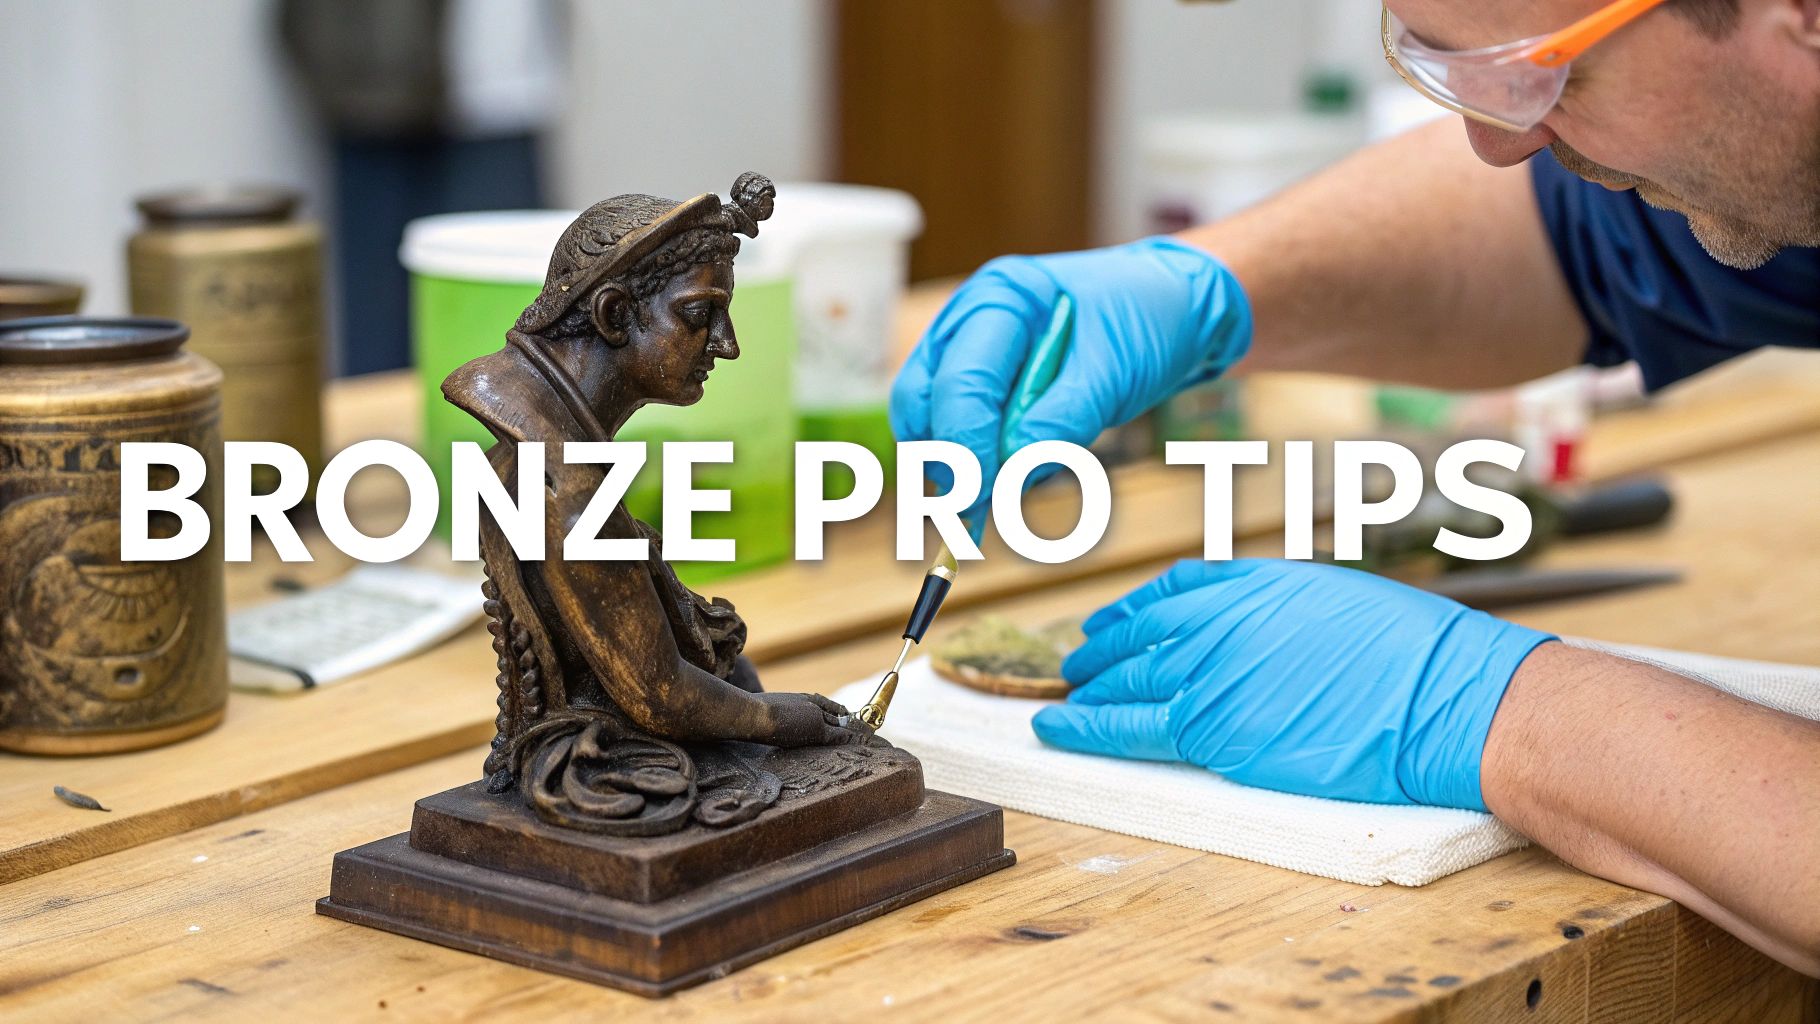
Cleaning a bronze sculpture isn't about making it look shiny and new. Far from it. The real art is in gently removing the surface grime while preserving the very thing that gives it character: the patina. Think of it less as a deep clean and more as a careful conservation effort using nothing more than mild, pH-neutral soap, distilled water, and soft cloths. The final touch? A protective layer of wax to guard it against whatever life throws at it.
What to Know Before You Clean Your Bronze
Hold on a second. Before you even think about touching the sculpture, the first step is always a thorough assessment. I've seen too many well-intentioned owners scrub away a beautiful, historic patina because they thought it was just caked-on dirt. That's a mistake you can't undo. The goal here is to protect the sculpture's integrity, not strip it back to its birth.
The patina is that beautiful, colored layer that forms on bronze over time. It's a natural result of oxidation, and it's what collectors and art historians get really excited about. This layer tells the piece's story and adds enormously to its value. Wiping it away is like erasing its history.
If you're curious about how these incredible sculptures come to life in the first place, you can learn more about how bronze statues are made in our detailed guide. Understanding the creation process gives you a much deeper appreciation for what you're trying to preserve.
Differentiating Dirt from Patina
So, how do you know what to clean and what to leave alone? It's a great question.
True patina is chemically bonded to the metal. It looks and feels like it's part of the bronze, showing up as deep browns, rich blacks, or even that classic blue-green you see on outdoor monuments. Surface dirt, on the other hand, is just a loose layer of dust and grime sitting on top.
A quick visual check usually tells you what you need to know:
- Dust and Grime: This often looks like a dull, greyish film that you can gently lift with a soft brush or cloth.
- Patina: This is the color of the bronze itself. It will have depth and a subtle sheen that won't just rub off.
- Harmful Corrosion: Watch out for bright green, powdery spots or streaks that flake off easily. This is active corrosion (verdigris) and is different from a stable, desirable green patina. It needs to be addressed.
To help you get started, use this simple checklist to examine your sculpture before you bring out any cleaning supplies.
Bronze Sculpture Pre-Cleaning Checklist
Use this checklist to evaluate your sculpture's condition and decide on the right cleaning approach before you start.
| Check Area | What to Look For | Recommended Action |
|---|---|---|
| Overall Surface | Dull, grey film; loose dust or cobwebs | Gentle dusting with a soft brush is a safe first step. |
| Coloration | Deep browns, blacks, stable greens integrated into the metal | This is likely the patina. Do not scrub. Leave it alone. |
| Powdery Spots | Bright green, flaky, or powdery residue | This could be active corrosion. Proceed with extreme caution; you may need a professional. |
| Hidden Areas | Underside of base, deep crevices | Perfect spots for a patch test with your cleaning solution. |
| Previous Coatings | Waxy, oily, or sticky feel | This could be an old wax or oil coating. A mild solvent might be needed, but consult an expert first. |
This initial look-over is your roadmap. It tells you where to be gentle and where you might need to pay a little more attention.
The Importance of a Spot Test
I can't stress this enough: never start cleaning in a prominent spot. Always, always do a spot test first. Find a small, hidden area—the underside of the base or a crevice in the back—and test your cleaning solution there.
A five-minute spot test can prevent a lifetime of regret. It’s the single most effective way to ensure your cleaning method is safe for your specific sculpture, protecting both its aesthetic and monetary value.
Just dab a small amount of your cleaning mix on a cotton swab, wipe gently, and see what happens. If you see any of the patina's color coming off on the swab, stop immediately. Your mixture is too strong. This quick check is the foundation for doing this job right and making sure the unique character of your sculpture remains for years to come.
Getting Your Bronze Cleaning Toolkit Together
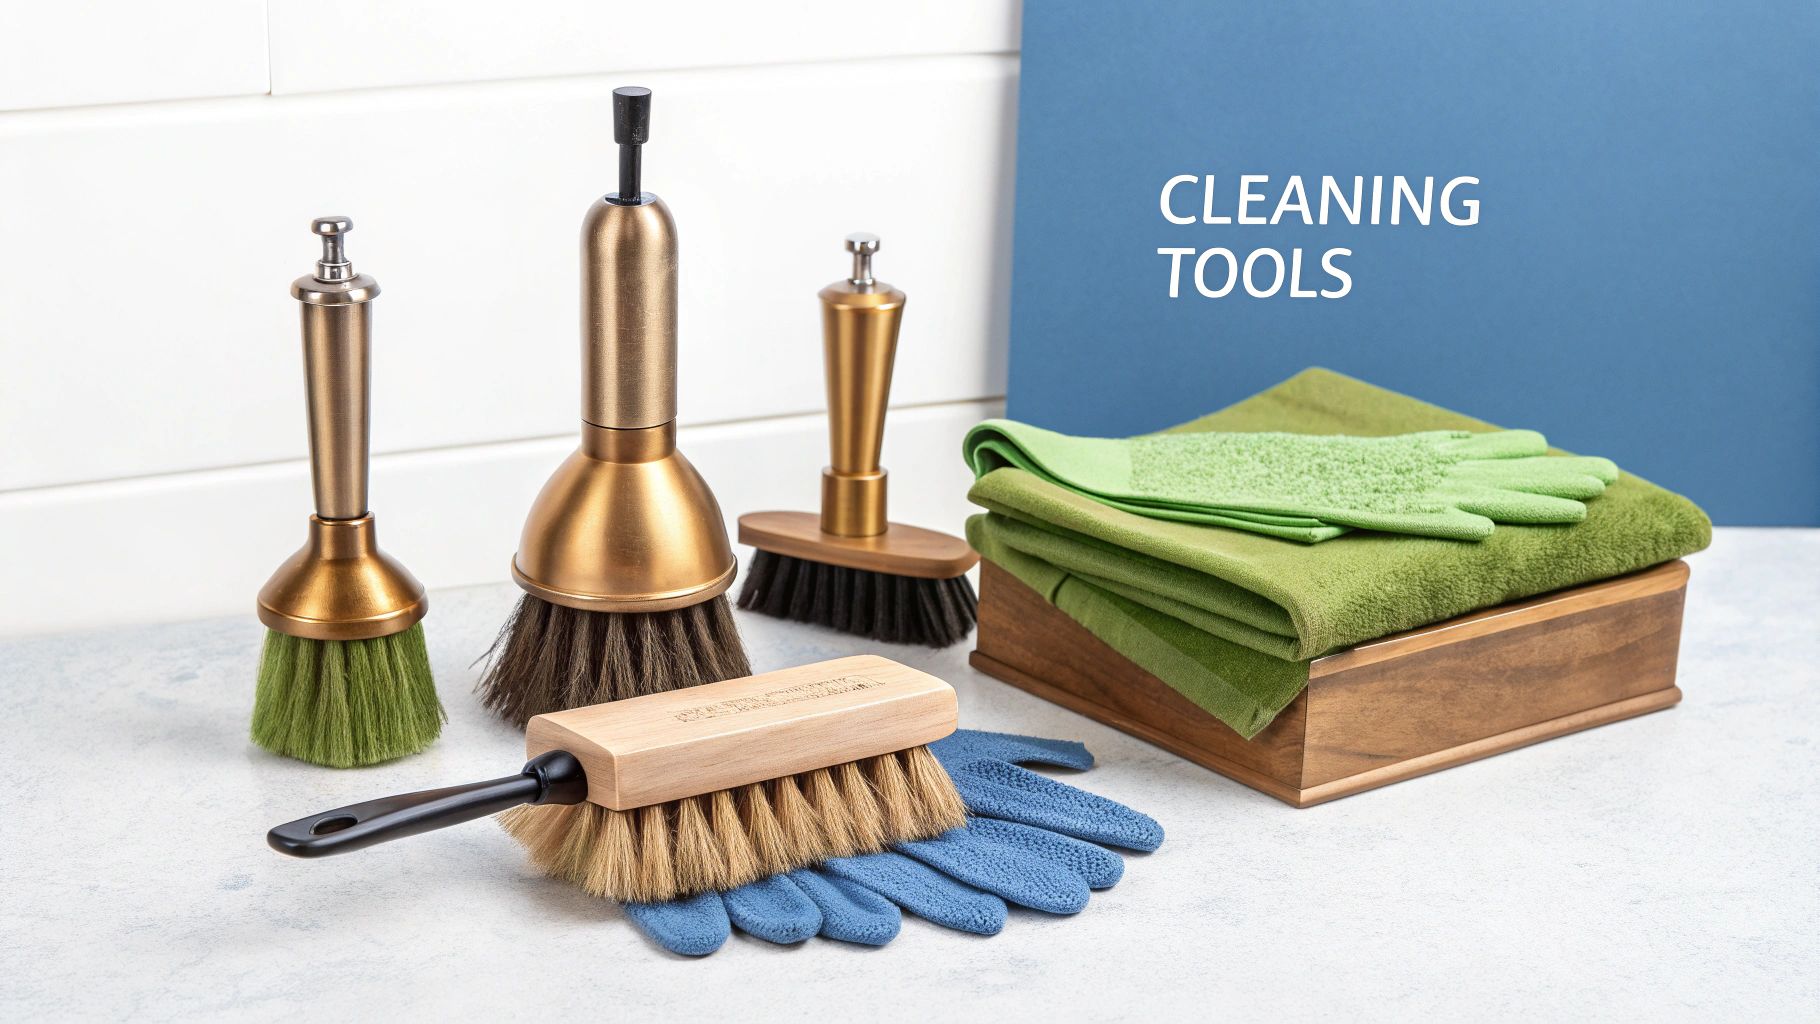
Before you ever touch that sculpture, you need to get your materials in order. This isn't just about being prepared—it's about preventing damage. Using the wrong tool can permanently strip away the very patina you're trying to preserve. A pro-level clean starts with a toolkit built for conservation, not for scrubbing the kitchen sink.
I can't tell you how many times I've seen people reach for standard household cleaners. That's the biggest mistake you can make. Anything with ammonia, bleach, or acidic ingredients like vinegar is far too harsh for bronze. These chemicals will literally eat away at the surface, destroying the desirable patina and leaving a blotchy, uneven mess. Remember, we're aiming for preservation, and that calls for a much lighter touch.
The Must-Haves for a Safe Clean
Your entire toolkit should be built around two words: soft and neutral. You aren't trying to obliterate the grime; you're gently lifting it away while keeping the sculpture's history right where it belongs.
Here are the non-negotiables for your kit:
- Distilled Water: Why distilled? Because tap water is full of minerals that leave behind ugly white spots when they dry. Distilled water is pure H₂O, which means you get a clean, residue-free rinse every time.
- Soft, Lint-Free Cloths: Microfiber cloths are your best friend here. Grab a handful—you'll want separate ones for washing, rinsing, and drying to avoid smearing dirt back onto the clean surface.
- Natural Bristle Brushes: To get into all those little details and crevices, you'll need a brush. Make sure it has soft, natural bristles, like boar or horsehair. Stiff nylon or, even worse, metal brushes will absolutely scratch the bronze.
It all comes down to a simple rule: anything that touches the sculpture needs to be softer than the metal itself. Follow that, and you'll protect the delicate patina that gives the piece its character and value.
Picking the Right Soap and Wax
With your basic tools ready, you need two more things: a cleaning agent and a protective coating. This is where using professional-grade materials really pays off.
For soap, look for a pH-neutral, non-ionic detergent. This is the gold standard conservators use. It's not like your everyday dish soap; it cleans without leaving a film or causing a chemical reaction with the bronze. You only need a few drops in distilled water to create a safe, gentle cleaning solution.
After cleaning, the final step is protection. The best product for this is a microcrystalline wax. A product like Renaissance Wax, originally developed for the British Museum, is what you want. It creates a breathable, moisture-resistant shield that protects the bronze from dust and fingerprints without yellowing over time. It's the perfect finishing touch to ensure your sculpture stays beautiful for years to come.
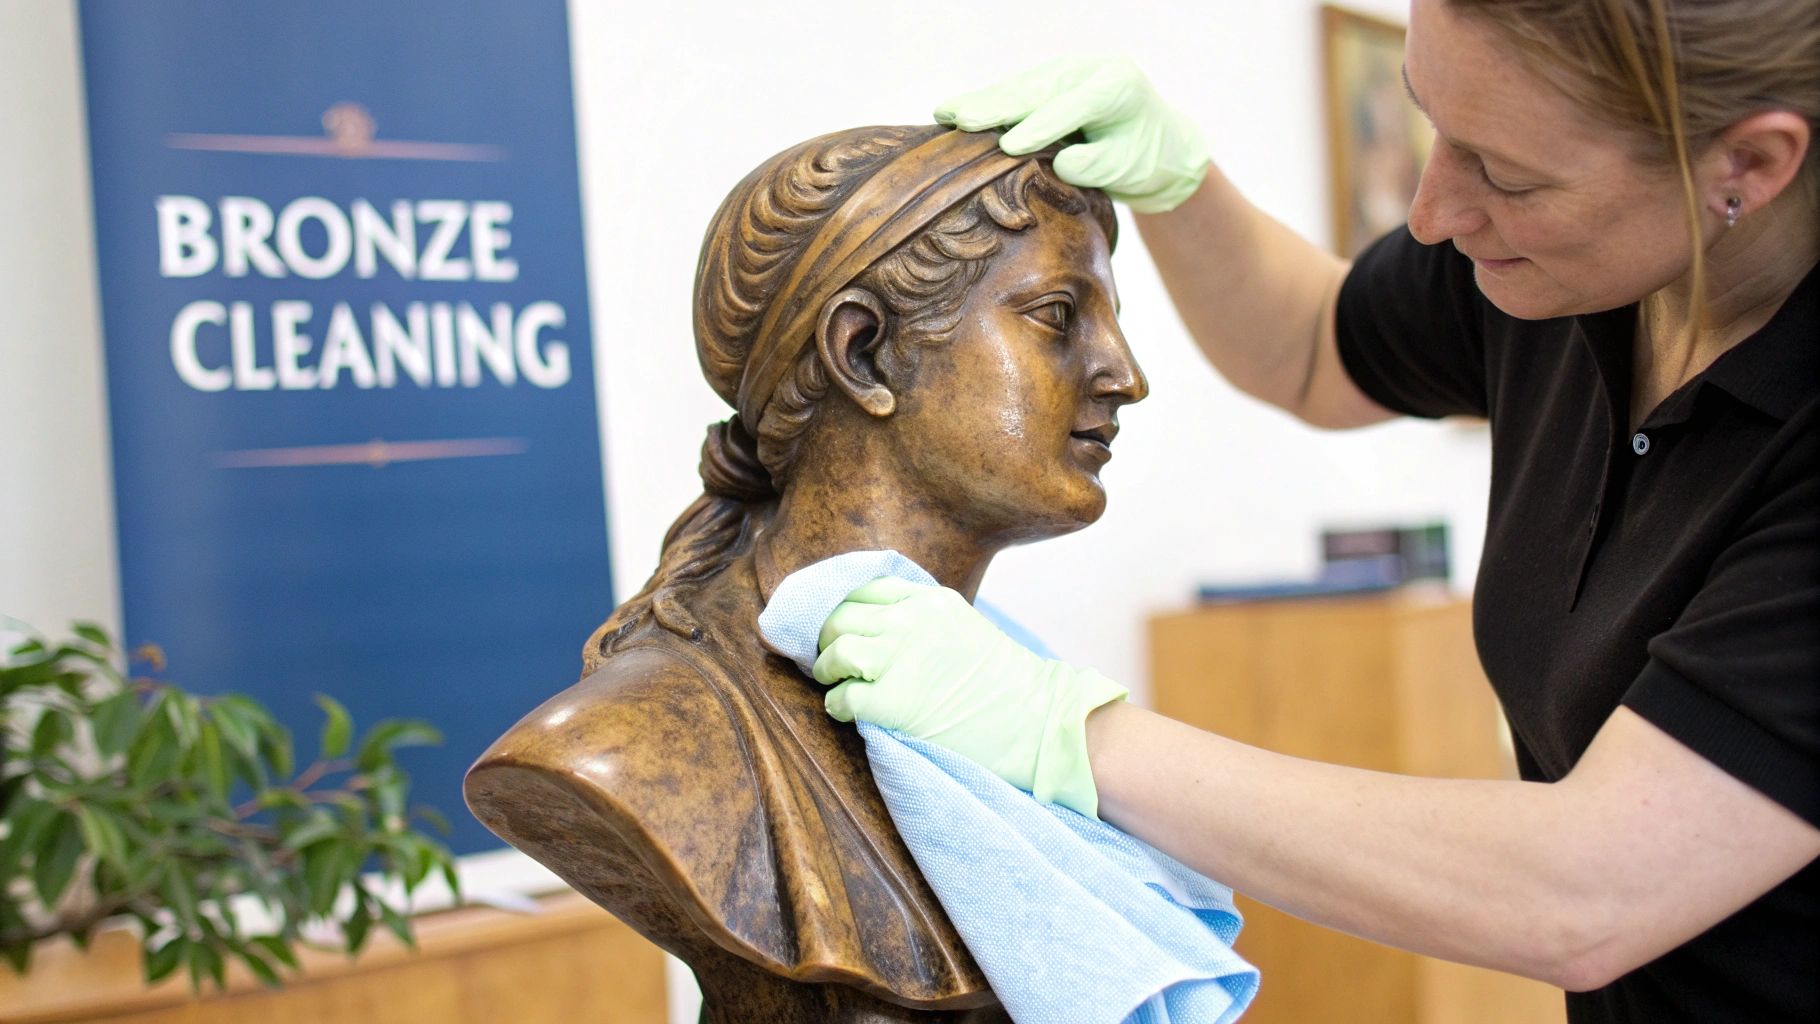
Your Guide to Routine Bronze Maintenance
Keeping your indoor bronze sculptures looking pristine for years to come really boils down to one thing: routine maintenance. We're not talking about a deep, intensive restoration here. This is about the simple, regular care that stops dust and grime from getting a foothold in the first place.
Think of it just like dusting your furniture. It’s a quick, gentle process that makes a world of difference over the long haul. In fact, for most pieces, this is the only cleaning they’ll ever need. It's the least invasive approach and carries virtually no risk of harming that delicate, beautiful patina. Your only goals here are to lift away surface dust, fingerprints, and minor smudges.
The Initial Dry Dusting
The first and most important part of routine care is a simple dry dusting. This should be your go-to method for weekly or bi-weekly upkeep.
All you need is a clean, dry microfiber cloth or a soft, natural bristle brush—something like a horsehair brush works perfectly. Gently wipe or brush the entire surface, making sure to get into the little nooks and crannies where dust loves to hide. The key here is to be incredibly gentle. You're just lifting dust, not scrubbing the surface. This one small action prevents those airborne particles from settling in and bonding with the bronze over time.
Preparing for a Gentle Wet Clean
Every now and then, you might notice that a dry dusting just isn't cutting it. Stubborn fingerprints or a light film of grime can sometimes need a bit more attention. When that happens, a gentle wet clean is the next logical step. The trick, however, is using the right solution. Get this wrong, and you could damage the sculpture.
Your cleaning solution needs to be incredibly mild. The professional standard is a simple mixture: just a few drops of a pH-neutral, non-ionic soap in a bowl of distilled water. And yes, distilled water is non-negotiable. Tap water contains minerals that can leave behind residue or water spots.
The most effective cleaning solutions are often the simplest. Fight the temptation to grab a household cleaner. Their harsh chemicals can strip the patina and cause damage you can't undo. Stick to the basics: a conservation-approved soap and distilled water.
This isn't just my opinion; it's the standard among conservation experts. A widely accepted method involves using a 3-5% solution of non-ionic detergent in water. It's a formula recommended by organizations like the U.S. General Services Administration for removing surface dirt without harming the patina underneath. You can even review the official preservation guidelines for bronze elements to see how the pros approach it.
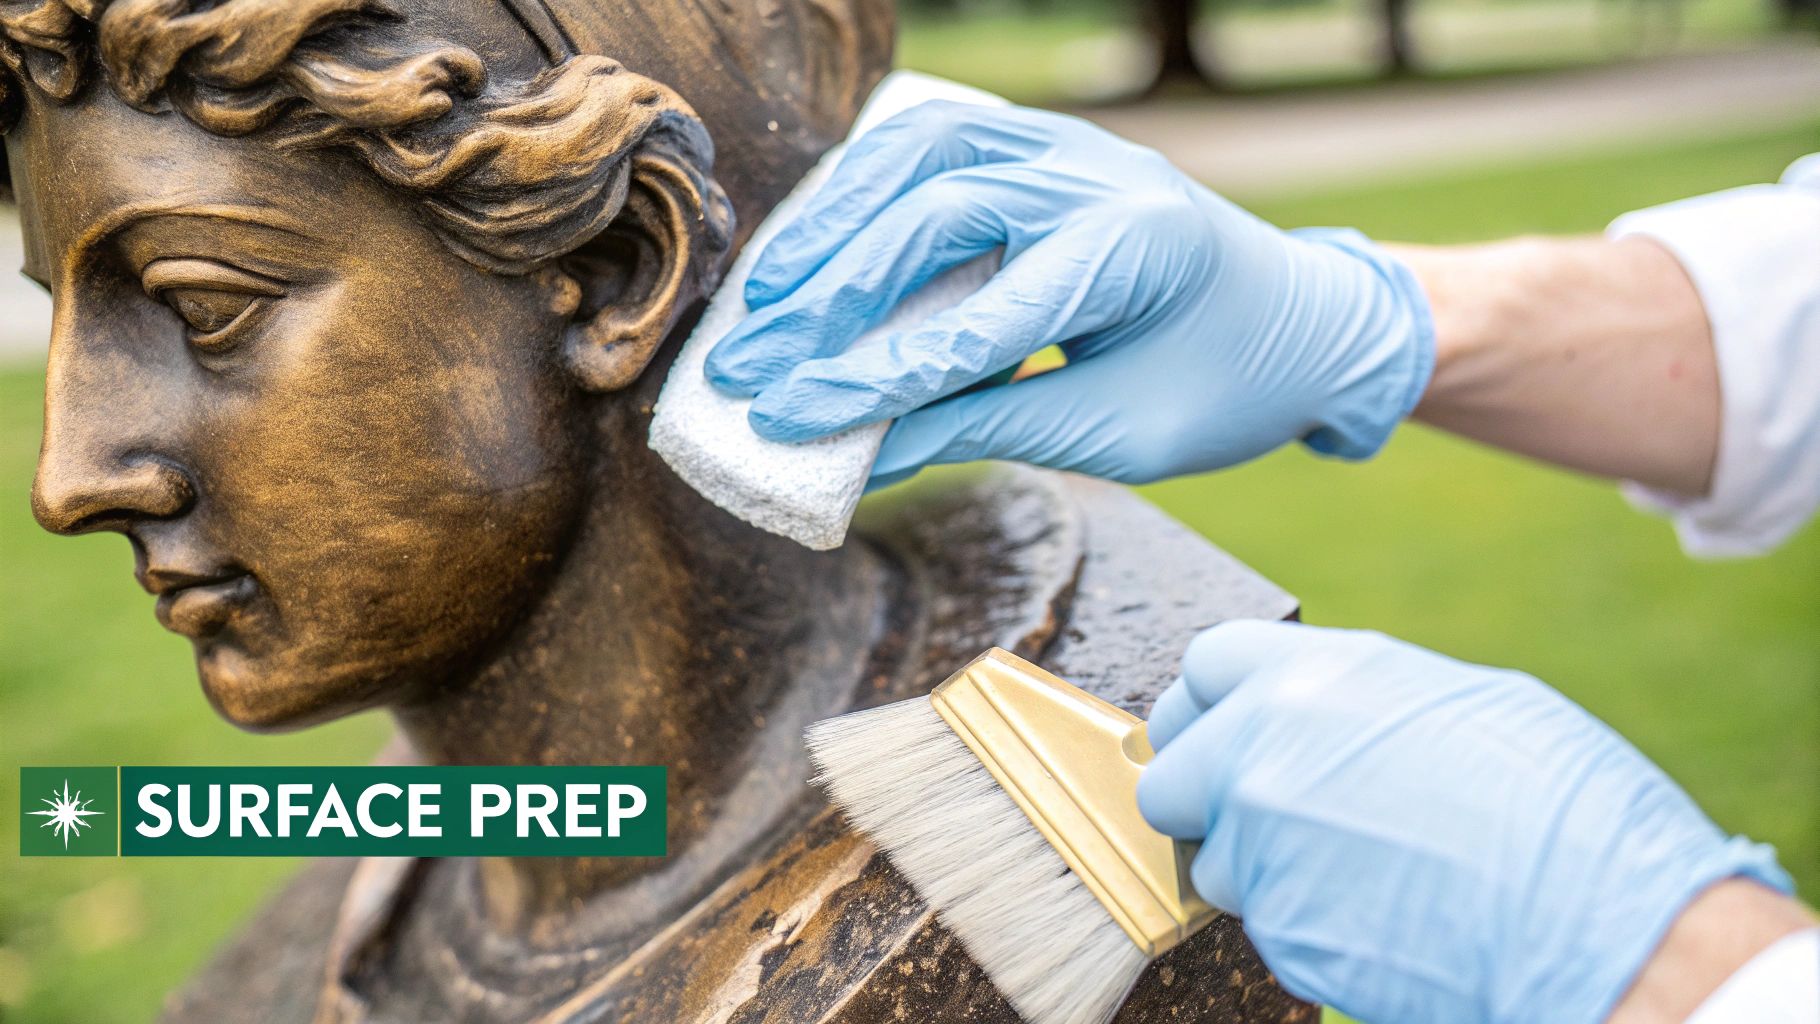
The Wet Cleaning and Drying Process
Once you have your mild soap solution ready, the cleaning process itself is all about a delicate touch. This part of learning how to clean bronze sculpture is less about scrubbing and more about careful application and, most importantly, thorough removal.
Here’s how to do it safely and effectively:
- Apply the Solution: Dip a clean, soft cloth into your soapy water, and then wring it out until it’s just damp, not dripping wet. Gently wipe the surface of the sculpture, working in small sections.
- Rinse Thoroughly: This is the most critical step. Using a separate cloth dampened with only distilled water, wipe away every trace of soap residue. You might need to rinse your cloth and repeat this a few times to get the surface completely clean.
- Dry Completely: As soon as you're done rinsing, grab a third clean, dry microfiber cloth and gently pat the sculpture dry. Any moisture left behind, especially in detailed crevices, can lead to spotting or unwanted reactions with the metal.
Following this careful process ensures you can remove built-up grime while keeping the sculpture's historical and aesthetic integrity perfectly intact.
Dealing With Corrosion on Outdoor Sculptures
When a bronze sculpture lives outdoors, it’s constantly at war with the elements. Unlike a piece kept safely inside, it has to stand up to acid rain, pollution, and wild swings in humidity. This constant exposure can cause some pretty aggressive corrosion that your usual cleaning routine just can't handle.
The most obvious red flag is verdigris—those bright green, powdery streaks that start to appear. This isn't the beautiful, stable patina you want; it's a sign of active corrosion that's literally eating away at the metal. Think of it as a warning that the sculpture's protective layers have failed. Tackling this kind of damage is absolutely essential, but it takes a delicate, almost surgical touch to get it right. You're trying to remove the bad stuff without stripping away the healthy patina underneath.
Spotting Unstable Corrosion
First things first, you need to know exactly what you’re looking at. A healthy, stable patina feels smooth, like it's part of the bronze itself. Harmful corrosion, on the other hand, is a different beast entirely.
Keep an eye out for these tell-tale signs:
- A Powdery Feel: The green spots feel chalky or dusty when you touch them.
- Streaks and Flakes: You can physically see the green layer peeling away, flaking off, or running down the surface in streaks.
- Vibrant Color: Active verdigris tends to be a much brighter, almost electric green compared to the deep, muted tones of a stable patina.
If you happen to spot any inscriptions or symbols while you're inspecting the piece, they could be foundry marks. These can tell you a lot about the sculpture's history and where it came from. We have a whole guide dedicated to helping you understand foundry marks on bronze.
Conservation-Grade Cleaning Methods
For corrosion this stubborn, your everyday cleaning methods won't cut it. In fact, they could easily make things worse. This is where the professionals bring out the specialized techniques.
One of the most effective and widely accepted methods is walnut shell blasting. It sounds intense, but it’s actually a very gentle process. Finely crushed walnut shells are propelled by low-pressure air, and they carefully abrade away the unstable, powdery corrosion without touching the solid patina you want to keep.
This gentle abrasive technique is what the experts rely on. It’s a precision tool for a delicate job, removing only the flaky, unwanted corrosion while leaving the desirable, stable patina completely intact.
This approach, which is a standard for organizations like the National Park Service, is all about control. The process is managed at very low pressures, usually no more than 25-30 psig, to ensure it only takes off the surface grime and loose corrosion. It's effective, safe, and a trusted standard in the world of professional conservation.
Given the special equipment and skill involved, techniques like walnut shell blasting are really best left to the pros. Trying to do this yourself without the right training can cause permanent, irreversible damage to the sculpture’s surface. Sometimes, the most important part of knowing how to clean a bronze sculpture is knowing when to put your tools down and call in an expert.
Applying a Protective Wax Coating
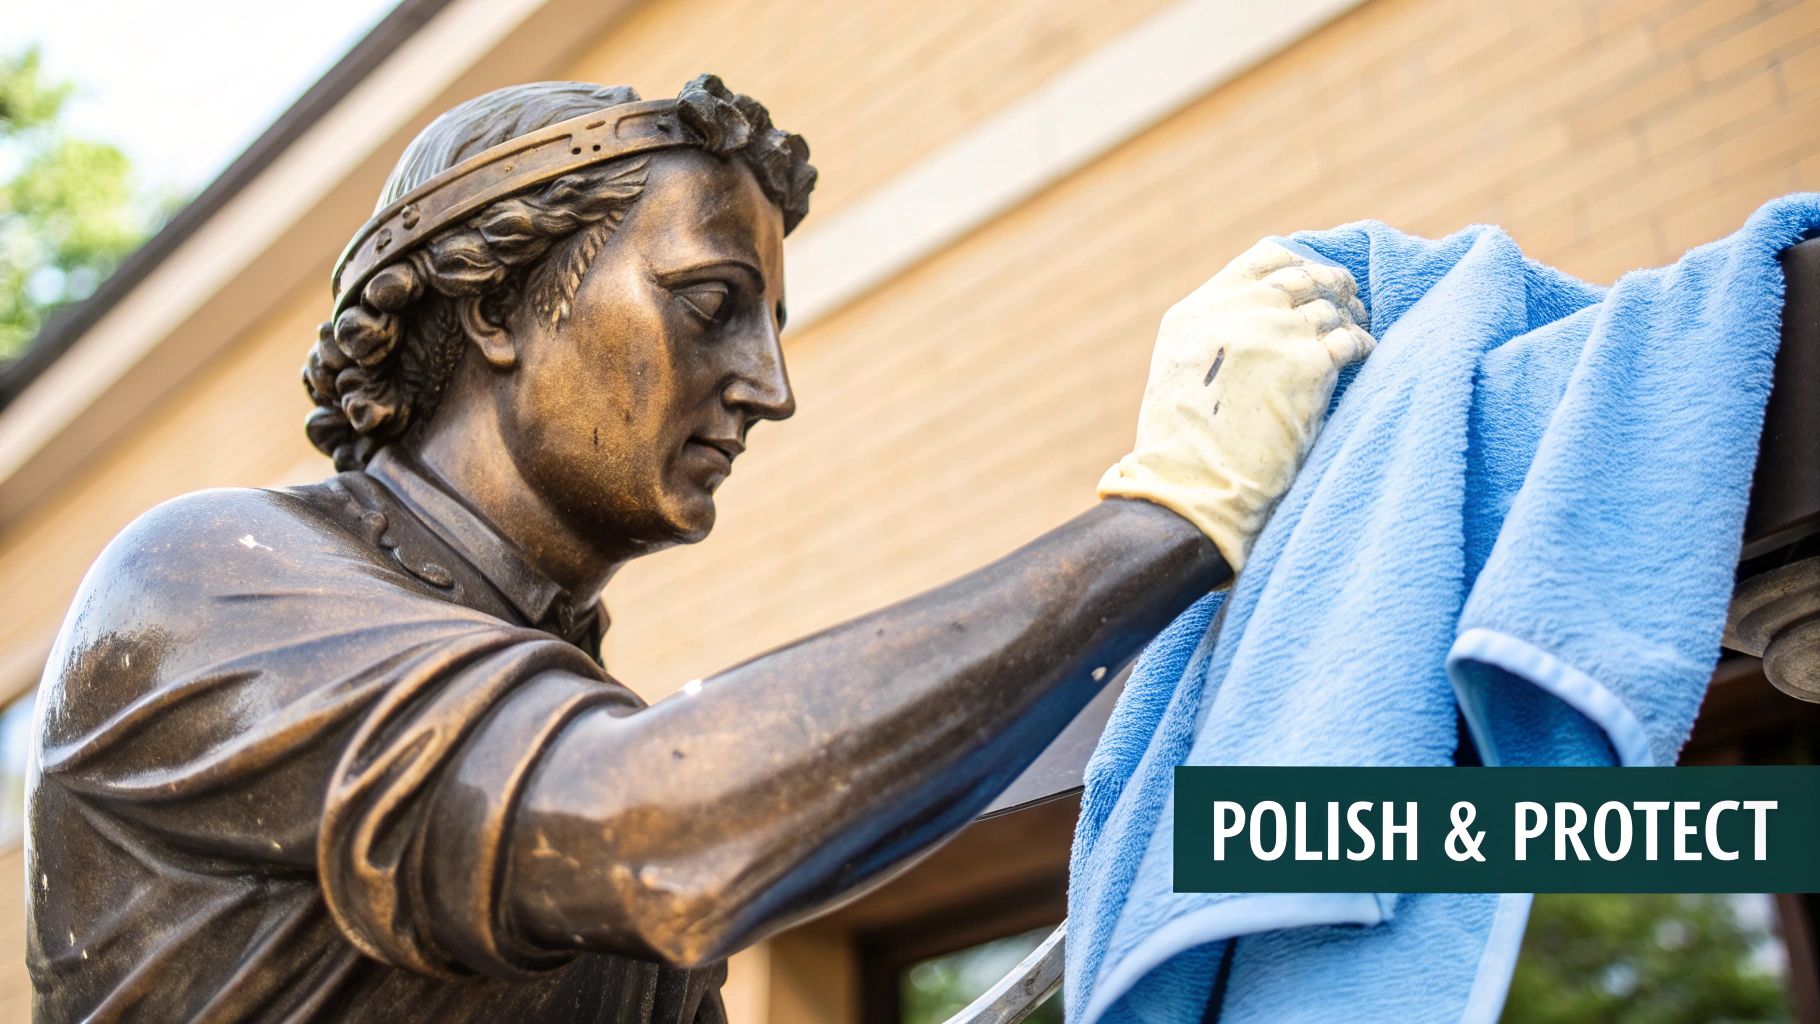
Once your sculpture is clean and dry, you're only halfway there. Cleaning gets rid of the immediate grime and potential corrosion, but it's the protective coating that truly preserves the piece for the long haul. This last step is absolutely non-negotiable, especially for outdoor sculptures that face a constant barrage of rain, humidity, and pollutants. A good quality wax is like armor, creating a shield that stops environmental damage in its tracks.
The goal here isn't to make the bronze shiny or new-looking. In fact, aggressive polishing can be incredibly damaging. Instead, we're aiming to seal the surface with a clear, reversible layer that protects both the metal and that beautiful, desirable patina underneath. This is what brings out a soft, subtle sheen and enriches the color, giving the bronze its depth.
Choosing the Right Conservation Wax
Not all waxes are created equal. You need to steer clear of anything containing harsh cleaning agents or waxes known to yellow over time, like beeswax or carnauba. The gold standard in conservation is microcrystalline wax. This stuff is refined to be exceptionally pure and stable, so it won't discolor and creates a tough, moisture-resistant barrier.
Stick with trusted, conservation-grade products. Brands like Renaissance Wax or Mohawk Blue Label Paste Wax are formulated specifically for preserving fine art and antiques. They offer top-tier protection without messing with the sculpture's original appearance.
A proper wax coating is the final, essential step in learning how to clean bronze sculpture correctly. It’s a preventative measure that safeguards the metal from the very elements that cause corrosion, extending the life and beauty of the piece for years to come.
This protective layer is what makes the difference between a sculpture that stays stable and beautiful and one that starts showing new green spots in a few months.
The Correct Application Technique
How you apply the wax is just as important as which wax you choose. The absolute key is to use a very thin, even layer. If you slather it on too thick, you'll just create a sticky surface that attracts more dust and dirt, obscuring all the delicate details you want to see.
Here’s a simple, reliable method to get a perfect finish:
- Start Bone Dry: First, make absolutely certain the sculpture is completely dry after its cleaning. Trapped moisture underneath a layer of wax is a recipe for disaster.
- Apply a Thin Coat: Grab a clean, soft, lint-free cotton cloth and dab a small amount of wax onto it. Gently rub the wax over the entire surface in a circular motion, making sure to work it into all the nooks and crannies. Less is more.
- Let It Haze Over: Give the wax a few hours to dry, or follow the specific directions on the product's label. You'll see it form a light, dull haze across the surface.
- Buff to a Soft Sheen: Using a separate clean cloth, gently buff the surface. You're not trying to create a high-gloss shine, just a soft, lustrous glow that looks natural.
For sculptures living outdoors, you'll want to repeat this process about once a year, or whenever you notice water no longer beading up on the surface. For indoor pieces, a fresh coat every few years should do the trick. This simple routine is the best defense you can give your sculpture, preserving its integrity and history.
When You Should Call a Professional Conservator
Learning how to clean your bronze sculptures is a rewarding part of being a collector, but the most important skill you can have is knowing when to put the cloth down and pick up the phone. Some situations are just too risky for a DIY approach. Deciding to call in a professional isn't admitting defeat—it's the smartest, most responsible choice you can make for a treasured piece of art.
It all comes down to recognizing the red flags. If you spot anything that looks more serious than a simple layer of dust or some light grime, it's time to pause. Trying to tackle deep-seated problems without proper training can cause irreversible damage, stripping away the very history that makes the piece special and tanking its value in the process. Your job as a caretaker is to protect the art, and sometimes, that means handing it over to an expert.
Signs It Is Time for Expert Help
Some problems are clear signals that a sculpture needs more than just a surface-level cleaning. These are issues that require a conservator's deep knowledge of metallurgy, chemistry, and art history to fix correctly and safely.
Keep an eye out for these tell-tale signs:
- Structural Damage: This is a big one. Look for any cracks, breaks, or spots where parts of the sculpture seem loose or wobbly.
- Severe Flaking or Peeling: If the patina or surface finish is lifting off or flaking away in noticeable patches, it points to a deeper problem with how the surface is bonded to the metal. A simple cleaning won't fix that.
- Bronze Disease: This is the stuff of nightmares for collectors. Be on the lookout for light green, fuzzy, or powdery-looking spots of corrosion. It's an aggressive and contagious corrosion that will literally eat away at the metal until it’s professionally treated.
- Significant Historical or Monetary Value: If the sculpture is from a well-known artist or holds immense personal or financial value, the risk of a DIY mistake is just not worth it. Period.
A professional conservator does so much more than just clean. They are art detectives, diagnosing and treating the root causes of decay. Their work is a careful blend of science and artistry, all focused on stabilizing the piece for the future.
Conservators have specialized tools and techniques that are worlds away from what you have in your garage. For instance, while they often clean and re-coat outdoor bronze, a 2002 survey revealed that aggressive methods like abrasive blasting were used in only about 1.5% of cases. That statistic alone shows you how meticulously they choose the right approach for each individual sculpture. You can dig deeper into these professional conservation practices and survey findings.
Finding a qualified expert isn't as hard as you might think. The American Institute for Conservation (AIC) has a fantastic "Find a Professional" tool on its website. You can easily search for accredited conservators in your area who specialize in metals. These are folks with the right training and a strict code of ethics, ensuring your art gets the respect and expertise it deserves. For more general advice on preservation, check out our guide on essential antique restoration tips for other valuable items.
Uncovering the history and value of your art shouldn't be a mystery. With the Curio app, you can get instant identification, historical context, and an estimated appraisal right from your phone. Whether you're a seasoned collector or just curious about a family heirloom, Curio puts an antiques expert in your pocket. Download Curio today and let your treasures tell their story