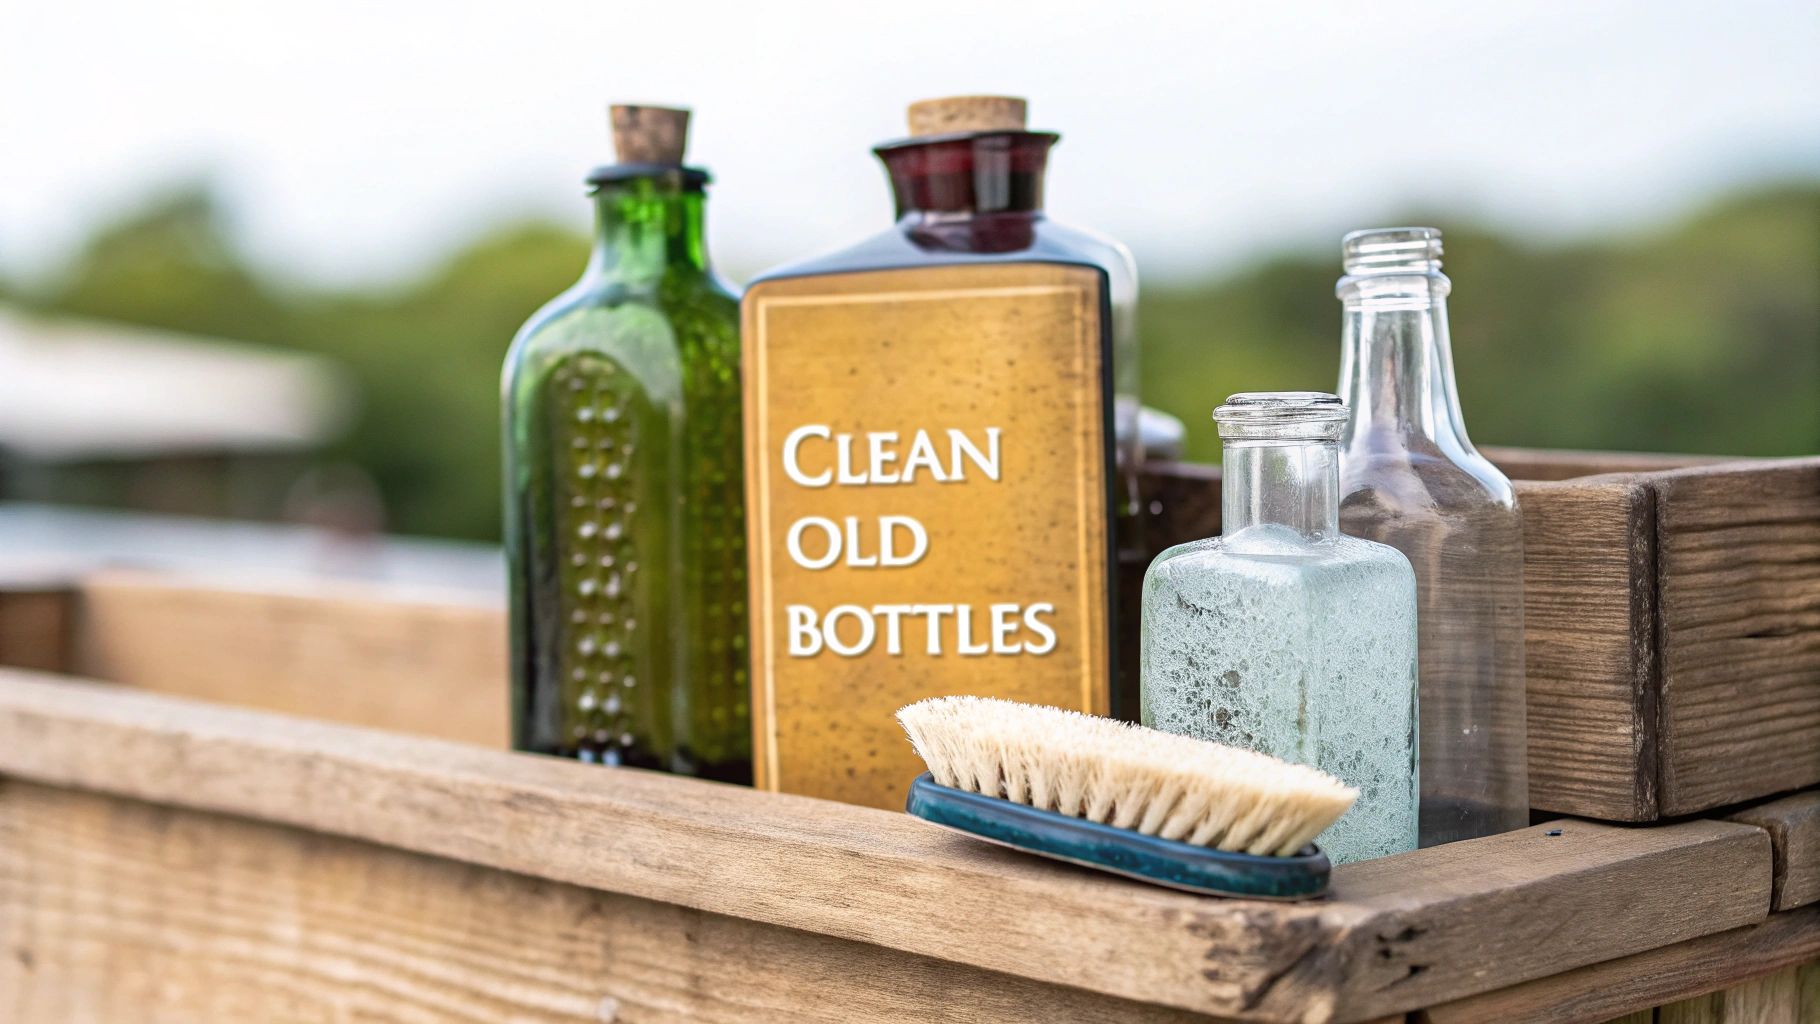
Before you even think about scrubbing, the first real step in cleaning an old bottle is to play detective. It's so tempting to dive right in and wash away the years of dirt, but that initial enthusiasm can be a bottle's worst enemy. Many old bottles, especially those dug up from the ground, are more fragile than they look.
Taking a Closer Look: The Pre-Cleaning Inspection
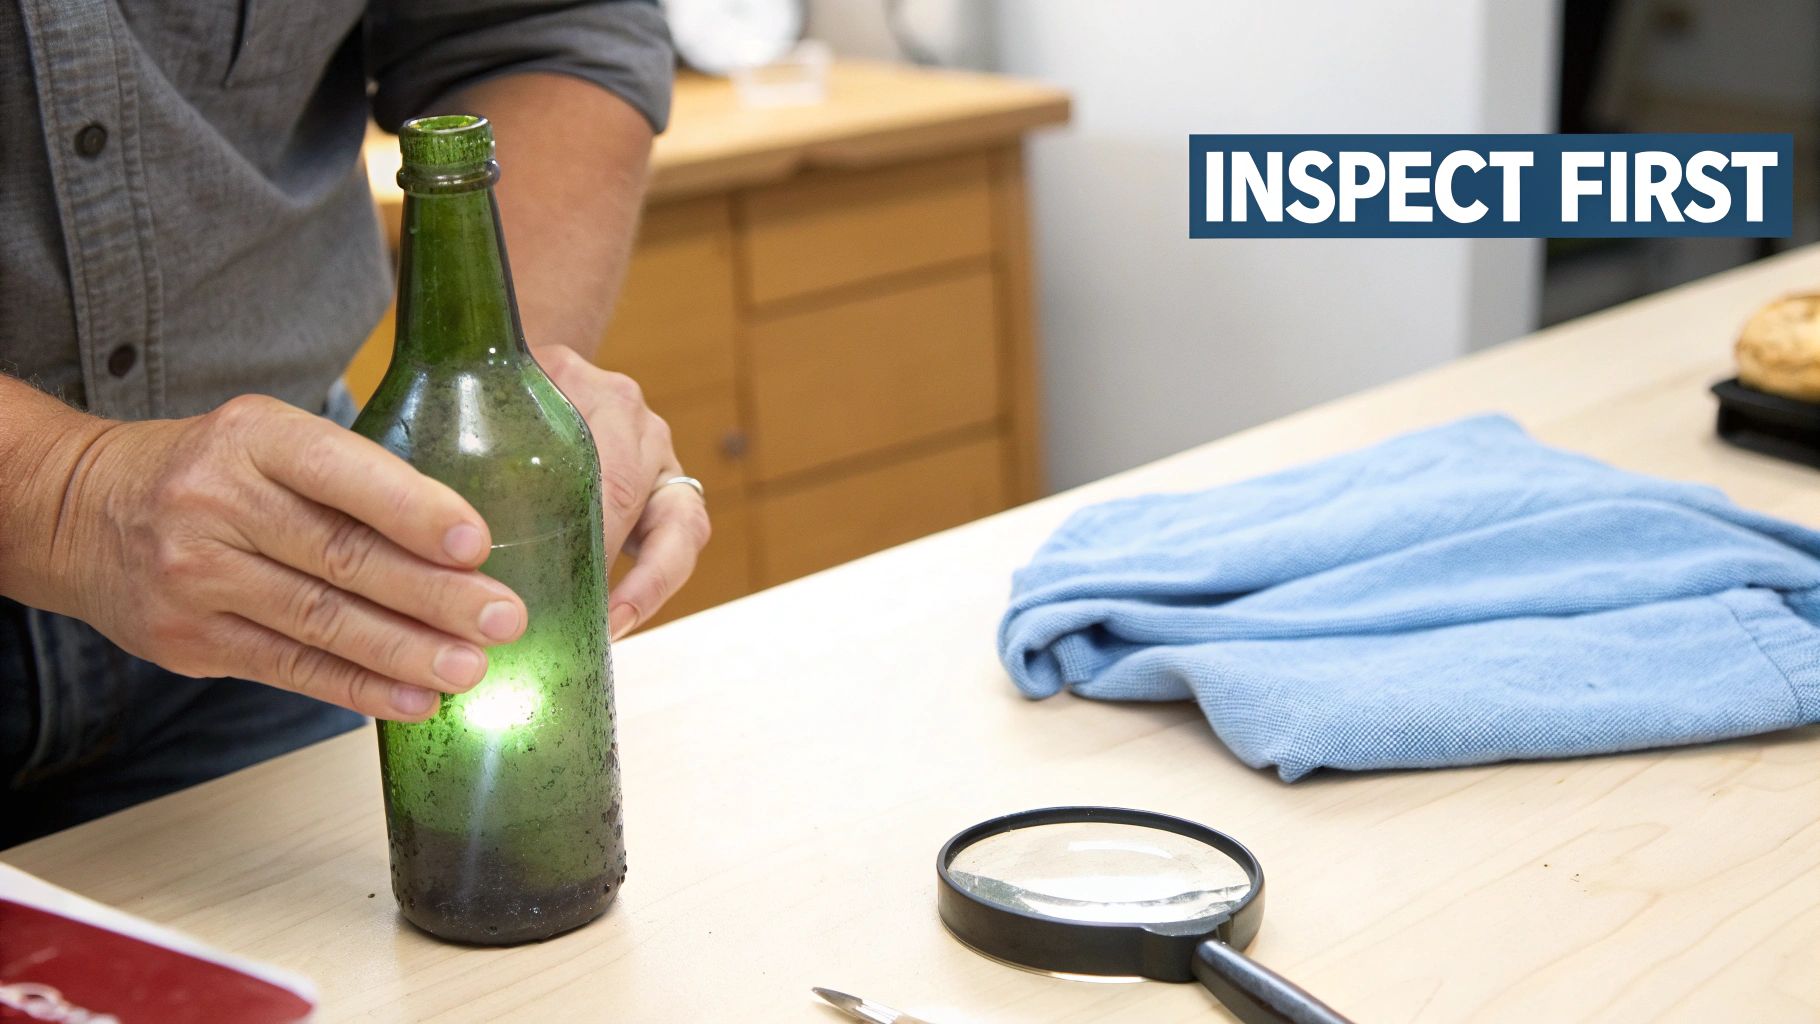
Patience is your best friend here. Before a single drop of water touches your find, you need to give it a thorough once-over. This isn't just a quick glance; it's a careful examination that can prevent a priceless piece of history from turning into a pile of broken glass.
Grab a bright light—a desk lamp or even your phone's flashlight will do the trick. Hold the bottle up and slowly turn it, looking at it from every possible angle. You're hunting for hidden weaknesses that could become major problems during cleaning.
What to Watch Out For
Your main targets are hairline cracks. These can be incredibly faint, looking more like tiny scratches than actual fractures. You're also on the lookout for signs of "sick glass," which is a form of deterioration. It often looks like a hazy or iridescent film that seems to be inside the glass, not just a film on the surface. If you need help figuring out what you're looking at, our guide on antique glass bottle identification can be a huge help.
This step is absolutely critical. Conservation experts estimate that 15–25% of antique glass has some form of structural instability. If you spot that cloudy, weblike "crizzling," it’s a red flag. It means you need to avoid any aggressive scrubbing or harsh chemicals that could cause the glass to flake or fall apart.
My Go-To Tip: I always keep a small magnifying glass on my workbench for this very reason. It's the best way to tell the difference between a harmless surface scratch and a deep, structural crack that could split open the moment it's submerged.
To make this easier, I've put together a simple checklist to guide your inspection. Running through these points before you start can save you a world of heartbreak.
Pre-Cleaning Assessment Checklist
Use this checklist to inspect your bottle for potential risks before starting any cleaning process.
| Check For | What to Look For | Risk Level if Present | Recommended Action |
|---|---|---|---|
| Cracks | Fine lines, spiderwebs, or fractures in the glass. Check rims and base. | High | Avoid submersion. Clean exterior with a damp cloth only. Seek professional advice. |
| Sick Glass | Hazy, iridescent, or flaky appearance inside the glass structure. | High | Do not use chemicals or abrasive methods. A gentle water soak may be okay, but proceed with extreme caution. |
| Fragile Labels | Paper labels that are peeling, flaking, or water-damaged. | Medium | Do not submerge. Work around the label carefully. |
| Painted Decoration | Any painted or enameled designs on the surface. | Medium | Test a tiny, inconspicuous area with a damp cotton swab before proceeding. |
| Loose Stoppers | Corks or glass stoppers that are crumbling or stuck. | Low-Medium | Do not force them. Clean around them or leave them in place. |
Once you’ve completed this check and are confident the bottle is stable, you're ready for the next step.
The First Soak: A Gentle Start
If your bottle passed the inspection, it's time for its first bath. This isn't a deep clean—it's a gentle, patient soak meant to loosen the surface grime without any stress on the glass.
Here’s how I approach it:
- Get a plastic tub. Never use a hard ceramic or metal sink. It’s far too easy to accidentally knock the bottle against the side and cause a chip or crack. A simple plastic bucket is perfect.
- Always use distilled water. The minerals in regular tap water can leave their own film and deposits on your bottle, which just creates more work for you later.
- Add a gentle, pH-neutral soap. A few drops are all you need. I recommend something like Orvus WA Paste, which is a favorite among conservators. Harsher detergents can be too acidic or alkaline and might etch the glass over time.
- Let it sit. Gently place the bottle in the soapy water and just let it be. For a lightly soiled bottle, a few hours might be enough. For one with heavy, caked-on dirt, let it soak for 24 to 48 hours. This slow, steady approach lets the water do all the hard work for you.
Gentle Methods for Cleaning Bottle Interiors
After a good soak, the real challenge begins: cleaning the inside. Those narrow necks and odd shapes can make scrubbing away years of film and grime feel like an impossible task. The secret is to avoid anything that could scratch the glass, like a wire brush, and instead use gentle, controlled abrasion.
Thankfully, you probably have the best tools for the job sitting in your kitchen pantry. This approach turns simple household items into a surprisingly effective internal scrubber, dislodging gunk without harming the glass. It’s a classic technique that collectors have trusted for generations.
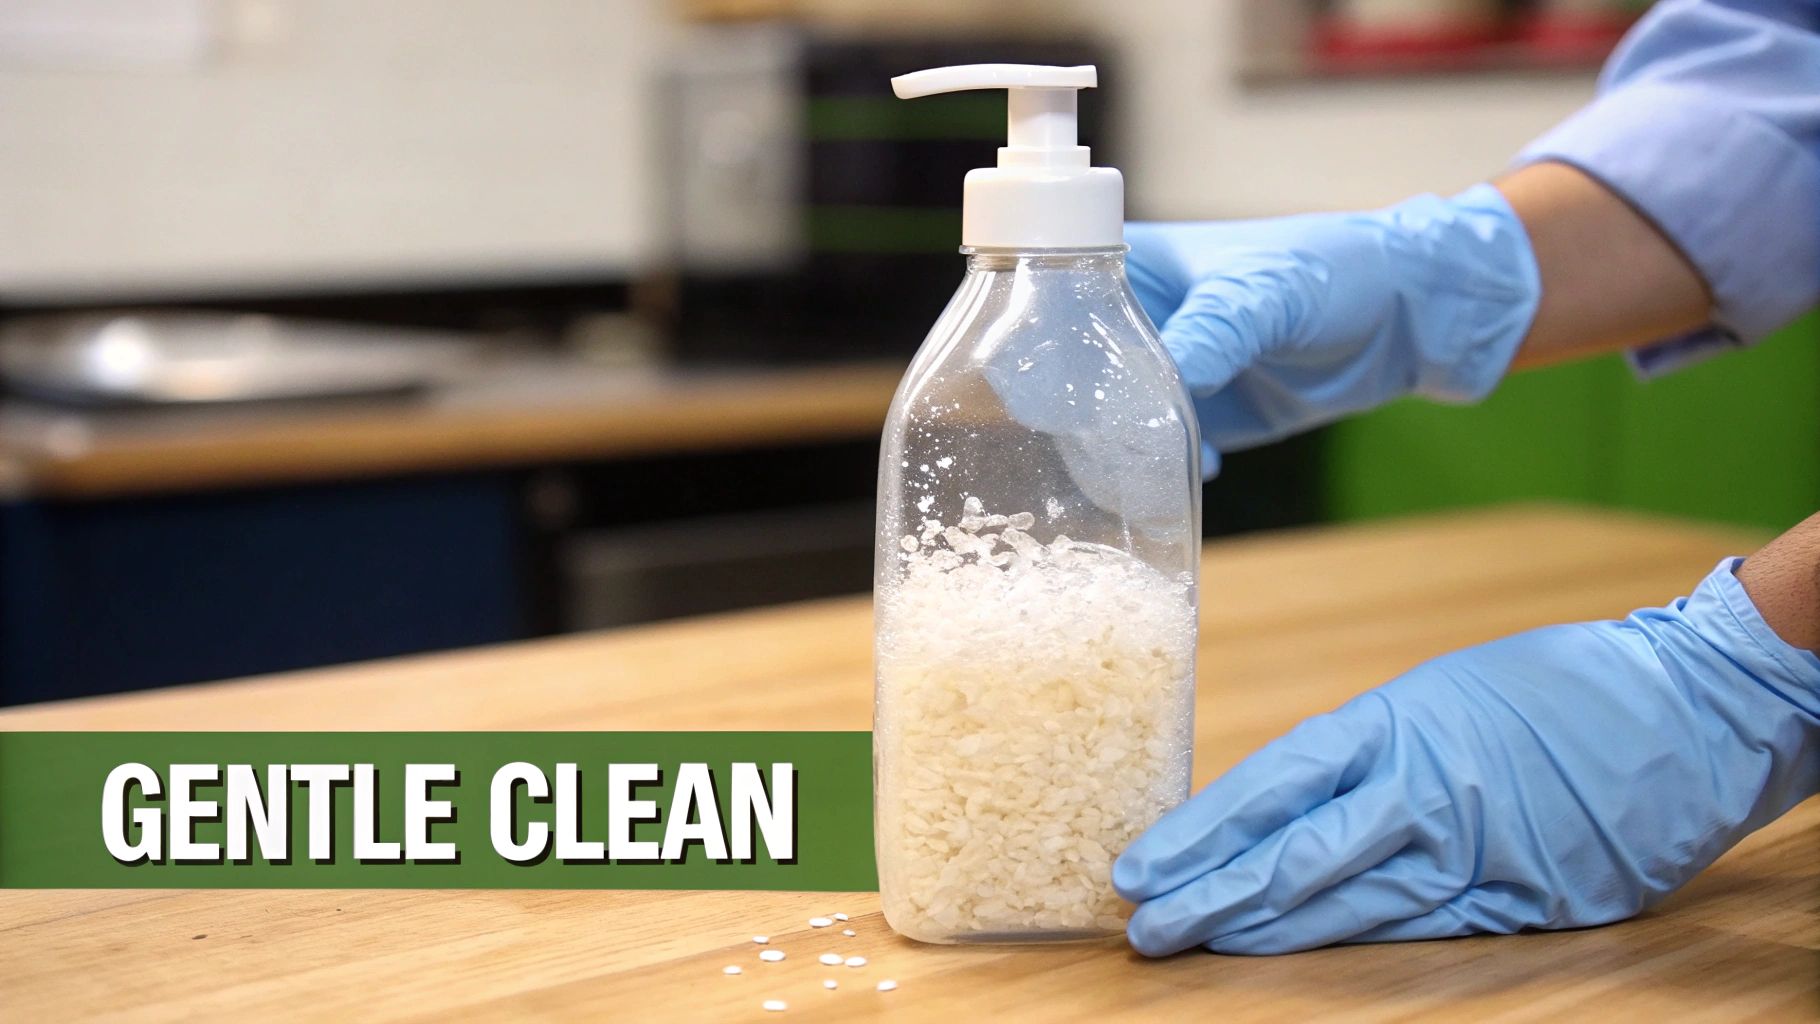
The Abrasive Swirl Technique
The idea is brilliantly simple. You add a soft abrasive and some soapy water, then swirl it all around to create a mini cleaning vortex inside the bottle. This is the perfect method for getting rid of general cloudiness, loose dirt, and light residue.
Common Household Abrasives to Use
- Uncooked Rice: This is an excellent all-around choice. A few tablespoons of long-grain rice provide just enough friction to scrub without being too harsh.
- Coarse Salt: A little more aggressive than rice, coarse sea salt or kosher salt works wonders on tougher grime. Just be sure to skip the fine table salt—it dissolves way too quickly.
- Sand: Clean craft sand can also do the trick, but make sure it’s fine and doesn’t have any large, sharp pebbles that could scratch the glass.
Ready to try it? Start by adding about two to three tablespoons of your chosen abrasive into the bottle. Next, pour in warm water until the bottle is about one-third full, and add just two or three drops of a mild, pH-neutral dish soap. When working with really delicate antiques, it's smart to be extra cautious, and you can learn more about using neutral pH cleaners for delicate items to keep them safe.
Now, cover the opening securely with your thumb or a stopper. Instead of shaking it violently, use a firm, circular swirling motion. Picture the rice or salt "washing" over every single interior surface. Keep this up for a few minutes, then empty the contents and rinse the bottle thoroughly with distilled water.
Expert Insight: The swirl is more important than the shake. An aggressive up-and-down motion can cause the abrasive to slam against the bottom and neck, creating unnecessary stress. A smooth, consistent swirl ensures the cleaning particles scrub evenly along the bottle's inner walls.
Reaching Difficult Spots
Sometimes, the swirl method just can't reach every nook and cranny, especially in bottles with funky shapes. When you need a more targeted approach, a few specialized tools can make all the difference without risking damage.
Collectors have long used things like rice, salt, or even small metal BBs to get inside narrow-necked bottles. While effective and cheap, you have to be careful if your bottle has any painted labels or applied decorations—too much scrubbing can wipe them right off. For really stubborn sediment in long-necked bottles, some hobbyists will even use a small hardware ball chain, dropping it inside and shaking it to dislodge the grime.
Tools for Precision Cleaning
When you're dealing with a few stubborn spots that just won't budge, you need more control. These tools give you that extra bit of precision.
- Flexible Bottle Brushes: Look for brushes with soft, non-abrasive bristles. The best ones can bend to match the bottle's contours, letting you gently scrub specific areas the swirl technique might have missed.
- Magnetic Scrubbers: These little gadgets are fantastic for cleaning glass. A magnetic scrubber has two parts: a soft, fabric-covered piece that goes inside the bottle and a powerful magnetic handle for the outside. As you move the handle around the exterior, you guide the inner scrubber precisely to any spot you need to clean.
No matter which method you use, always finish with a thorough rinse using distilled water. This prevents new mineral spots from forming as the bottle dries. Patience and a gentle touch are your best friends here, and they'll help you reveal the true clarity of your old bottle.
Tackling Stubborn Stains with Care
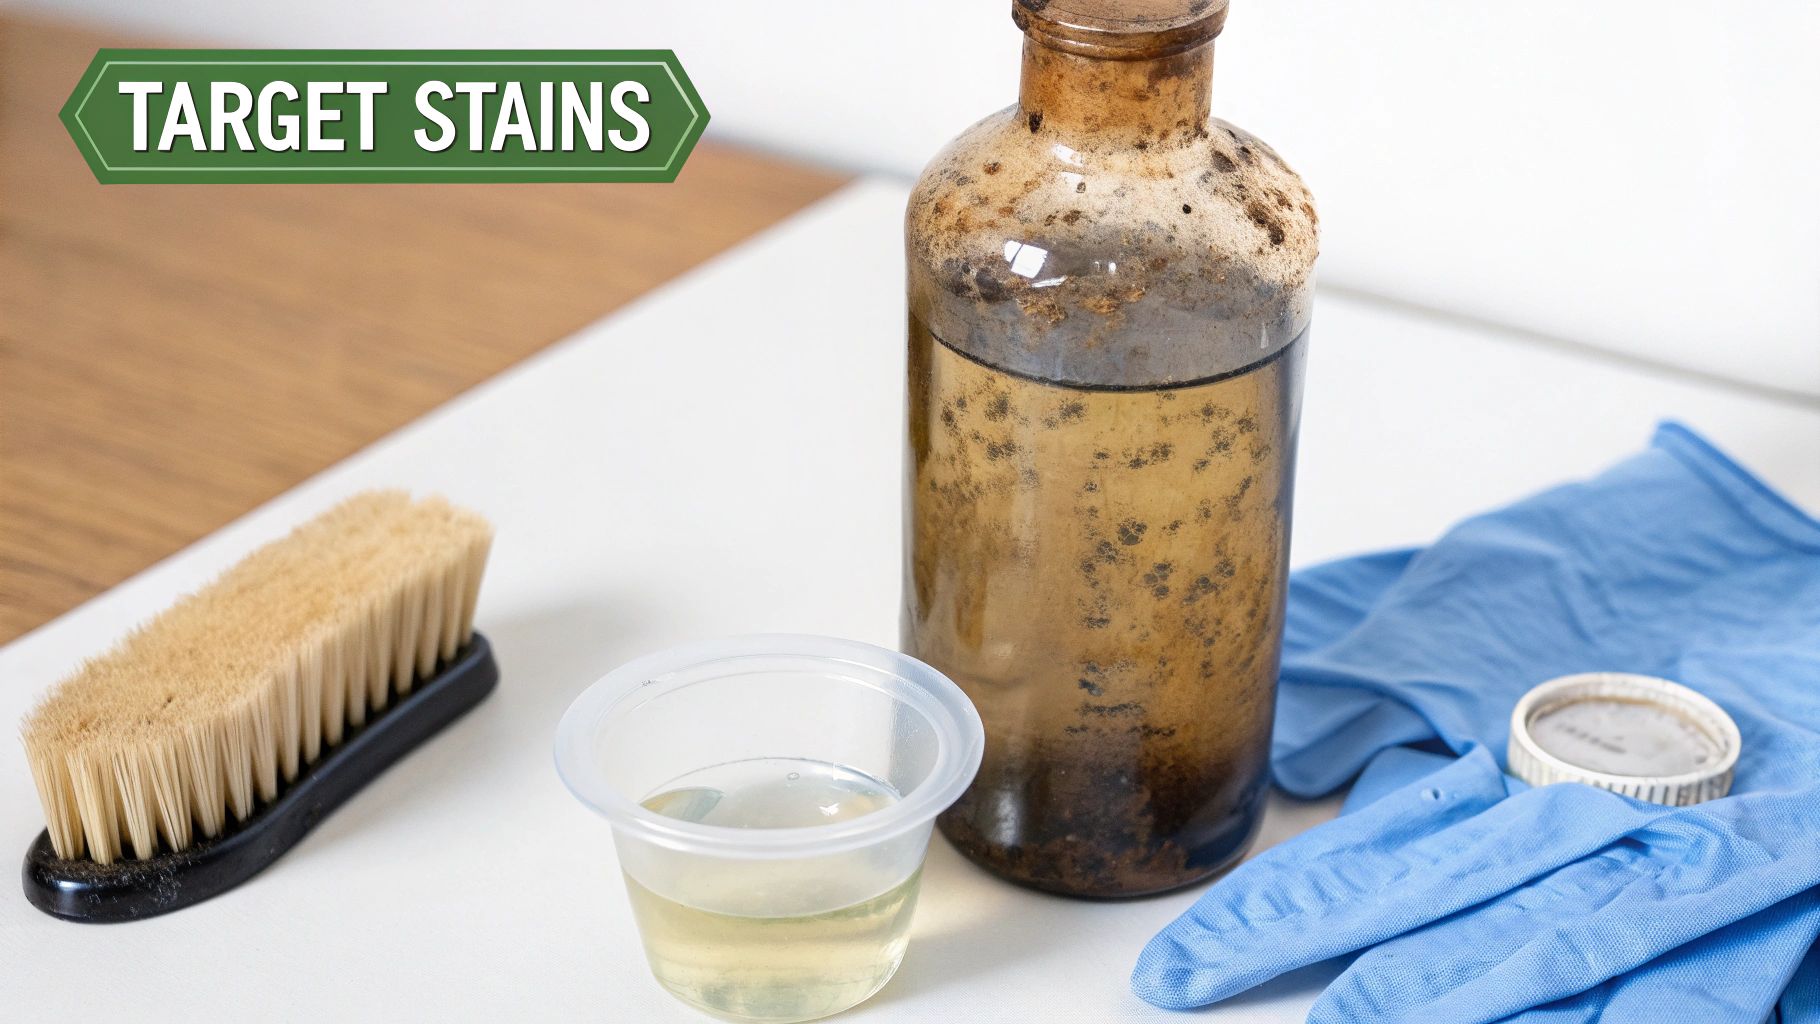
So, you’ve soaked your bottle and swirled rice until your arm ached, but some stubborn marks just won't let go. You might be staring at a cloudy haze, a chalky film, or a rusty ring that seems fused to the glass. This is when you graduate from gentle soaps to more targeted chemical solutions.
When you start using chemicals on antique glass, you need to shift your mindset. You aren't trying to blast the stains off; you're gently persuading them to dissolve. It’s a game of patience and precision. If you rush this part, you can permanently etch or cloud the glass, so always, always start with the mildest possible option.
Dissolving Mineral Deposits and Haze
One of the most common problems is that white, cloudy film inside a bottle. This is usually caused by mineral deposits—calcium and lime scale—left behind by water over decades. It's especially common in bottles that were buried or left with liquid in them for years.
Your first line of defense is plain old white vinegar.
Mix a solution of one part distilled white vinegar to one part distilled water. Using distilled water is important here, as you don't want to add new minerals to the mix. You can either submerge the whole bottle or just fill it up if the stains are only on the inside. Let it soak, but keep an eye on the clock.
Key Takeaway: A huge part of cleaning old glass is knowing when to stop. Never leave a bottle in a vinegar bath indefinitely. For a light haze, a 30-minute soak is often plenty. For tougher buildup, you might go for a few hours, but check on it often. Too much time in acid can permanently damage the glass surface.
After the soak, use a soft bottle brush to gently scrub away the loosened minerals. Then, rinse it out completely. I recommend a first rinse with tap water to get the vinegar out, followed by a final rinse with distilled water to prevent new water spots from forming as it dries.
Targeting Organic Grime and Tough Residues
What if the problem isn't mineral-based? Old oils, waxes, or sticky adhesives won't budge with a vinegar soak. These organic residues need a different game plan, one that usually involves a solvent like isopropyl alcohol (rubbing alcohol) or even acetone. Use these with extreme care.
Mineral scale and organic gunk respond to different treatments, and it's all about precision and timing. For instance, professional conservators might make a localized paste of baking soda and vinegar for heavy mineral spots, applying it for just a few minutes before rinsing. For organic stuff, they often use solvents like acetone or ethanol applied sparingly with cotton swabs. It's worth noting that acetone can cloud some 19th-century glass, so testing on an inconspicuous area like the base is standard practice. To get a better sense of how historical context informs cleaning methods, the Wine History Project is a great resource.
Instead of soaking the entire bottle, try applying the solvent directly to the stain. A cotton swab or a small piece of microfiber cloth on a flexible wire works well. Make sure you're in a well-ventilated area, as the fumes can be strong. Gently dab and rub the spot until you see the residue start to break down.
Safe Practices for Chemical Cleaning
Safety has to be your number one priority. A few simple rules will protect both you and your bottle.
Essential Safety Checklist:
- Always wear gloves and eye protection. Protect your skin and eyes from splashes.
- Ensure proper ventilation. Open a window or use a fan to clear out the fumes.
- Never mix chemicals. This can create dangerous reactions, especially when combining acids and solvents.
- Test in a small spot first. Before you go all-in, dab a little solution on the bottom of the bottle to see how the glass reacts.
- Rinse, rinse, rinse. When you're done, a thorough water rinse is crucial to neutralize and remove any leftover cleaning agent.
By carefully matching the right cleaner to the right stain, you can often bring back a bottle's original sparkle without causing any new damage. This methodical, careful approach is what separates a collector from someone who just breaks old stuff.
Preserving Labels and Knowing When to Stop
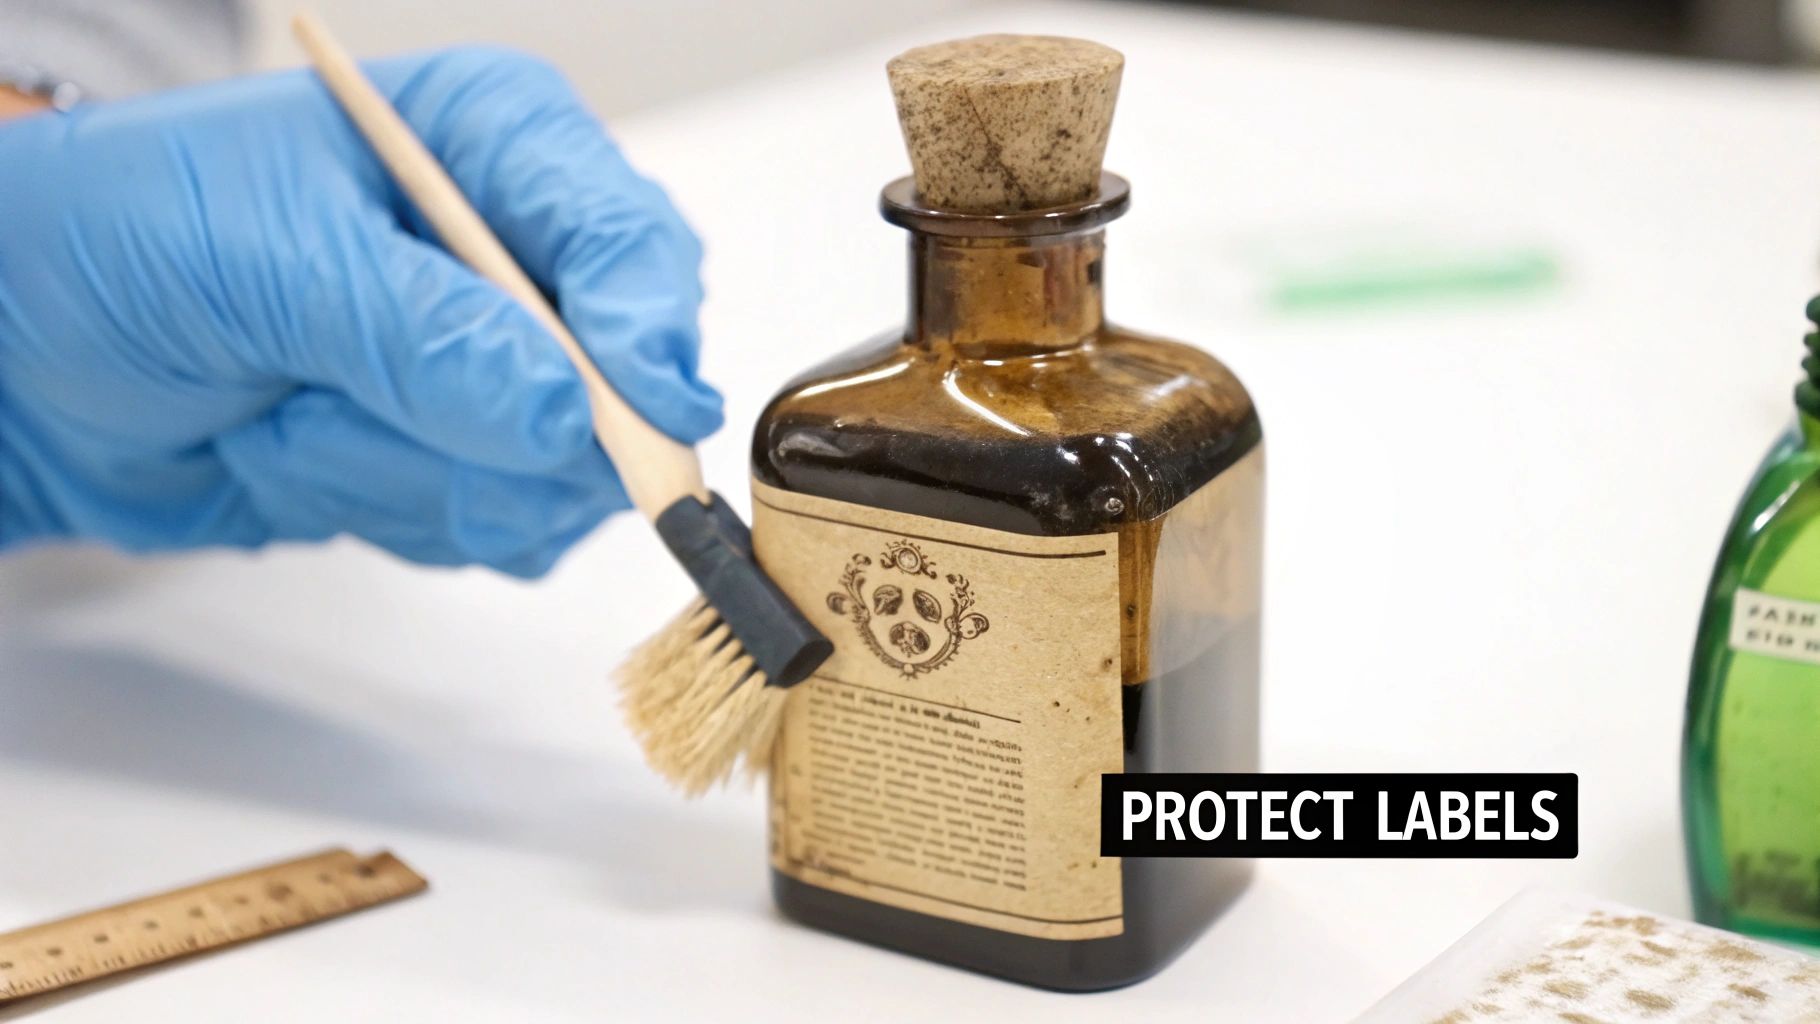
It’s a heart-stopping moment when you find a bottle with its original label still intact. Whether you’ve pulled it from the ground or found it tucked away in an attic, that fragile piece of paper or embossed logo is often where the real history and value lie.
In these situations, your mindset has to shift immediately from "cleaning" to "conservation." One wrong move can dissolve a bottle's story—and a huge chunk of its worth—right before your eyes.
The golden rule here is incredibly simple: do not submerge it. Soaking is the fastest way to turn a priceless paper label into a pile of mush. Instead, you have to work around it with almost surgical precision. Patience is your best friend here.
Working Around Fragile Paper Labels
When a paper label is involved, your cleaning process should be almost entirely dry. You’re just trying to get the loose dust and grime off the glass without letting a single drop of water touch that paper.
I've learned a few tricks over the years that work well:
- Soft, Natural-Bristle Brushes: Grab a set of small, soft brushes, like the kind used for watercolor painting or even makeup application. Gently sweep dust away from the glass, starting far from the label and always brushing away from its edges to avoid snagging it.
- Controlled Damp Swabs: For stubborn grime on the glass right next to the label, a cotton swab is your tool. Dip it in distilled water, then press it firmly against a dry paper towel until it’s barely damp to the touch. Carefully clean the glass, making sure to stay at least a quarter-inch away from the paper.
It takes a steady hand, but this is really the only safe approach. A bottle that’s a little dusty but has a complete original label is almost always more valuable than a sparkling clean bottle with a torn or missing one.
The Value of Patina and Applied Color Labels
Sometimes, what looks like "dirt" is actually part of the bottle's character. Glass that has been buried for decades can develop a beautiful, iridescent sheen called patina. To a serious collector, that shimmer is a badge of honor—proof of its age and journey. It's not something you should ever try to scrub off.
Before you attack a hazy film, ask yourself if it could be patina. True patina is an alteration of the glass itself and won't flake off like a hard water stain. When in doubt, leave it alone. Removing it is a permanent mistake.
You'll also come across bottles, especially from the mid-20th century, with Applied Color Labels (ACLs). Think of those old-school Coca-Cola or Pepsi bottles with the logos painted right onto the glass. These are pretty tough, but they aren't invincible.
Crucial Warning: Never use abrasive cleaners, scouring pads, or even coarse salt on an ACL bottle. The friction can easily scratch and fade the painted design, killing its visual appeal and value. A gentle wash with a soft cloth and a drop of mild dish soap is all these bottles ever need.
Knowing when to put down the brushes and call it a day is what separates a novice from an experienced collector. The goal isn't to make an old bottle look brand new; it's to stabilize it and let its history shine through.
Properly Drying and Storing Your Collection
After all that careful work, it's easy to feel like you've crossed the finish line. But the final step—drying your bottle—is just as important as the cleaning itself. Getting this part wrong can ruin your hard work by leaving behind new water spots or a frustrating haze.
Whatever you do, don't try to speed things up by stuffing a paper towel or cloth inside. This is a classic mistake. You'll almost certainly leave behind lint, and you could even snag the cloth on a rough pontil mark or some other imperfection inside the glass. The best way, without a doubt, is to let them air-dry patiently. It’s the only way to get a truly flawless finish.
The trick is to position the bottles so air can get in and moisture can get out. If you just stand a bottle upright on a shelf to dry, you'll trap a pool of water at the bottom that can leave a permanent mineral ring.
My Personal Tip: For those stubborn, narrow-necked bottles where water loves to hide, I'll sometimes take a small piece of lint-free microfiber cloth, thread it onto a thin, flexible wire, and gently dab the puddle at the bottom. This gets the worst of it out and dramatically speeds up the final air-drying process.
Creating the Ideal Drying Environment
To get that perfectly clear, spot-free result, you have to set your bottles up for success. Give them time. A full 24 to 48 hours might seem like a lot, but it’s what’s needed to ensure every last bit of hidden moisture has evaporated.
Here are a few simple and effective ways to position them:
- On a Soft Towel: Just lay a thick, soft towel on a flat surface and stand the bottles upside down. The towel provides a safe cushion for the delicate rims and helps wick away moisture as it drips out. Simple, but it works.
- Using a Bottle Rack: If you have one, a bottle drying rack—like those used for baby bottles or sodastream bottles—is fantastic. They hold bottles securely at an angle, which is perfect for encouraging airflow.
- In a Dishwasher Rack: The prongs in your dishwasher rack work great for this, too (just make sure the machine is off!). Simply place the bottles upside down over the plastic-coated prongs. They'll be held steady and have plenty of room for air to circulate.
Safely Storing and Displaying Your Bottles
Once your collection is completely dry and sparkling, it's all about keeping it that way. Proper storage is what protects your bottles from dust, sunlight, and clumsy accidents. Cleaning them is only half the job; caring for them afterward is how you preserve their beauty and value for the long haul.
Be especially mindful of direct sunlight. Over time, UV rays can cause the color in old glass to fade, and in some cases, can even make the glass itself more brittle. Find a spot for your collection away from any sunny windows.
For long-term storage, your best bet is to wrap each bottle individually in acid-free tissue paper and place them in a sturdy, clearly labeled box.
But if you’re ready to show off your hard work, a glass-front cabinet is a great choice. It keeps the dust off while letting you admire your collection. If you're looking for more inspiration, you can find a ton of creative collectible display ideas to help you set up the perfect showcase. Taking these final precautions ensures your beautifully cleaned treasures stay that way.
When to Call a Professional Conservator
Learning how to clean old bottles is a fantastic skill, but the most important part of that skill is knowing when to stop. While most finds can be safely spruced up at home, some bottles are just too rare, fragile, or valuable for a DIY approach.
For those truly special pieces, stepping back and calling in a professional conservator is the wisest decision. Trying to restore a historically significant or incredibly delicate bottle can cause permanent damage, wiping away its history and tanking its value. A pro has the right tools, archival-grade chemicals, and years of hands-on experience with museum-quality glass. They know the science behind glass decay and can stabilize a piece without causing harm.
Red Flags That Signal You Need an Expert
It's crucial to spot the warning signs. If your bottle shows any of these signs, put on the brakes and get a professional opinion.
- Severe 'Sick Glass': Is the glass covered in a fine network of cracks (crizzling), feel chalky, or actively flaking? This means it's structurally unstable. Any standard cleaning method could cause it to literally fall apart.
- Delicate Painted Details: This is a big one. We're talking about hand-painted enamel, gold leaf (gilding), or any cold-painted labels that weren't fired on. This type of decoration is unbelievably fragile and can vanish with the slightest bit of moisture or friction.
- Unknown or Hazardous Residues: If you find a bottle—especially a sealed one—with some unknown gunk inside, don't even think about opening it. A conservator is equipped to safely test and remove potentially dangerous materials.
- Extreme Financial or Historical Value: Got a hunch your bottle might be a big-ticket item? The financial risk of a cleaning mistake is just too high. A good first step is to learn more about https://www.curio.app/blog/vintage-bottles-values to get a better sense of what you're dealing with.
A professional conservator’s job is preservation, not perfection. Their main goal is to stabilize the bottle and stop any further decay, which is a whole different ballgame from just making it look shiny and new.
If you're still tempted to tackle a major restoration yourself, it's worth reading about the potential downsides of DIY projects before you begin. A conservator can give you a full condition report and a plan of action, so you know exactly what you're getting into. Handing a special find over to an expert ensures it'll be around for others to enjoy for years to come.
Common Questions About Cleaning Old Bottles
When you start cleaning old bottles, a few tricky situations always seem to pop up. Let's tackle some of the most common questions I hear, so you can move forward without risking damage to your finds.
Can I Just Put an Old Bottle in the Dishwasher?
I know it's tempting, but please don't. A dishwasher is one of the most destructive things you can do to antique glass. The intense heat, harsh detergents, and high-pressure water jets are a disaster waiting to happen.
This aggressive environment can cause thermal shock, which is just a fancy way of saying the glass will crack or shatter from the rapid temperature change. It will also completely obliterate any paper labels and can even etch the glass, leaving it with a permanent, cloudy film. Always stick to gentle, by-hand cleaning methods.
How Do I Get a Stuck Cork or Stopper Out?
This is where patience really pays off. Never try to force it.
First, try soaking only the neck of the bottle in some warm (not hot!) water. This can help the glass expand just enough to loosen the stopper's grip. For a truly stubborn glass stopper, a few drops of penetrating oil applied around the seam can work wonders. Let it sit for a few hours, then gently try to twist and wiggle it free.
A Pro Tip for Crumbly Corks: If an old cork starts to fall apart, a standard corkscrew is still your best bet, but be incredibly gentle. If it breaks anyway, don't panic. You can usually just push the remaining pieces down into the bottle and fish them out after you've finished cleaning the inside.
Is It Dirt, or Is My Bottle "Sick"?
It can be tough to tell the difference at first. Dirt is just a film or residue sitting on the surface; it will come off with the cleaning methods we've talked about.
“Sick glass,” on the other hand, is a permanent condition. Also known as crizzling, it's a type of glass decay that shows up as a rainbow-like shimmer, a web of tiny cracks, or a haze that’s inside the glass. You can't scrub it off.
Hold the bottle up to a light. If a gentle cleaning doesn't touch the cloudiness and it looks like it's part of the glass itself, you're dealing with sick glass. Stop cleaning immediately, as you'll only make it worse.
Have a bottle you're not sure about? Let Curio do the detective work for you. Snap a photo to get instant identification, historical context, and an estimated value. Download the app today and uncover the story behind your treasures!